Call to action buttons for enrollment
Two new buttons have been developed for websites to provide a consistent visual encouraging potential students to begin the enrollment process:
If you are comfortable editing web page code in the “text” view of the WordPress editor, these instructions will help you add these buttons today. Please let us know that you have added these buttons to your website (email us at um.weboffice@maine.edu), and when we make an improved button, we will be in touch to update your site.
Step one: Download the icon graphics
The two graphical icons used in these buttons are contained in this .zip file archive. You will need to download this file, unzip the contents, and upload the individual icons into your Media Library. Appropriate alt text for the images:
- Apply-now-icon.png – UMaine Black Bear head icon
- Request-info-icon.png – Clipboard with form icon
Step two: Insert an icon into the page
Using the Add Media feature, select the button you want to use (Apply-now-icon.png or Request-info-icon.png). If you did not already specify alt text, please add that now, and click the “Insert into page” or “Insert into post” button.
Step three: Resize the icon to 125 pixels wide
The buttons are larger to allow for best display at different screen resolutions, and the default size will be larger as a result. Select the image and click the “Edit” button in the pop-up toolbar (see below):
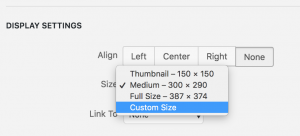
In the edit screen that appears, you will want to select a custom size, and enter 125 into the width field (see below):
Step four: switch to text view to add HTML around this image
When you switch to text view, you should see code similar to this:
<img class="alignnone wp-image-972" src="https://umaine.edu/sitename/wp-content/uploads/sites/33/2019/01/Apply-now-icon-300x290.png" alt="UMaine Black Bear head icon" width="125" height="121" />
For the APPLY NOW button
Type this HTML code immediately before the beginning of the code (the <img… part):
<div style="text-align: center;"><a href="https://go.umaine.edu/apply/"><span class="button">
Type this HTML code immediately after the end of the code (the /> part):
<br/>APPLY NOW</span></a></div>
For the REQUEST INFO button
Type this HTML code immediately before the beginning of the code (the <img… part):
<div style="text-align: center;"><a href="https://umaine.secure.force.com/form?formid=217739"><span class="button">
Type this HTML code immediately after the end of the code (the /> part):
<br/>REQUEST INFO</span></a></div>
Step five: Save your work and preview your page
If this worked as it should, you will see buttons similar to what is at the top of this page. Each button is centered within the content area. If you need to display buttons beside content, we recommend using the Rich Text content blocks to control placement of the buttons alongside other content. You should also use content blocks in this manner if you want to display these buttons beside one another.