Knots!
Knots are an important part of outdoor recreation and safety. This page explains how to tie various knots and what they are used for.
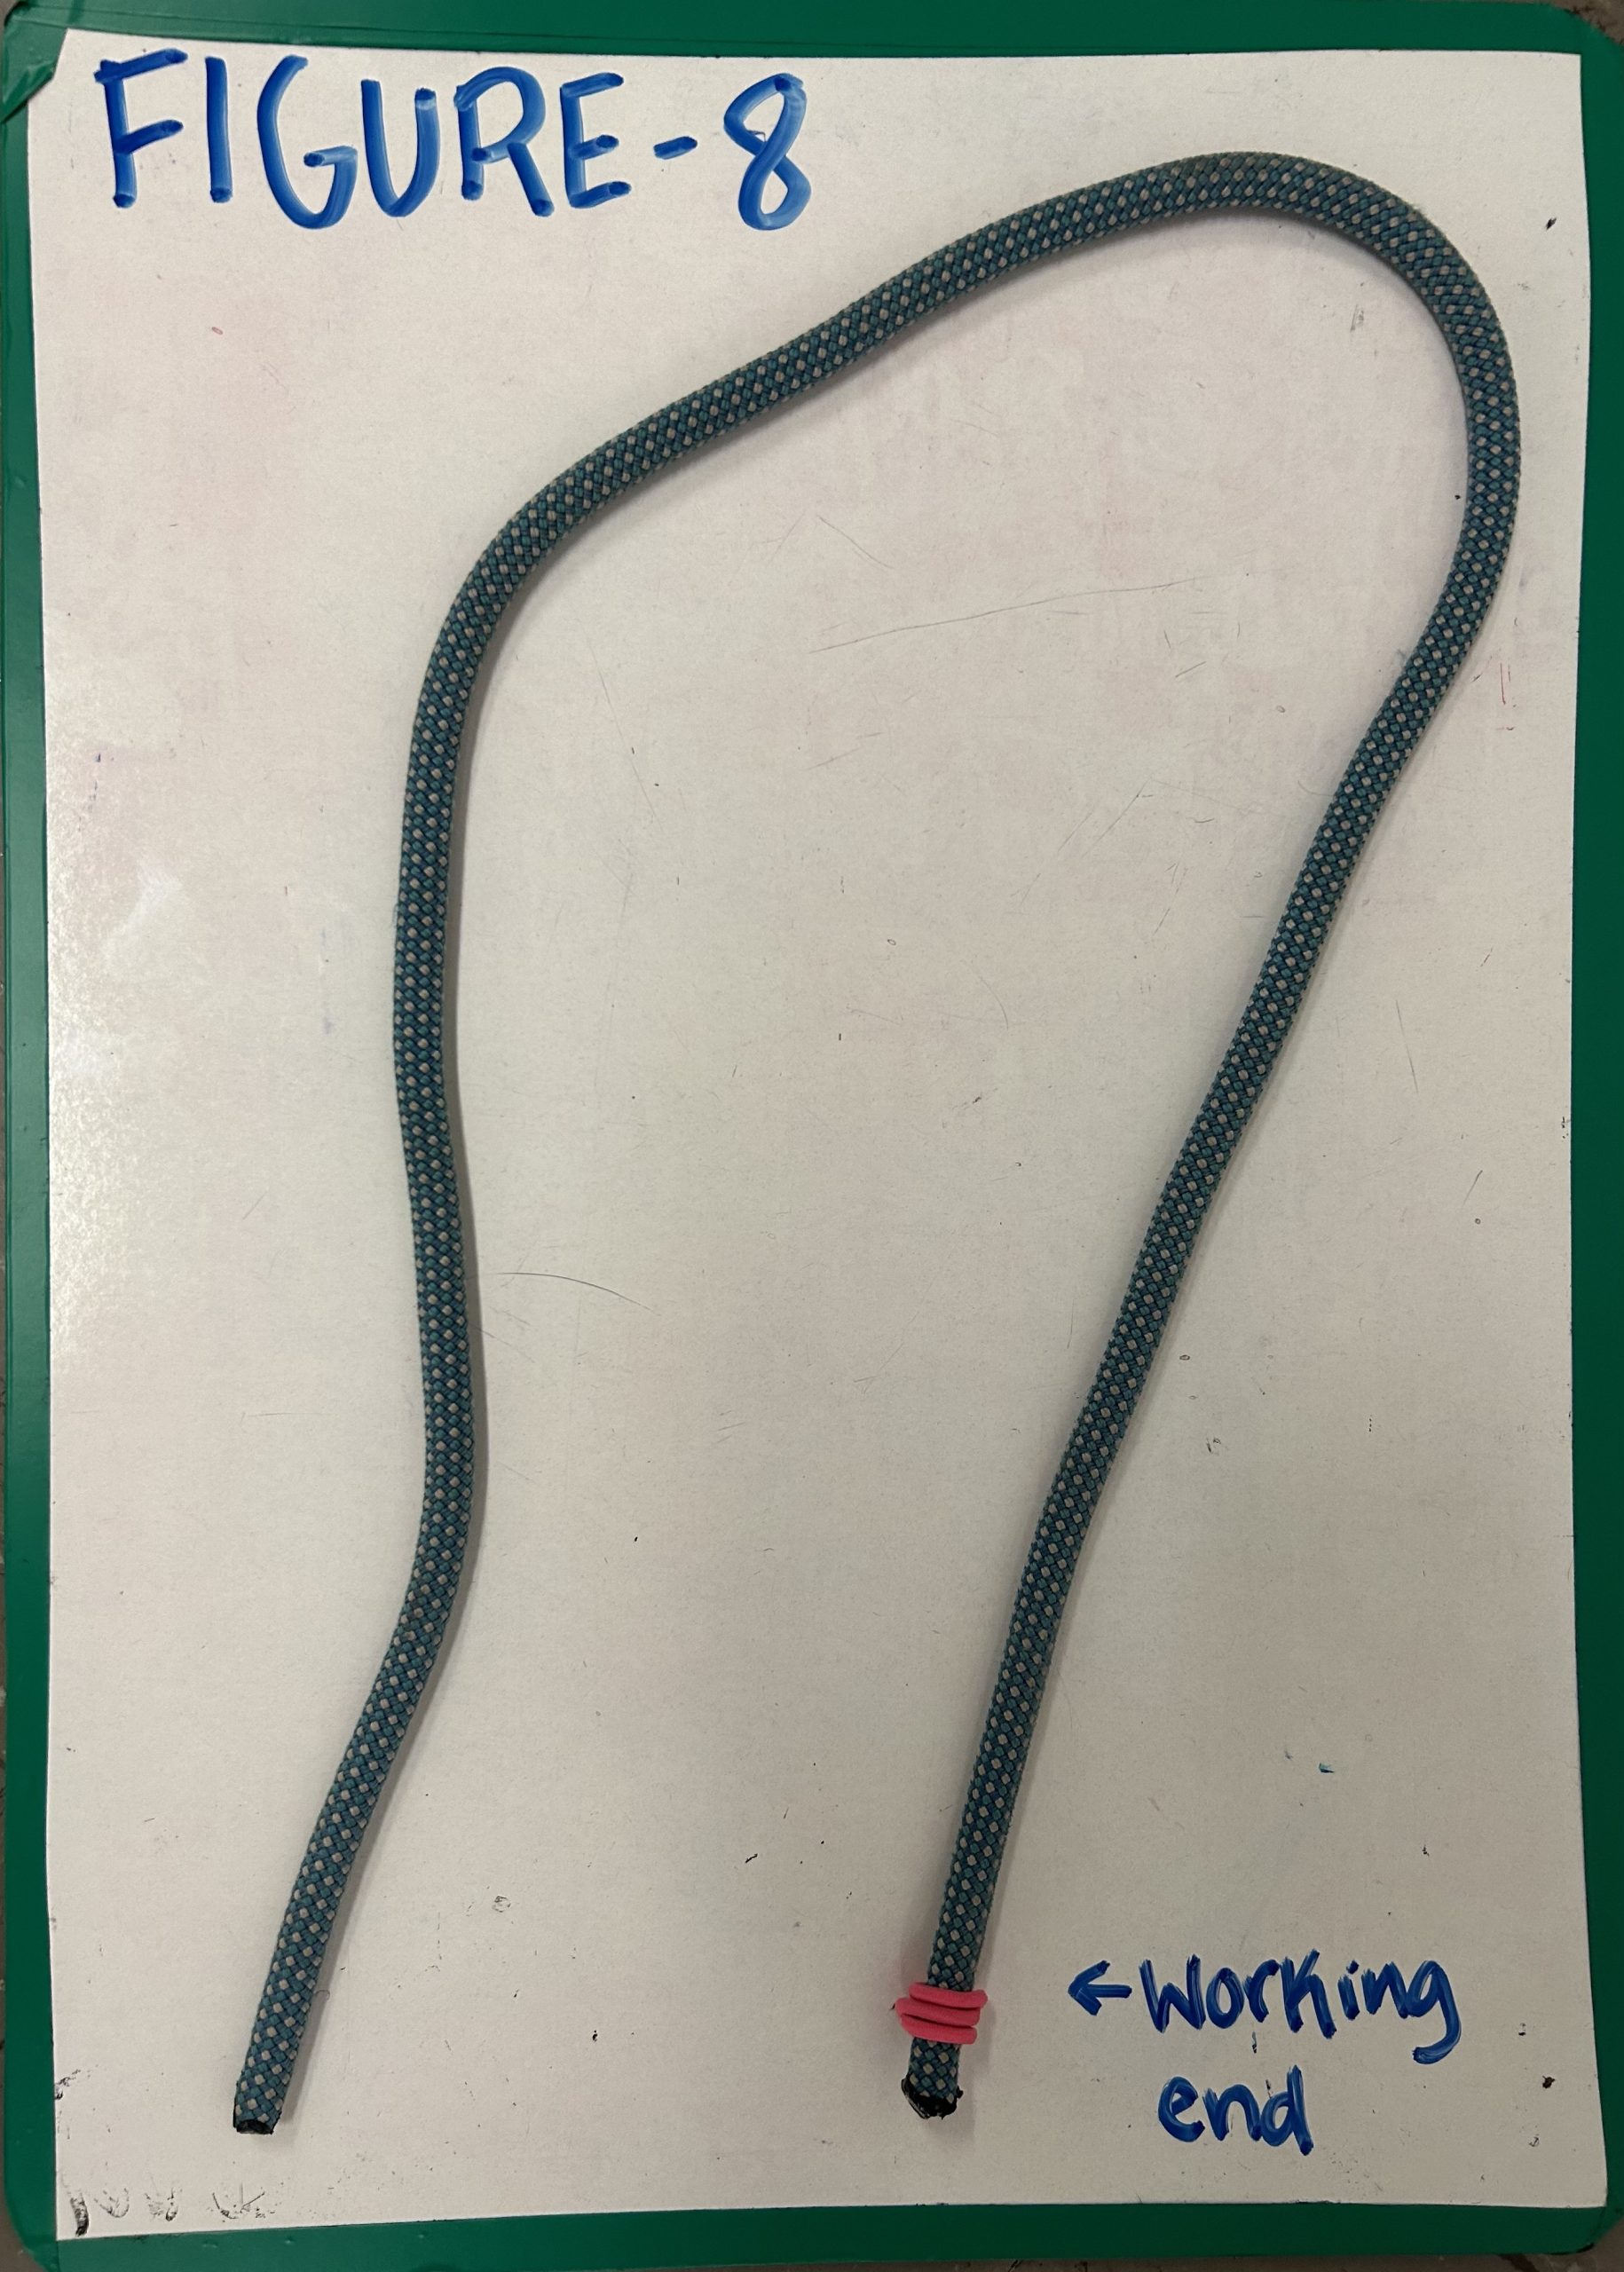
Serves as the basis for a figure-8-follow through, which is used for tying into a climbing rope.
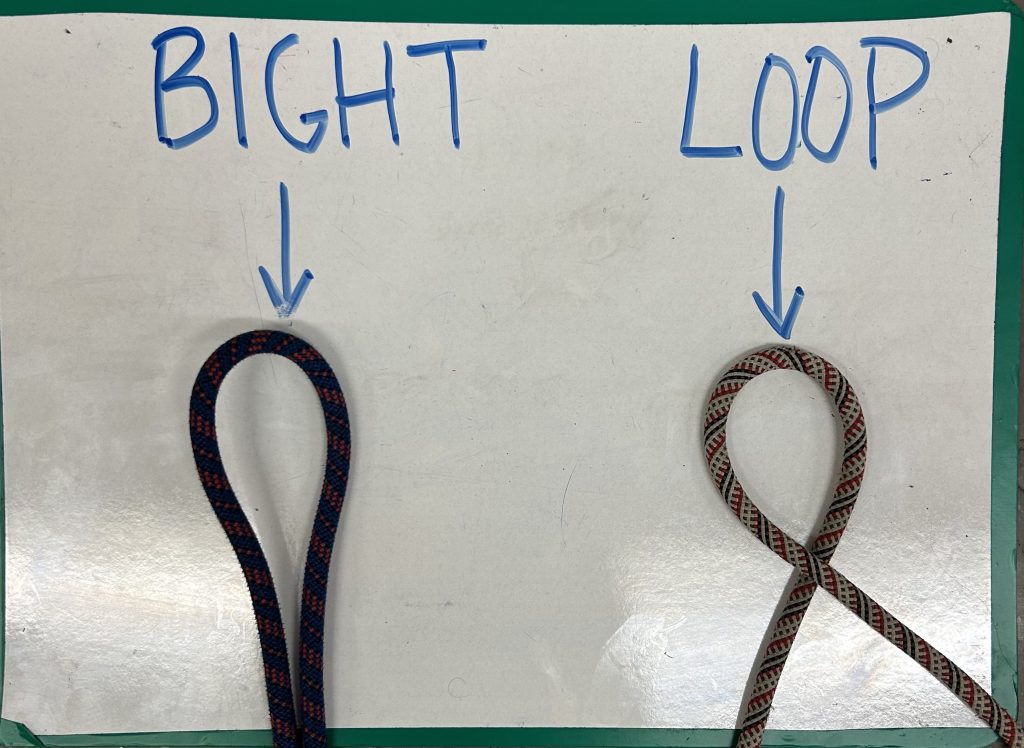
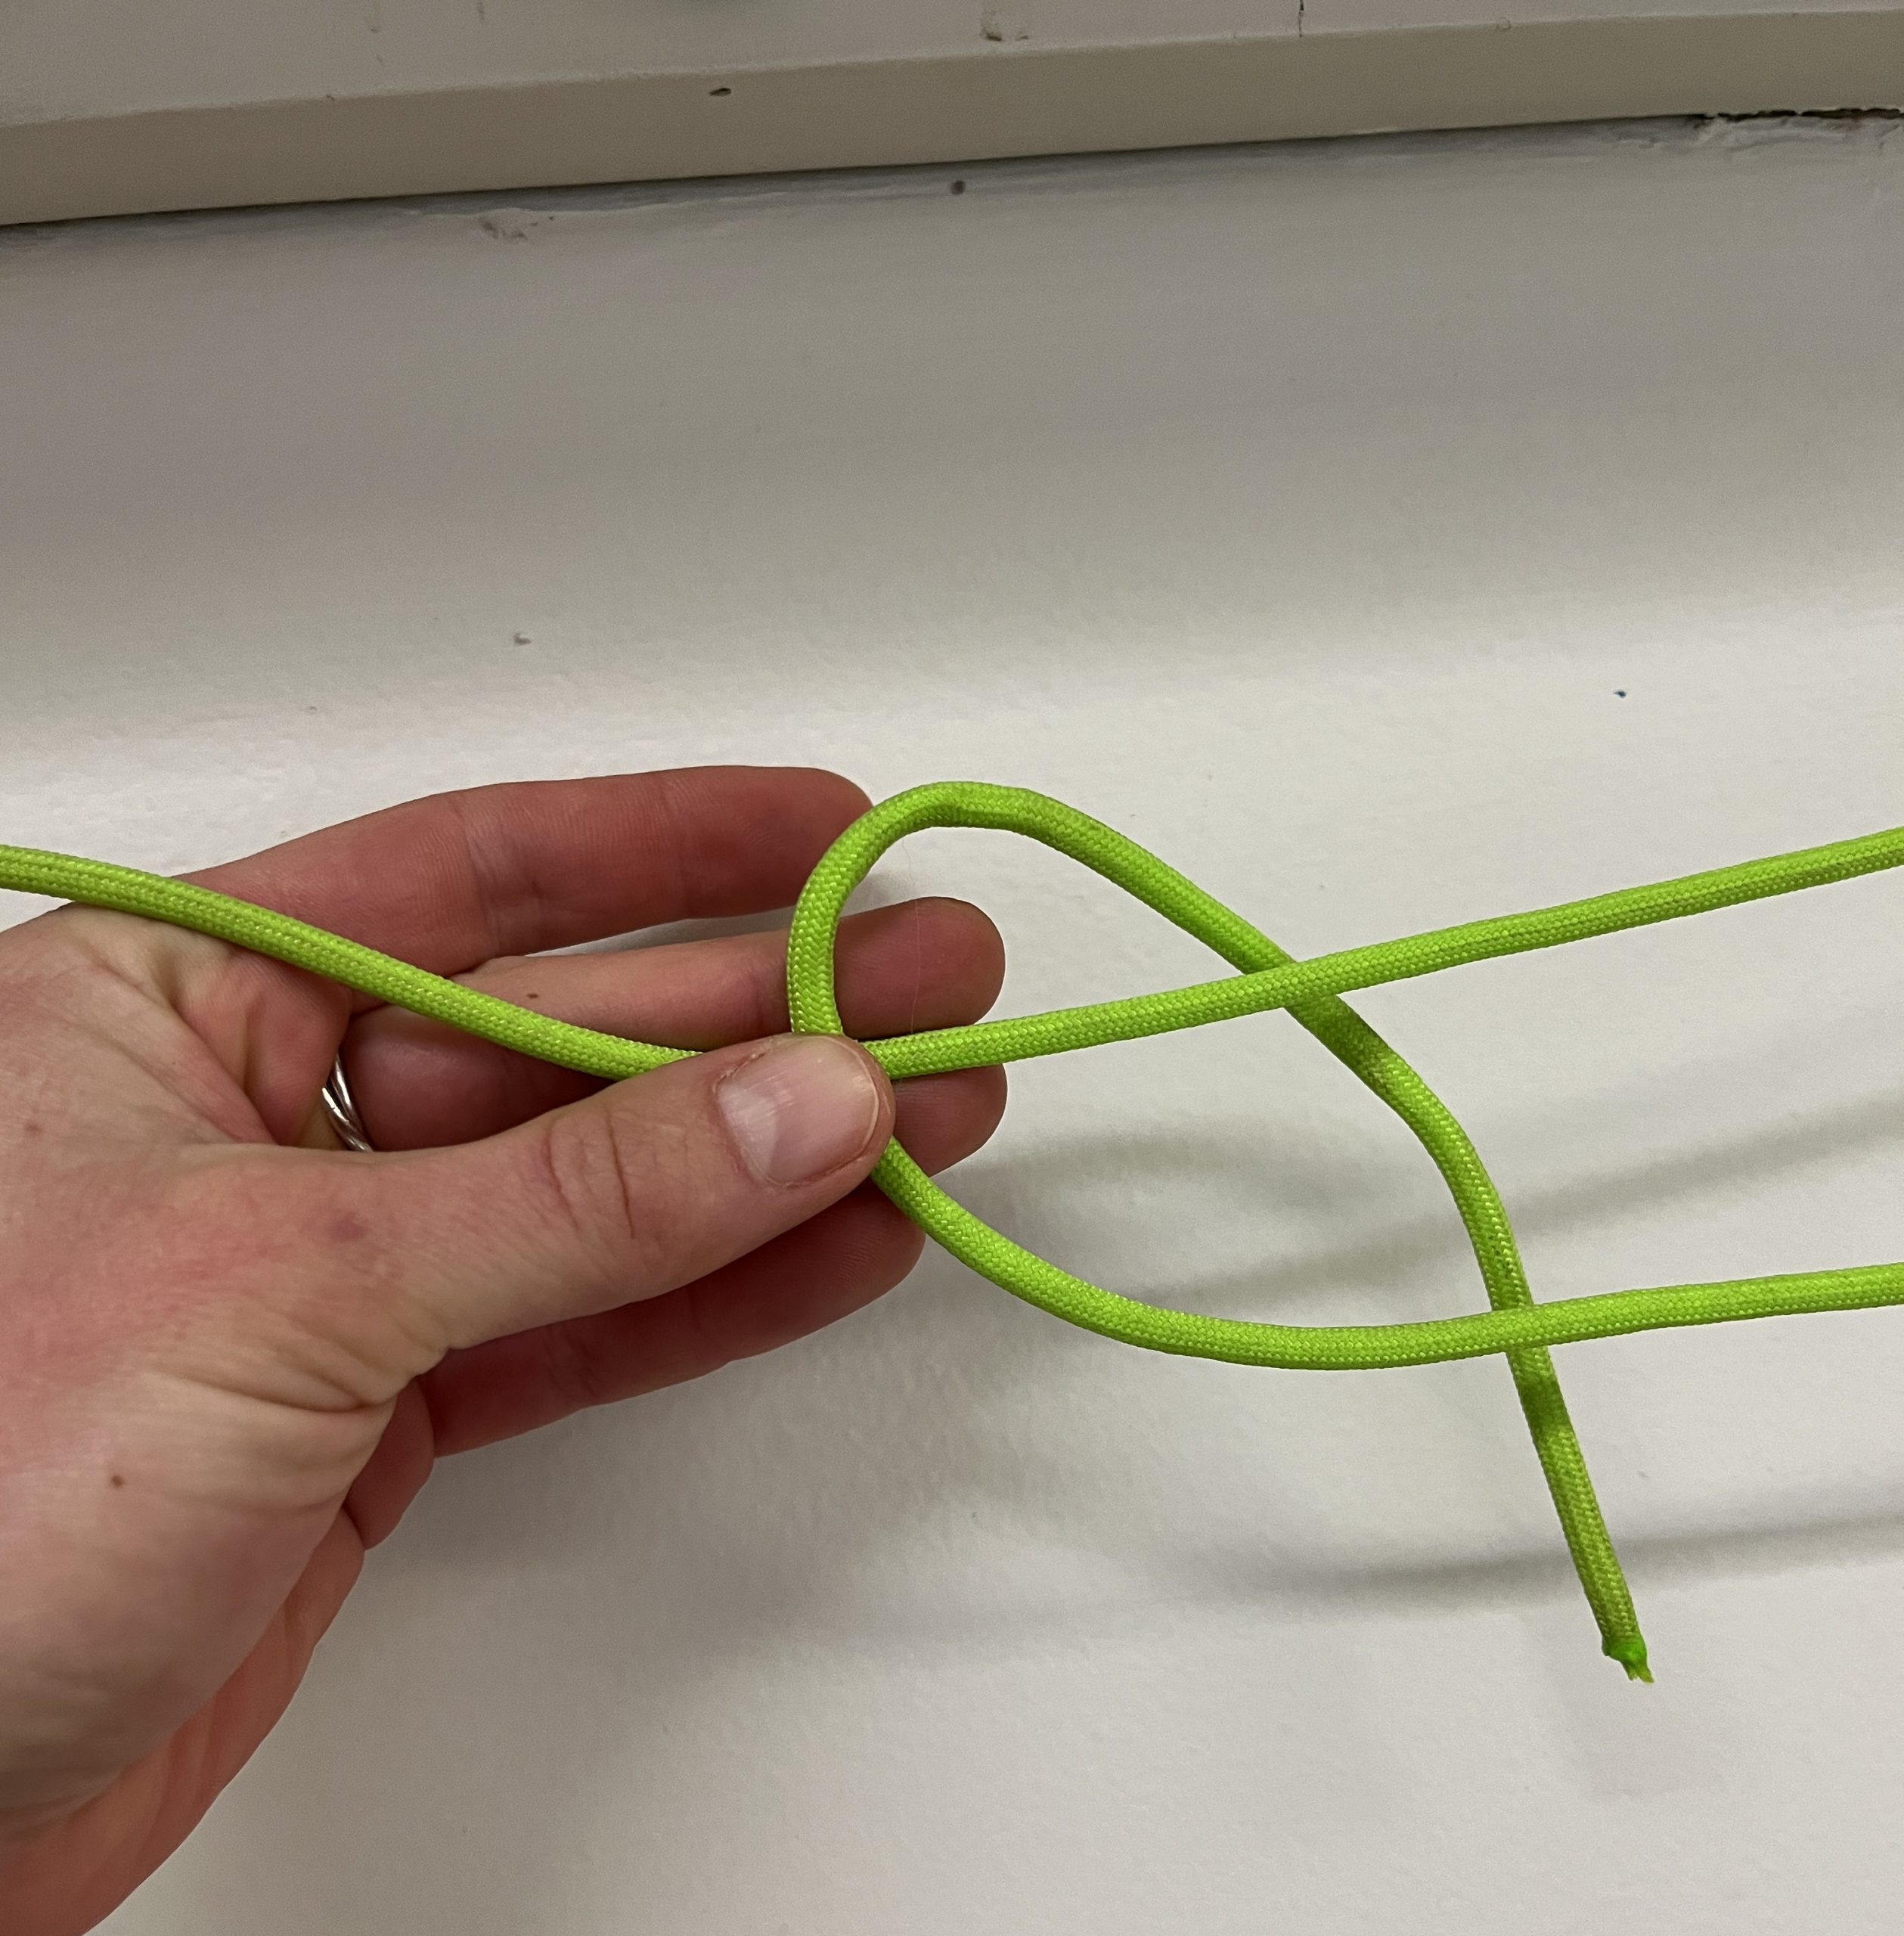
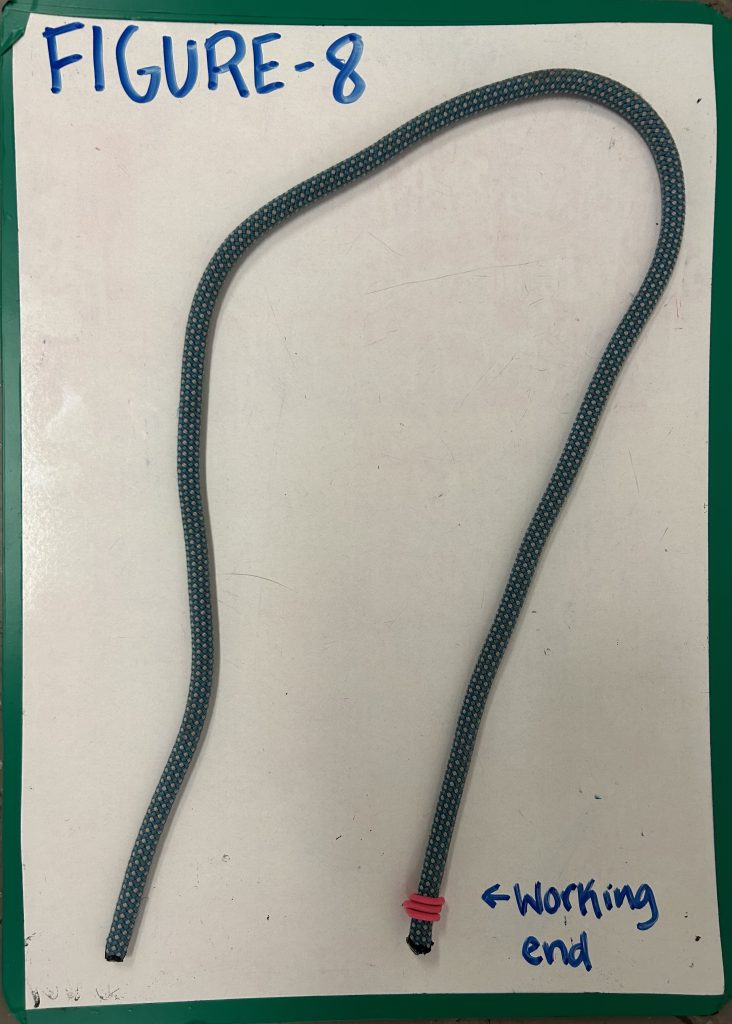 Step 1: Create a bight of rope, holding the standing end and working end in either hand.
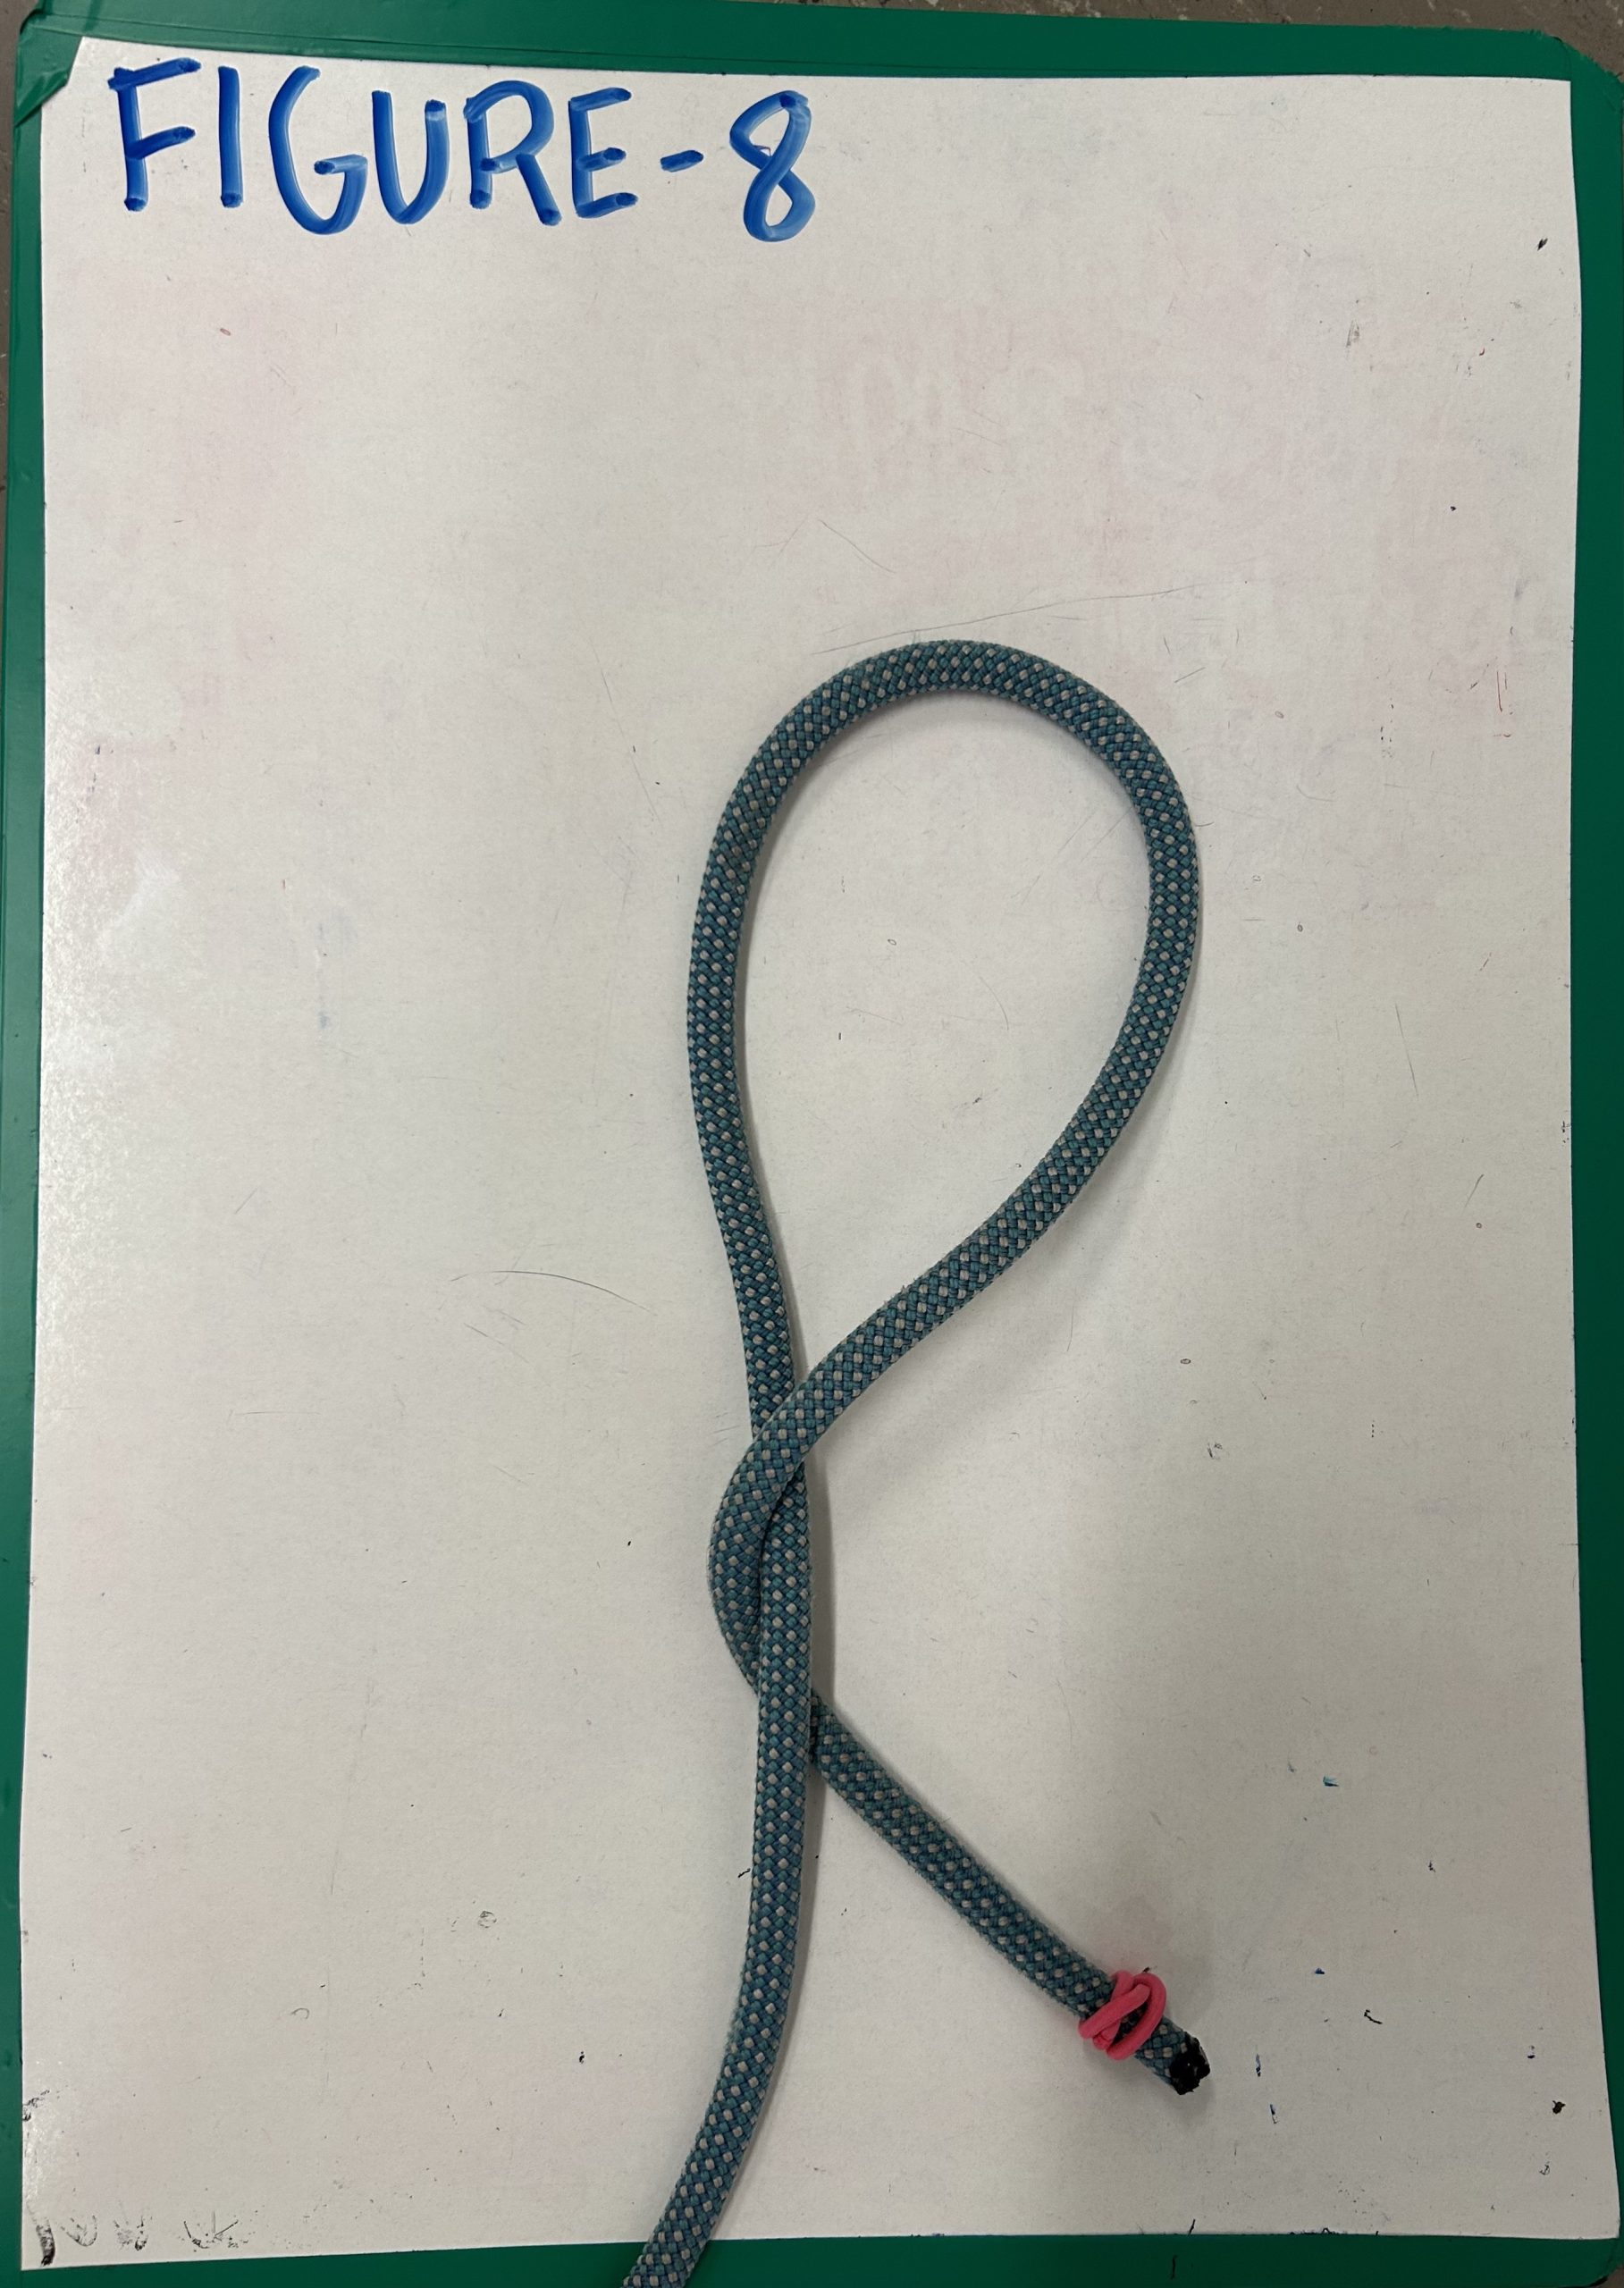
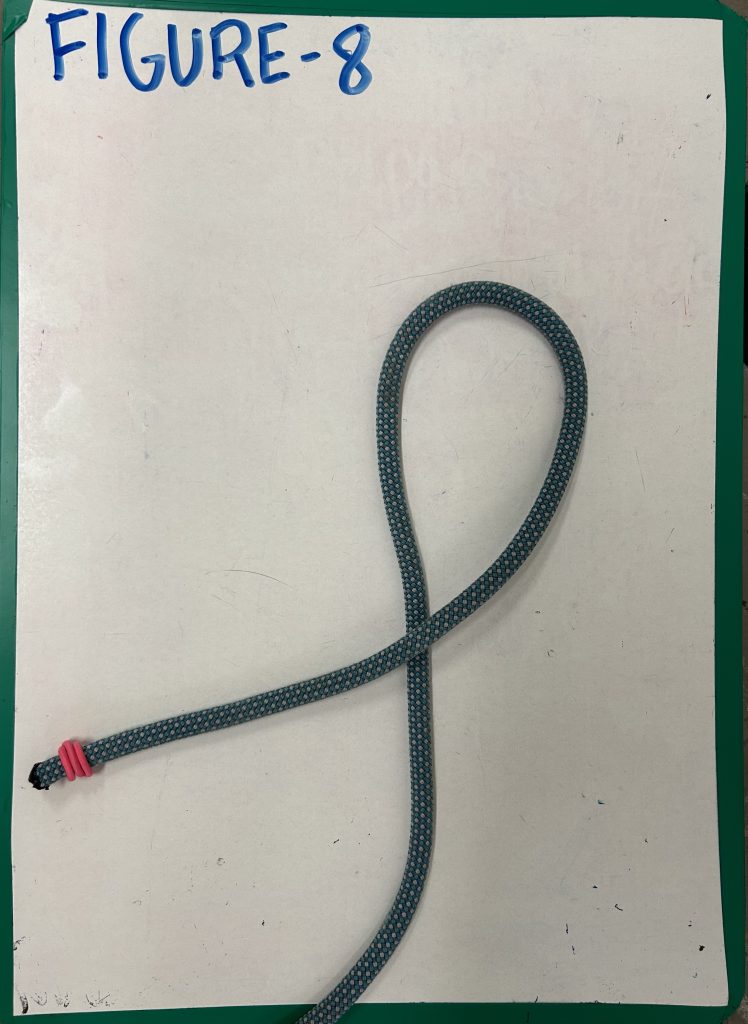 Step 2: Create a loop by crossing the working end over the standing end.
 Step 3: Bring the working end behind the back side of the standing end.
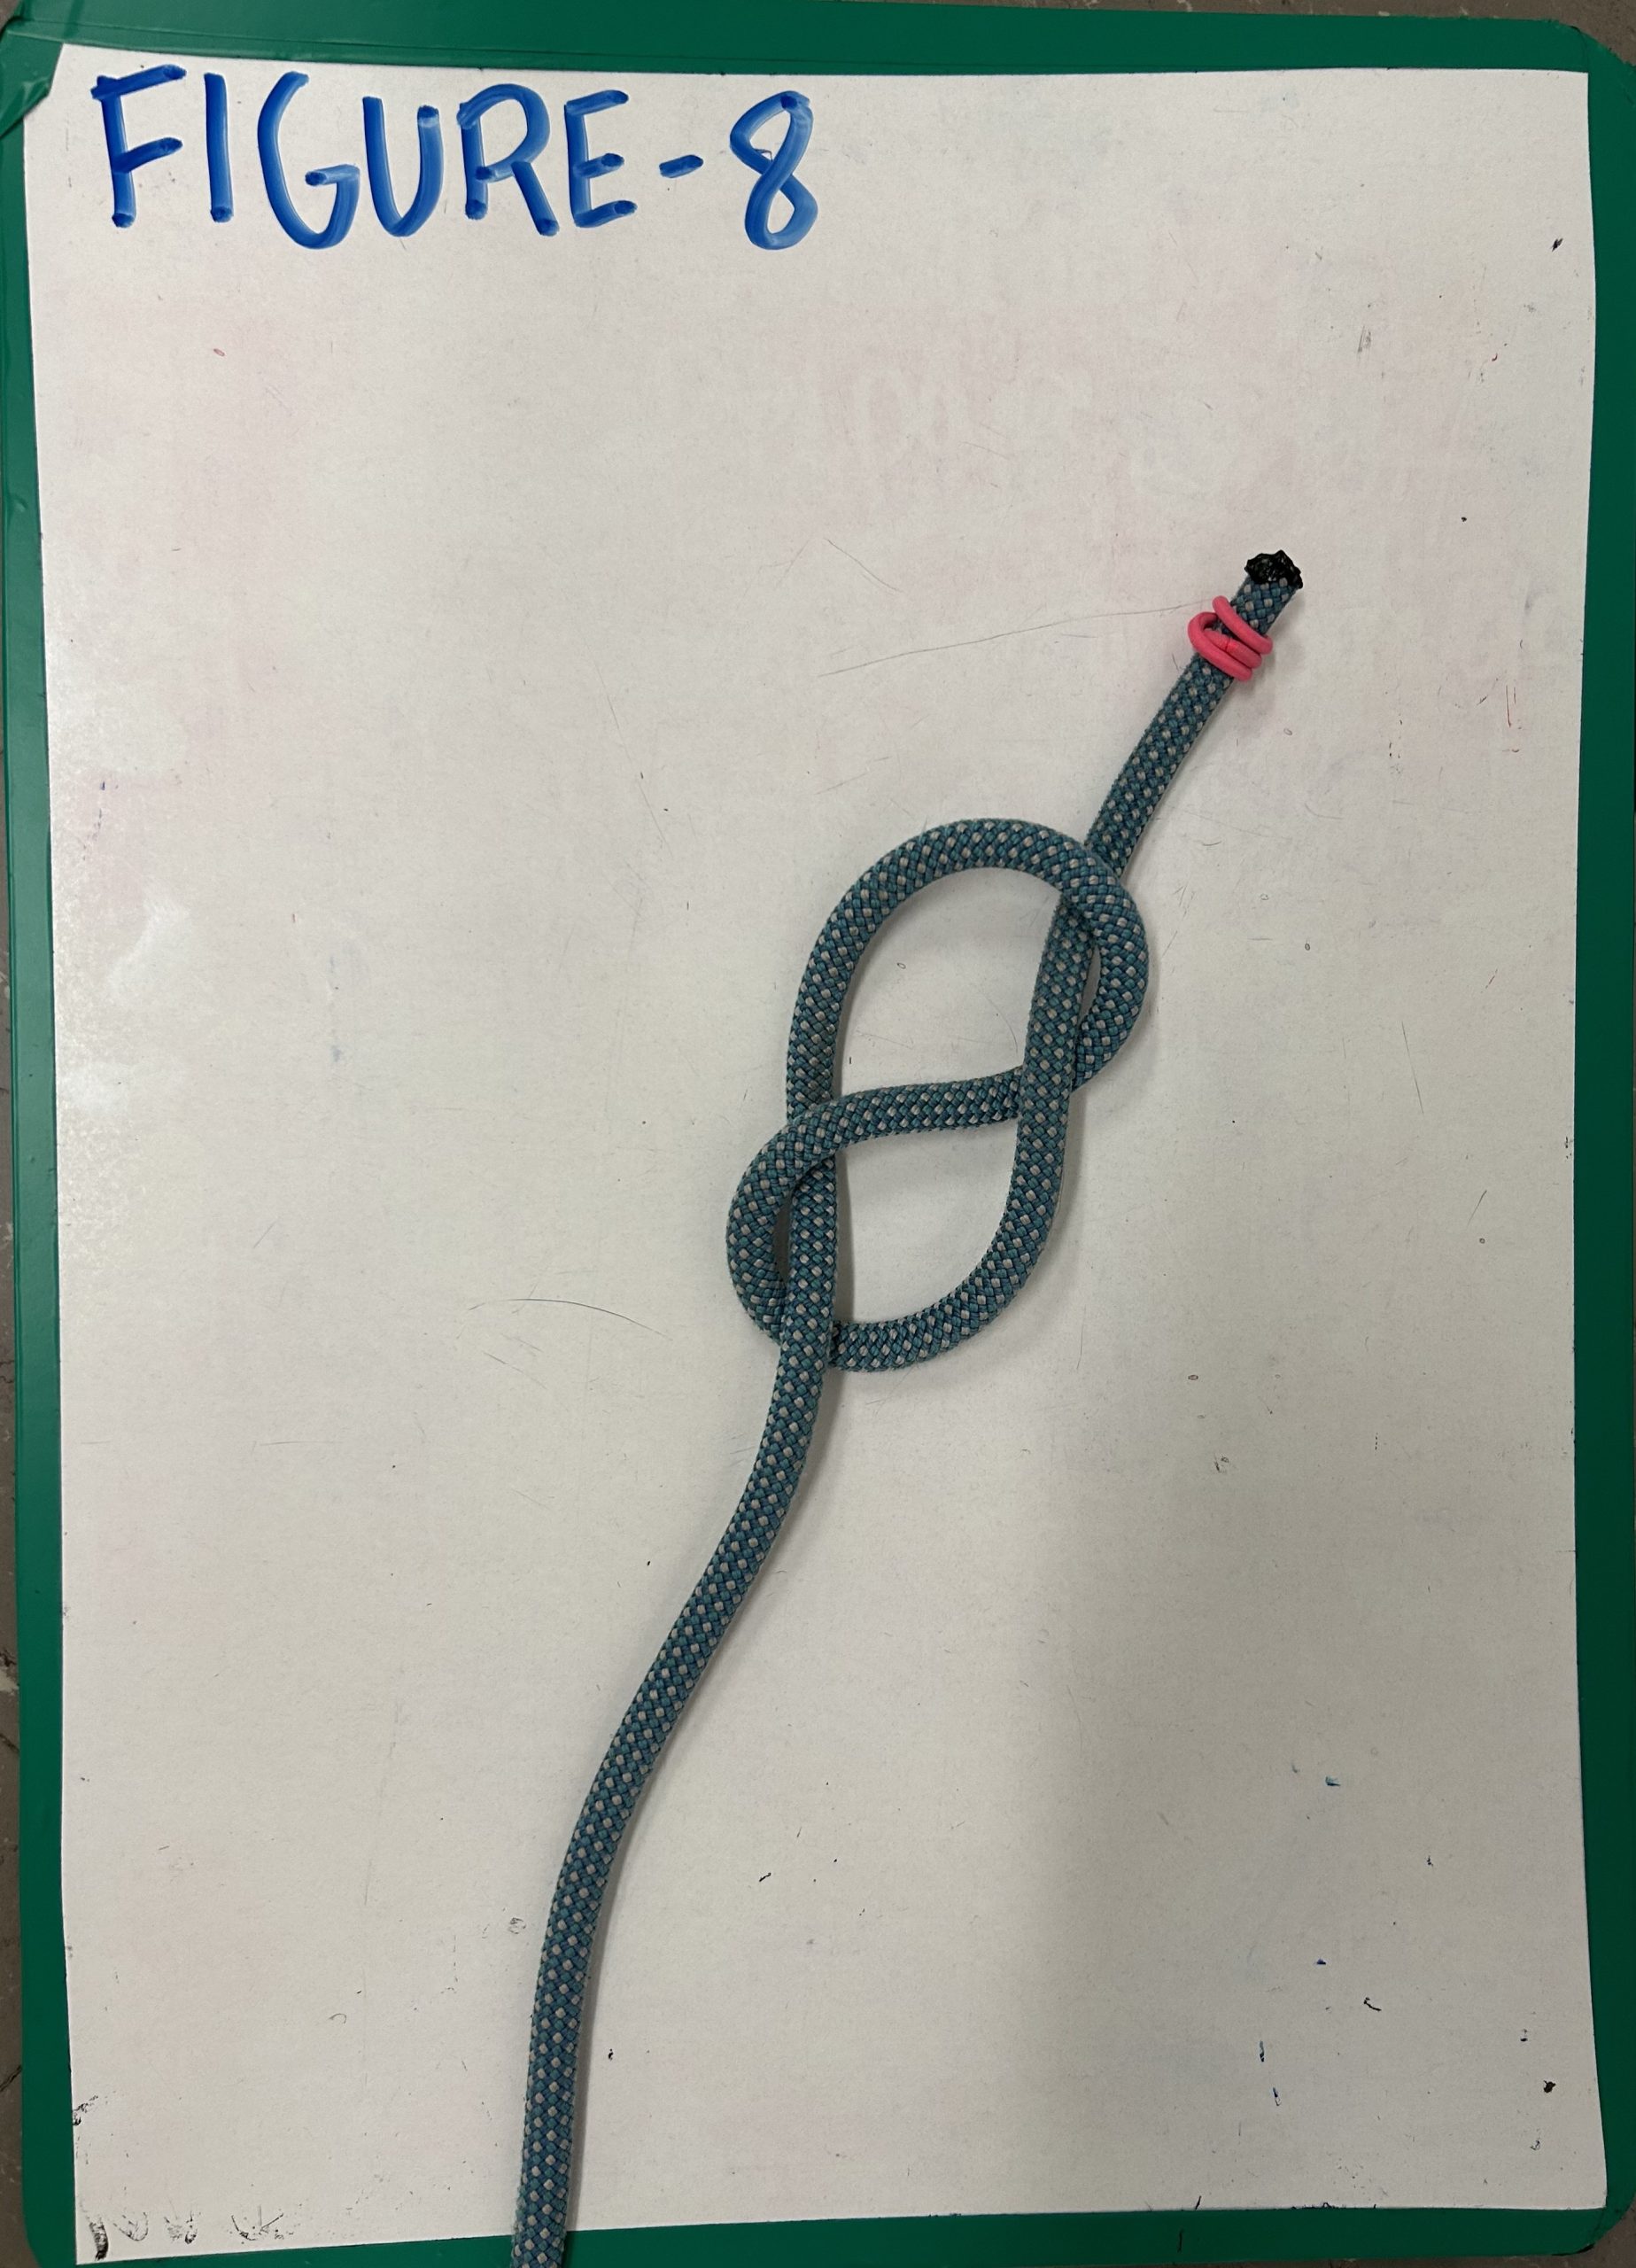
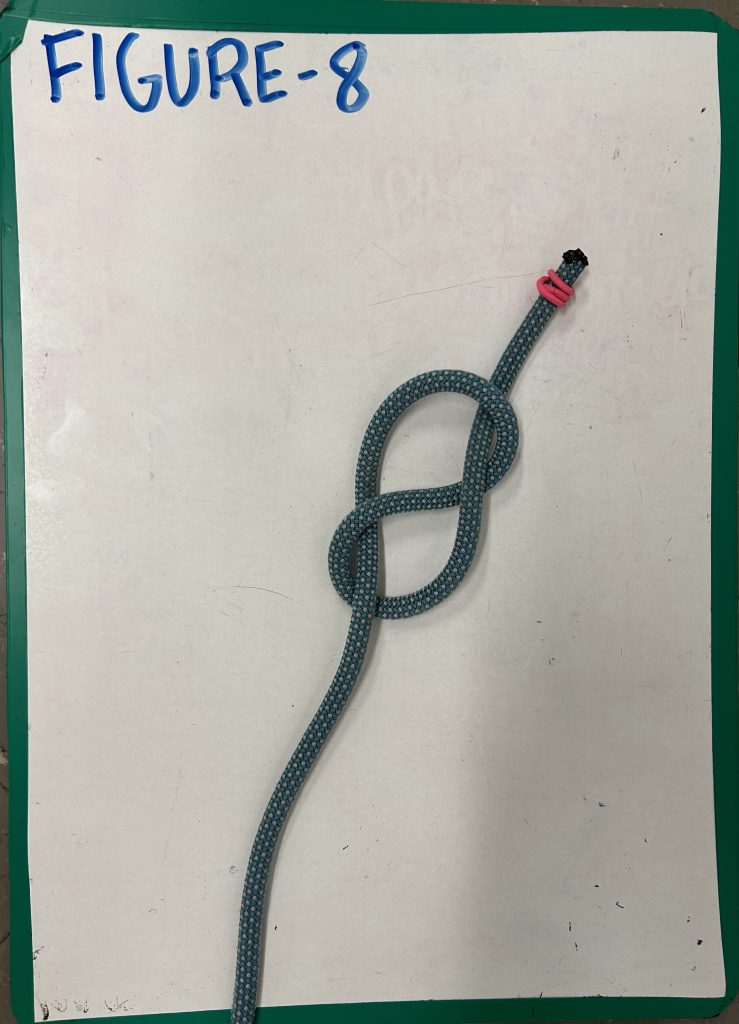 Step 4: Pull the working end back through the loop you created, entering from the side facing you.

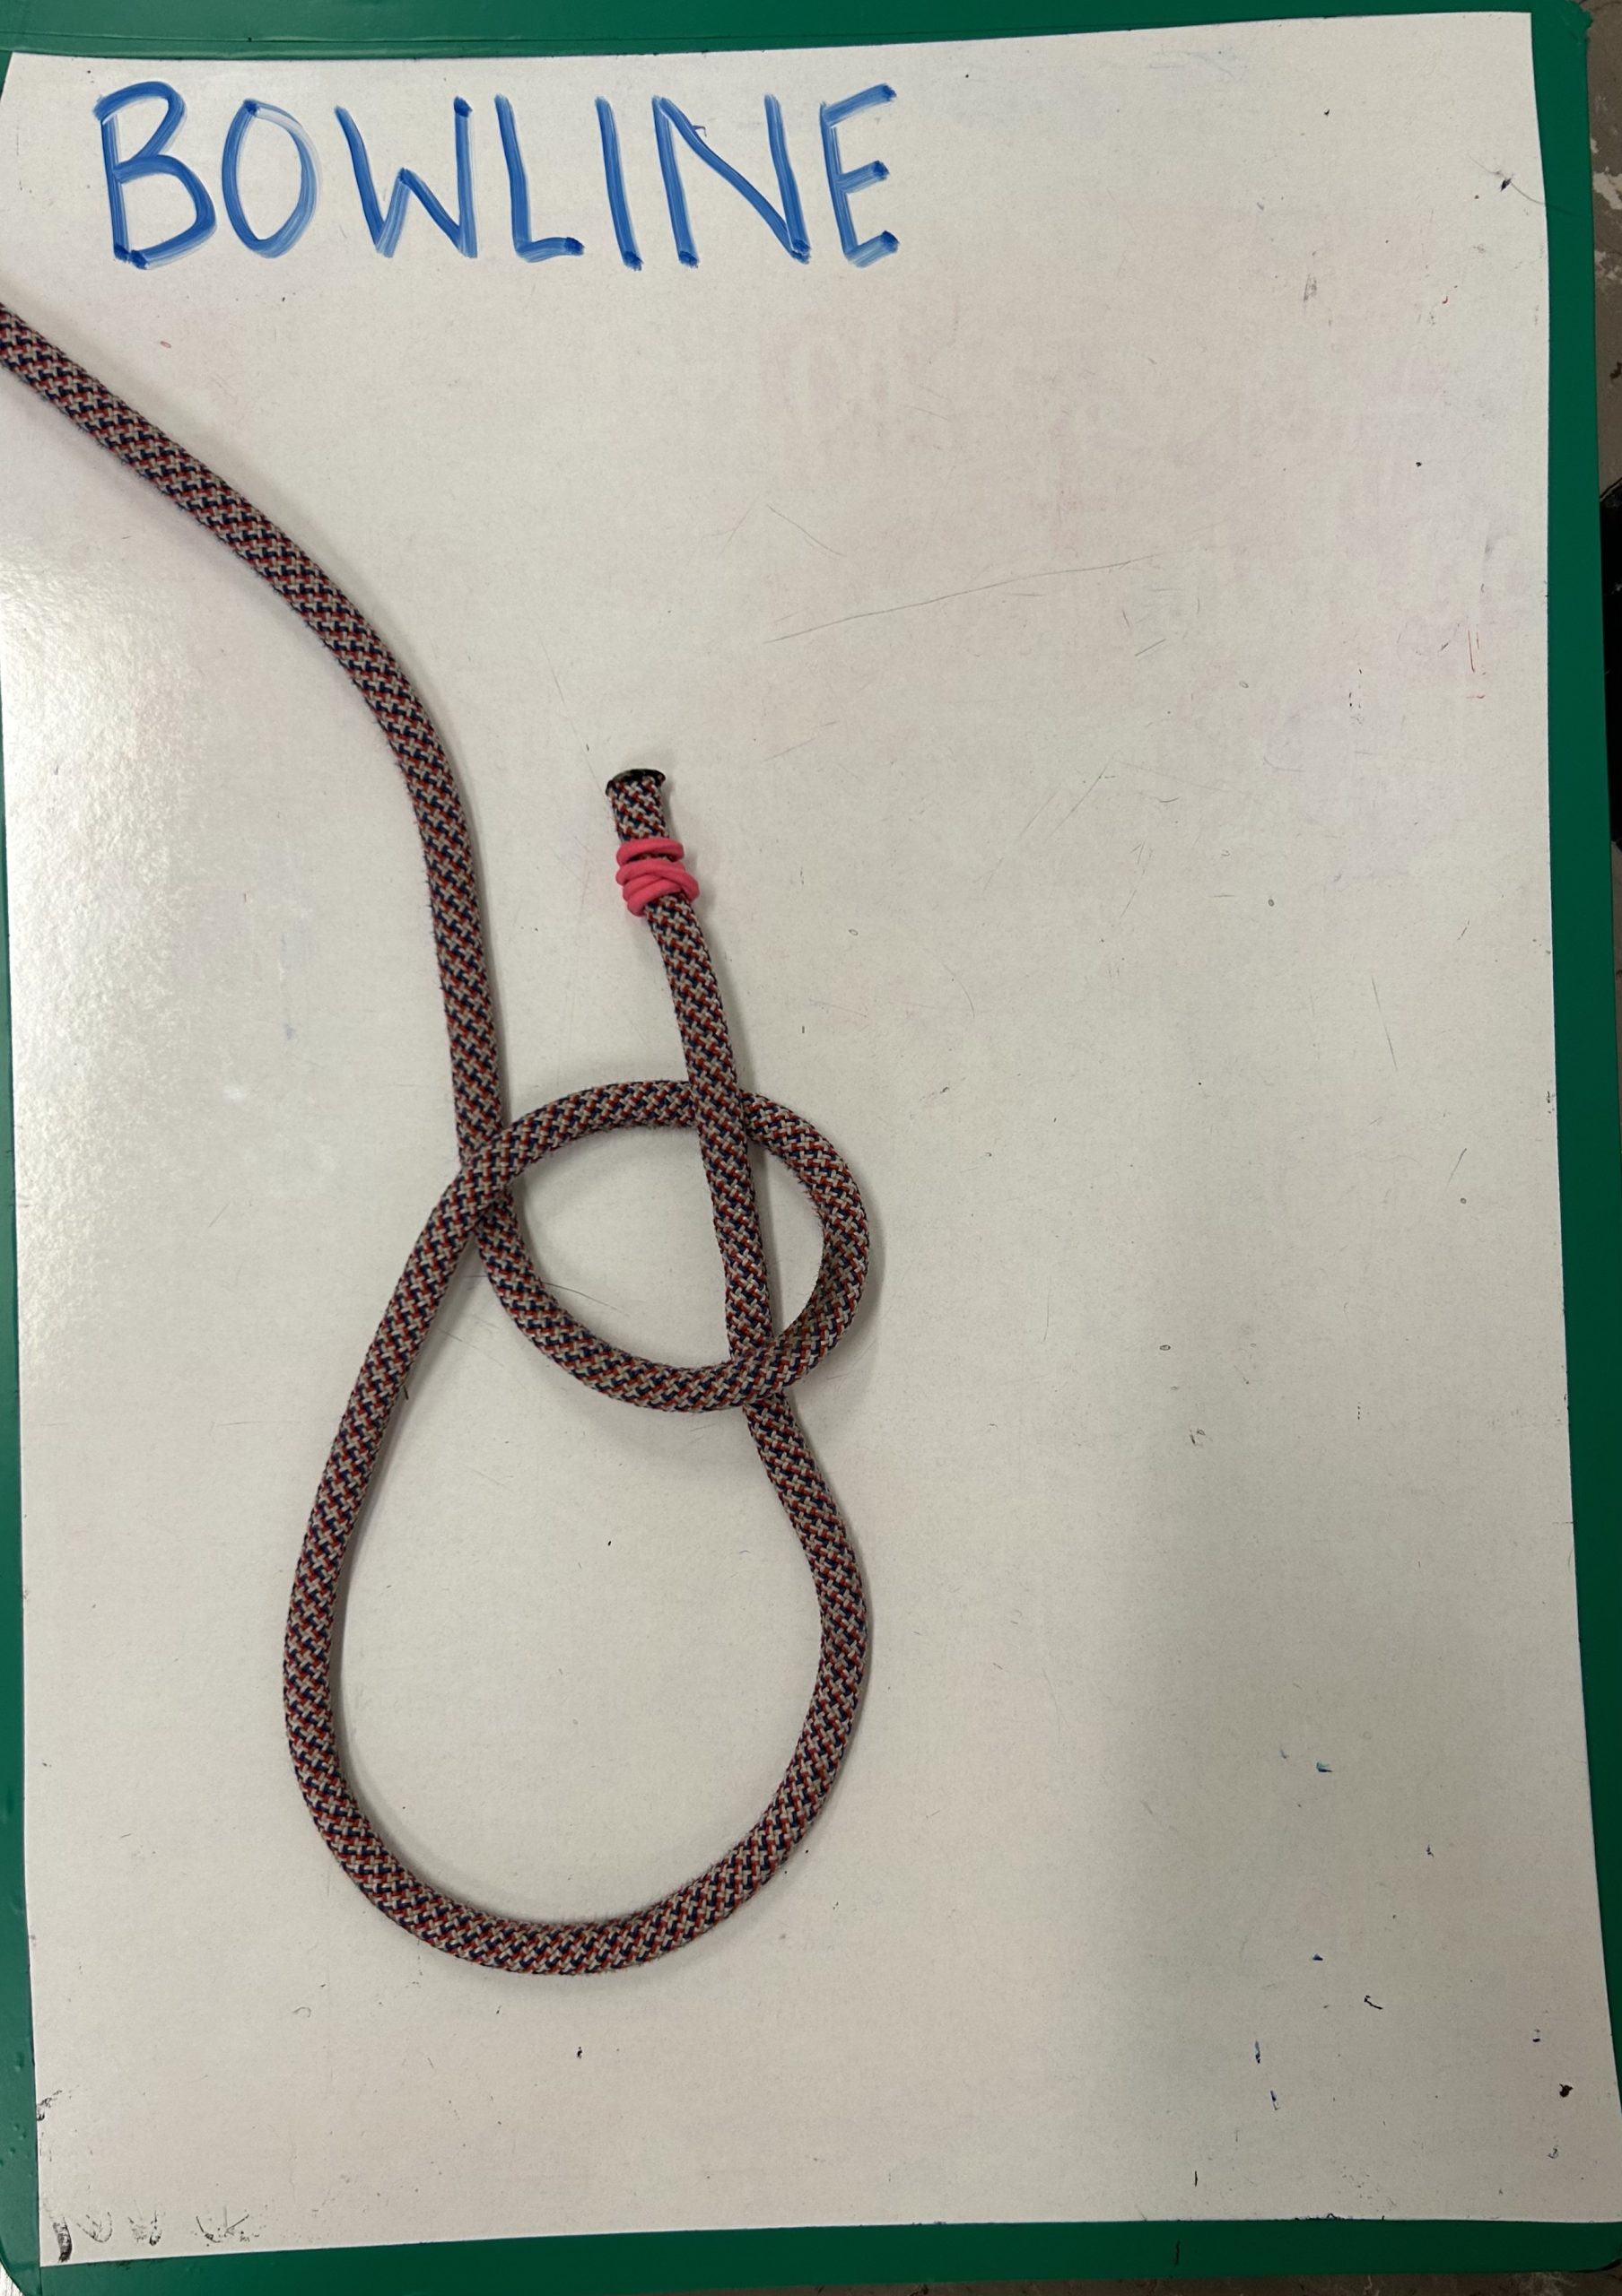
Forms a secure loop in the end piece of rope. Used mainly for sailing for fastening to a mooring or tying rope around a natural anchor (ie. tree or rock). Much easier to tie around something. Does not slip or bind under rope strain: cannot be tied or untied when there is a load on the standing end. Requires a long tail end or stopper knot to prevent slippage.
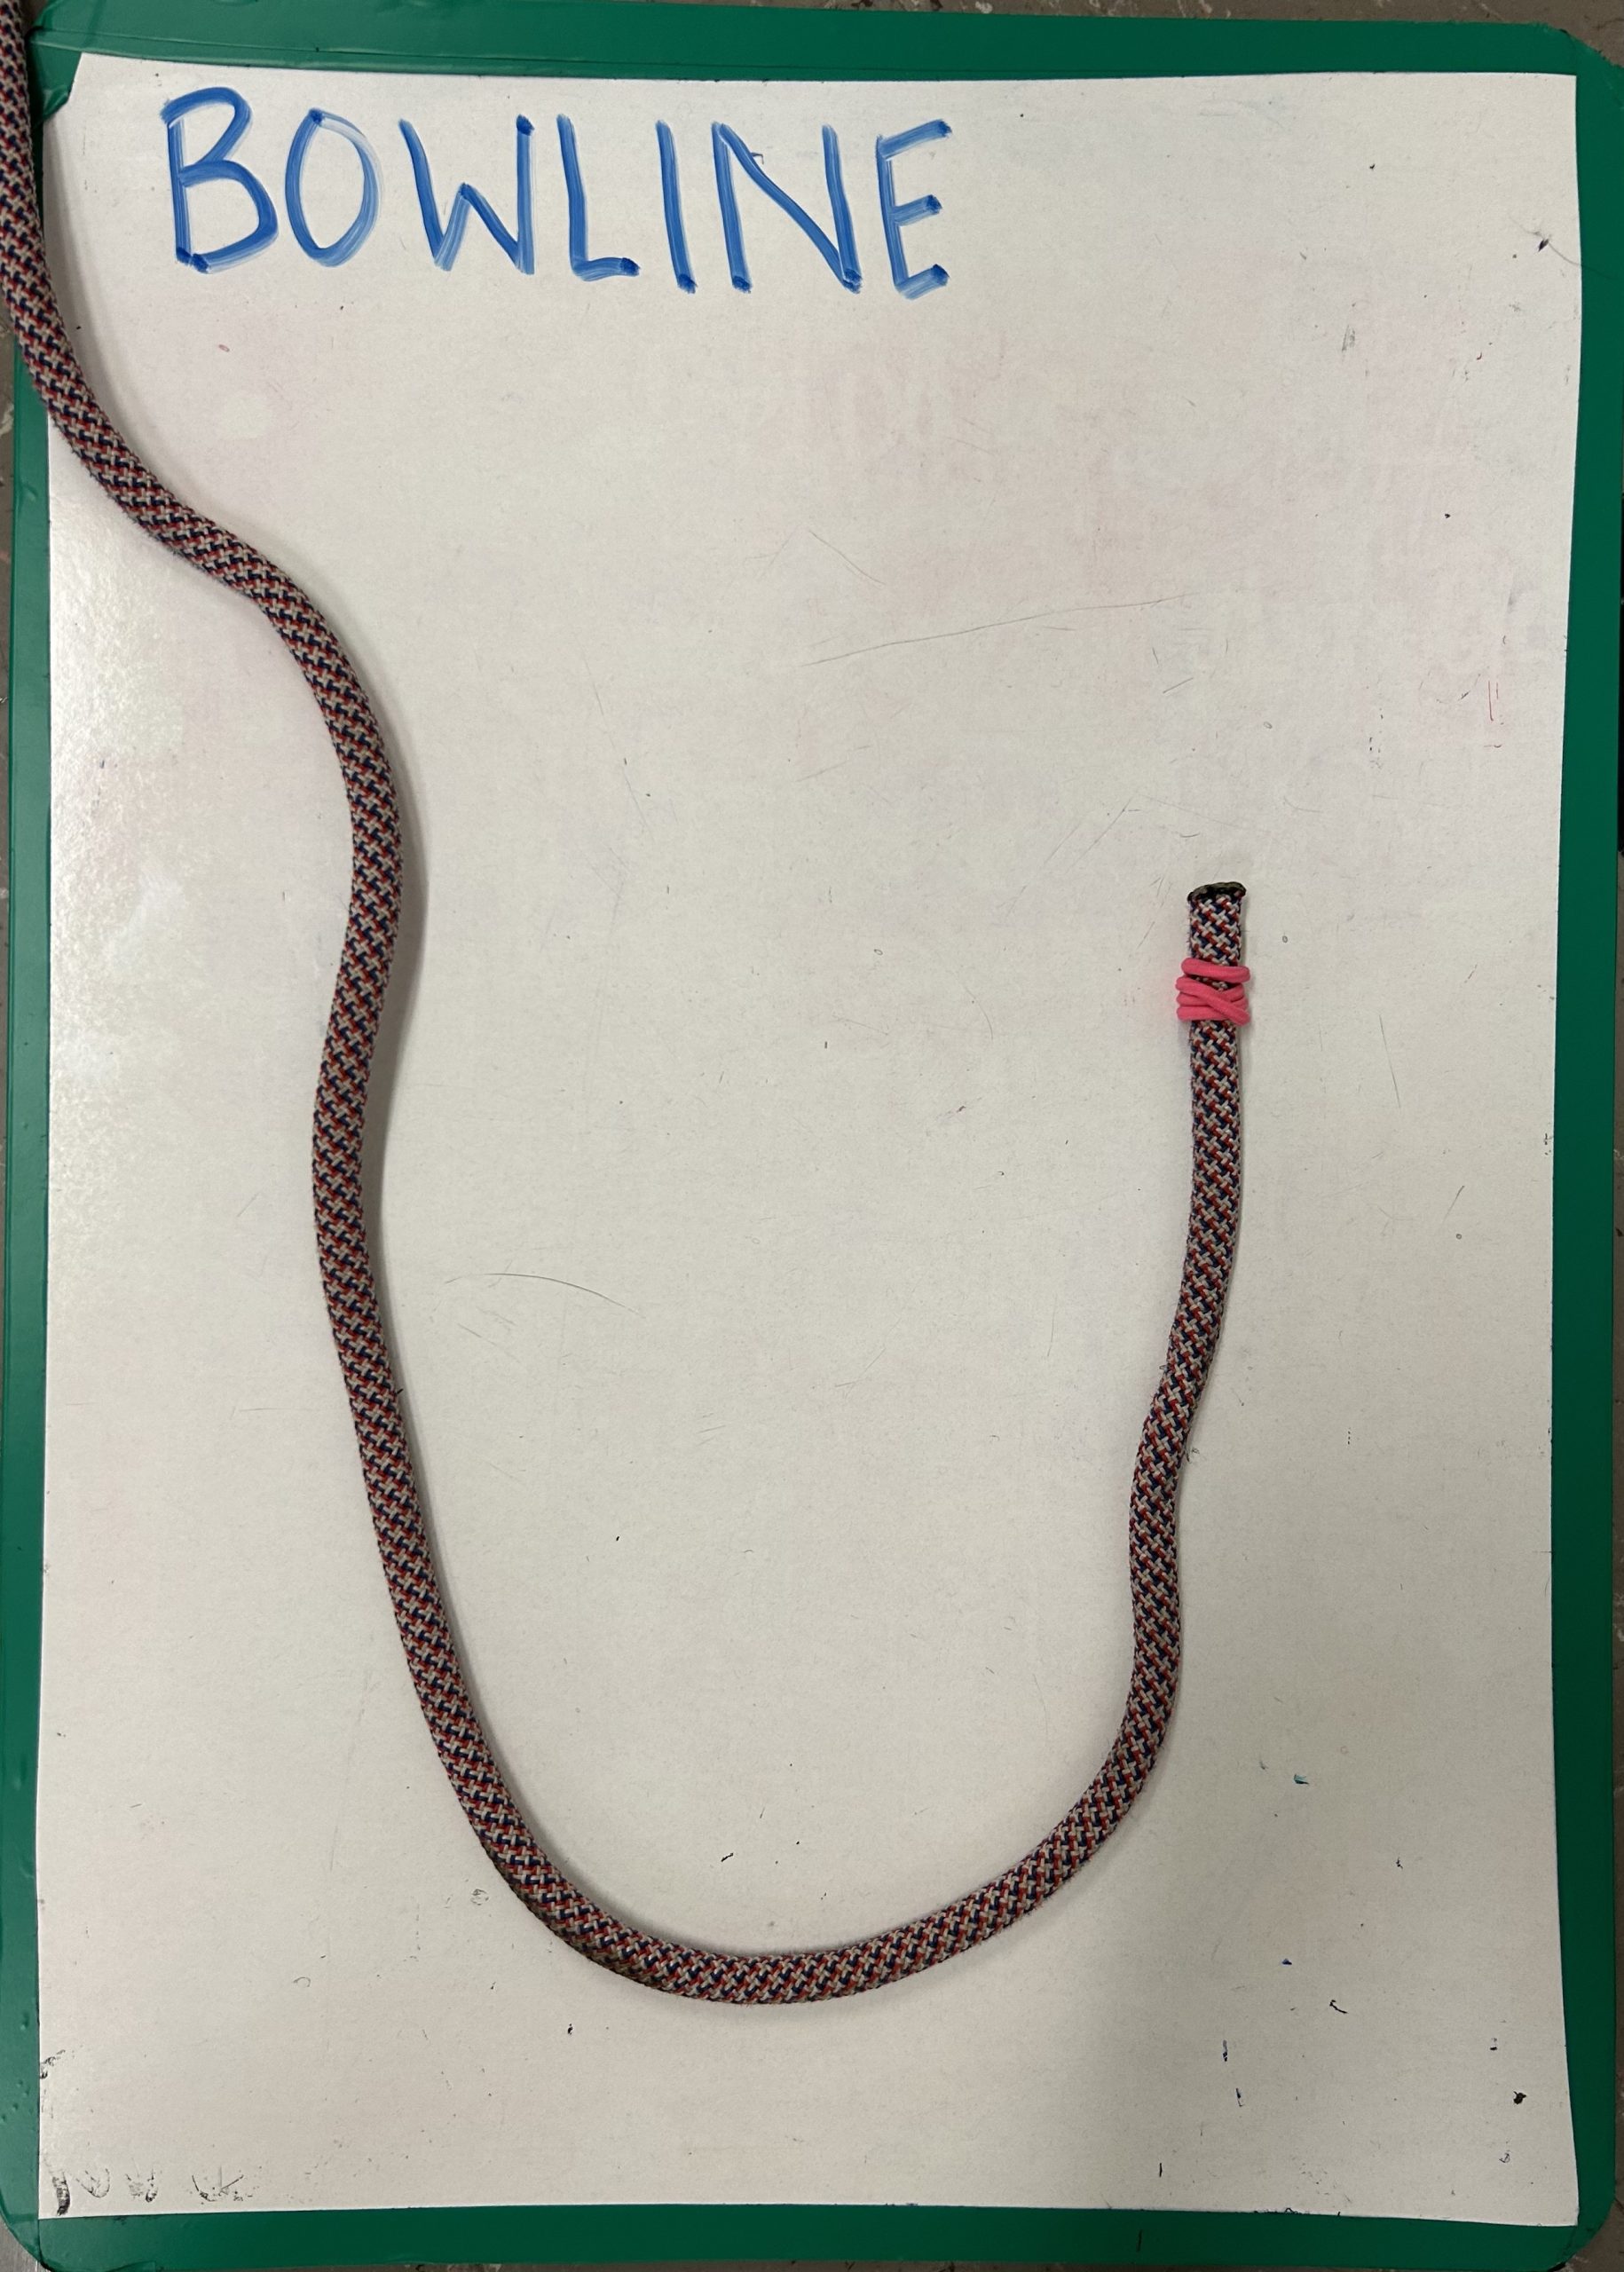
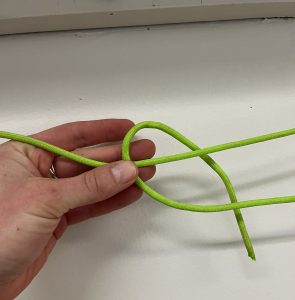
 Step 1: Hold working end in one hand and standing end in the other.
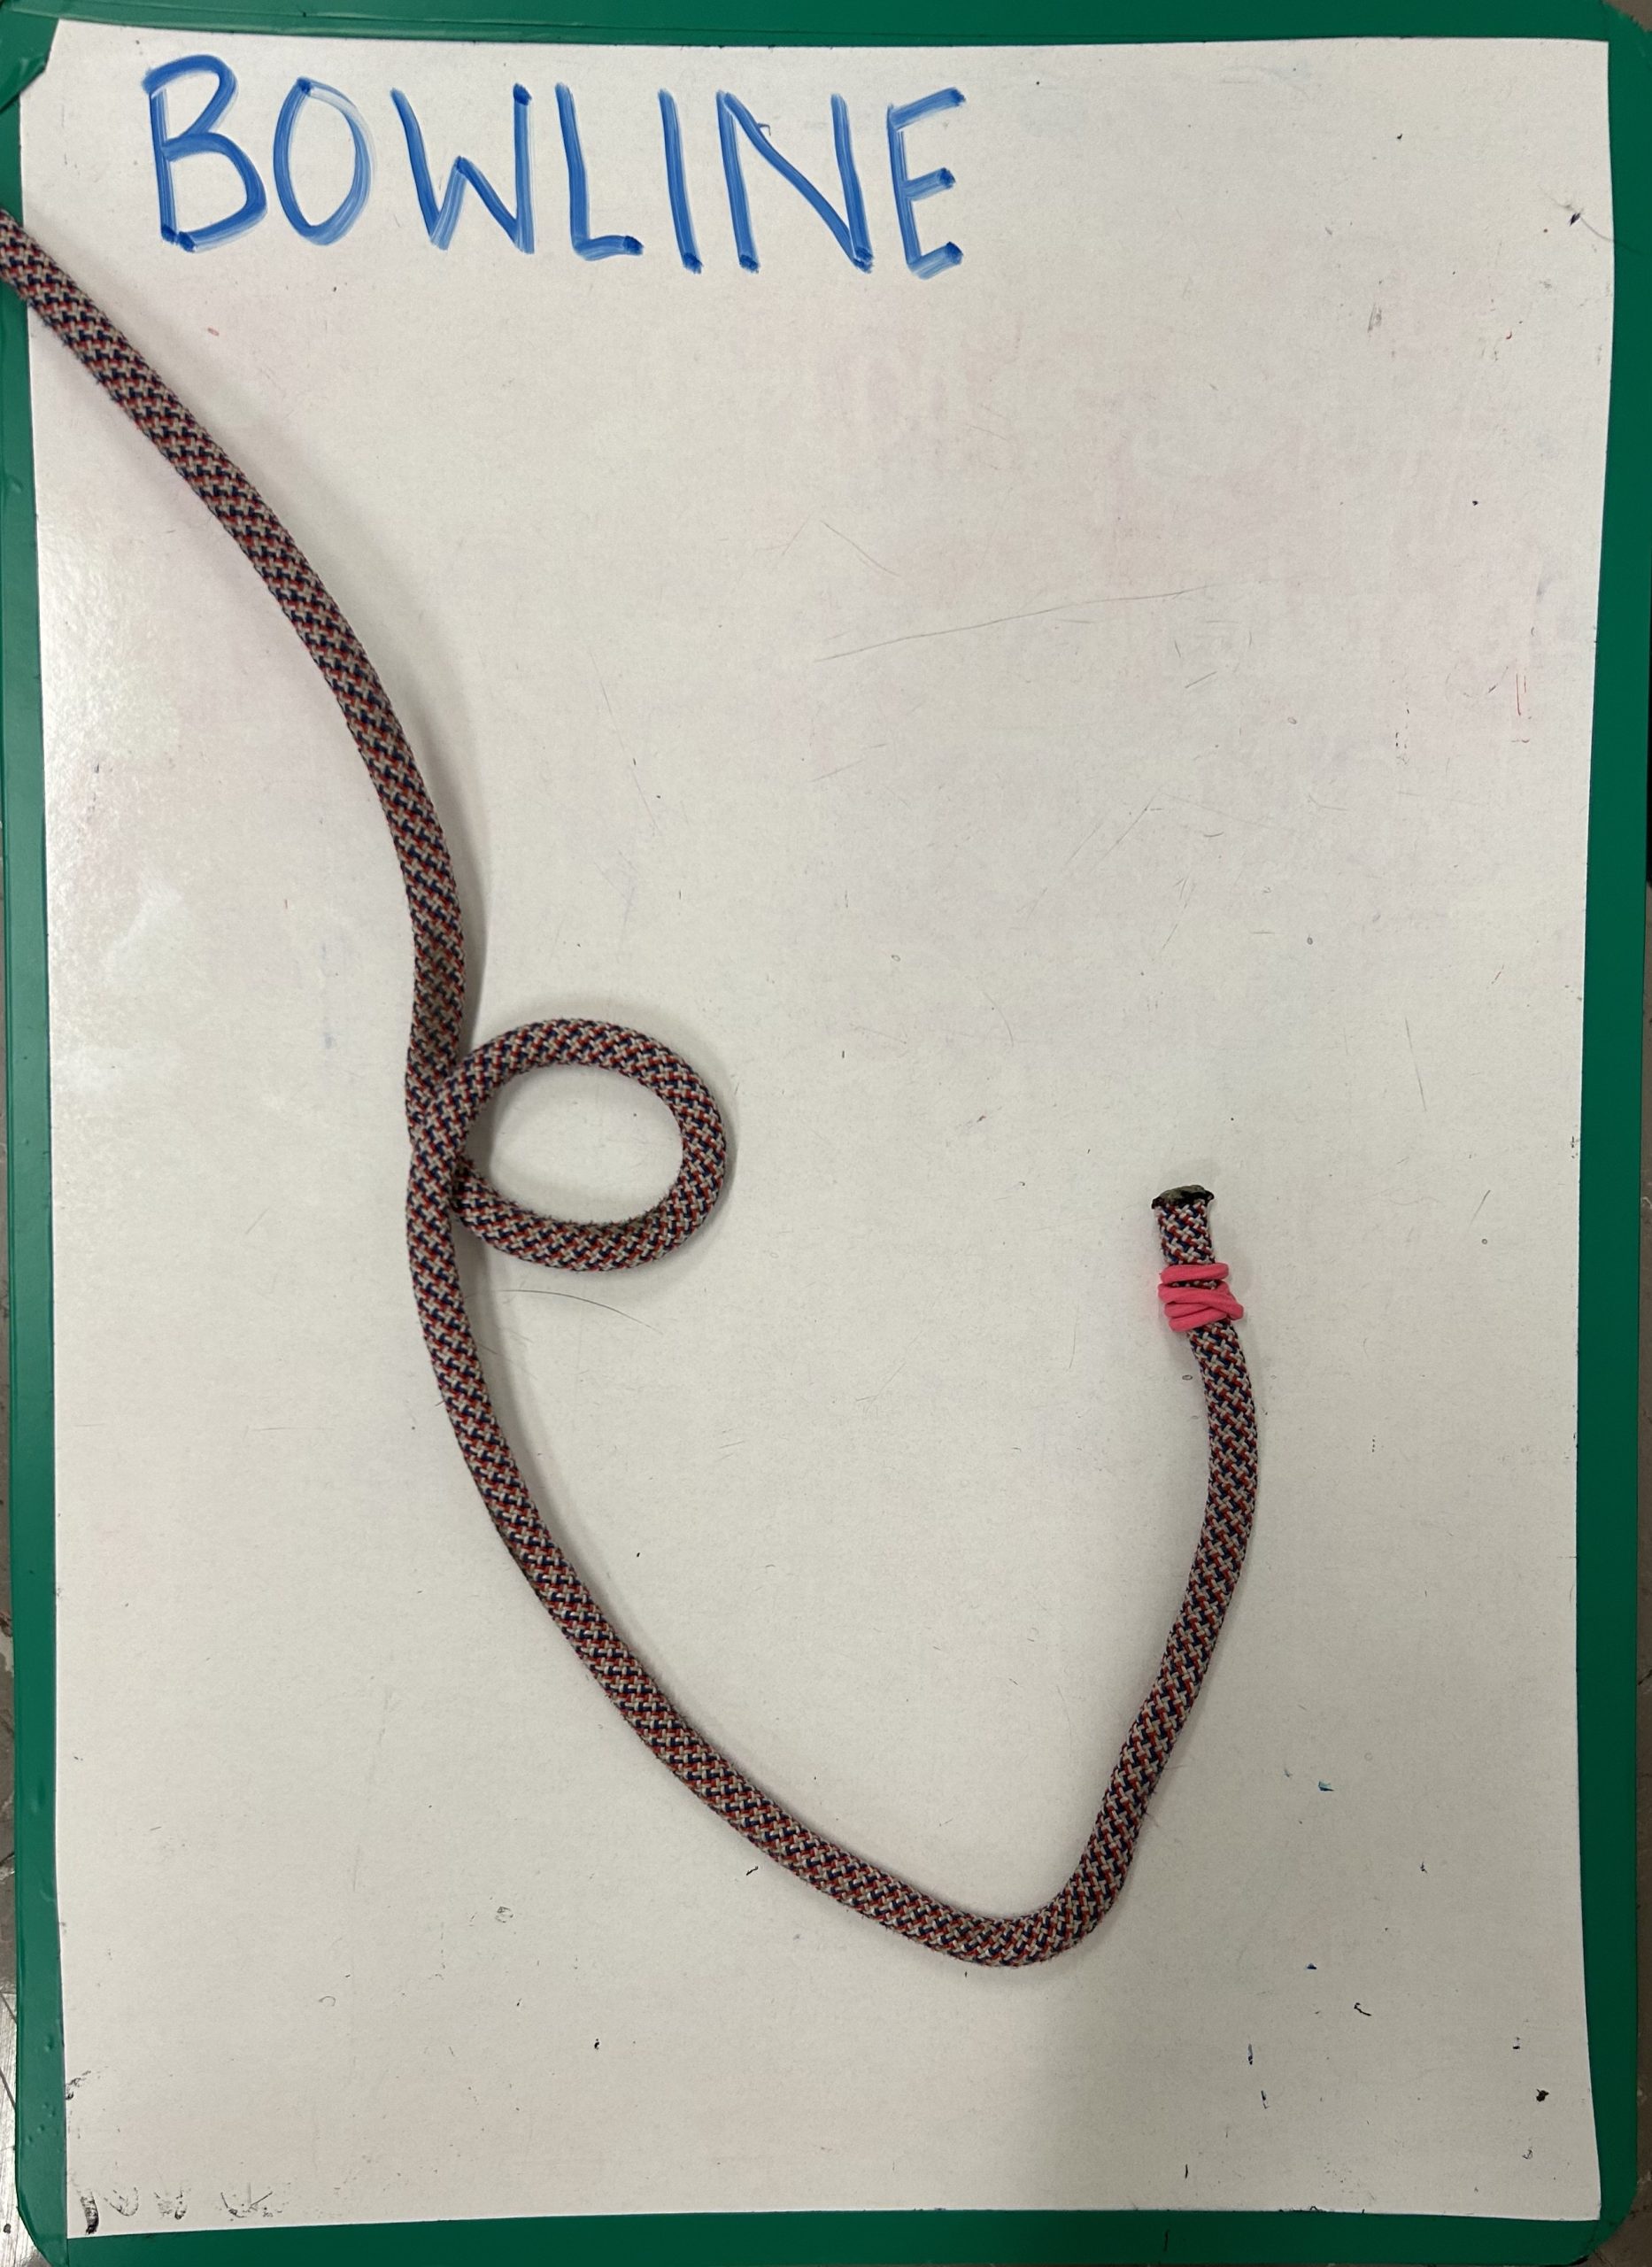
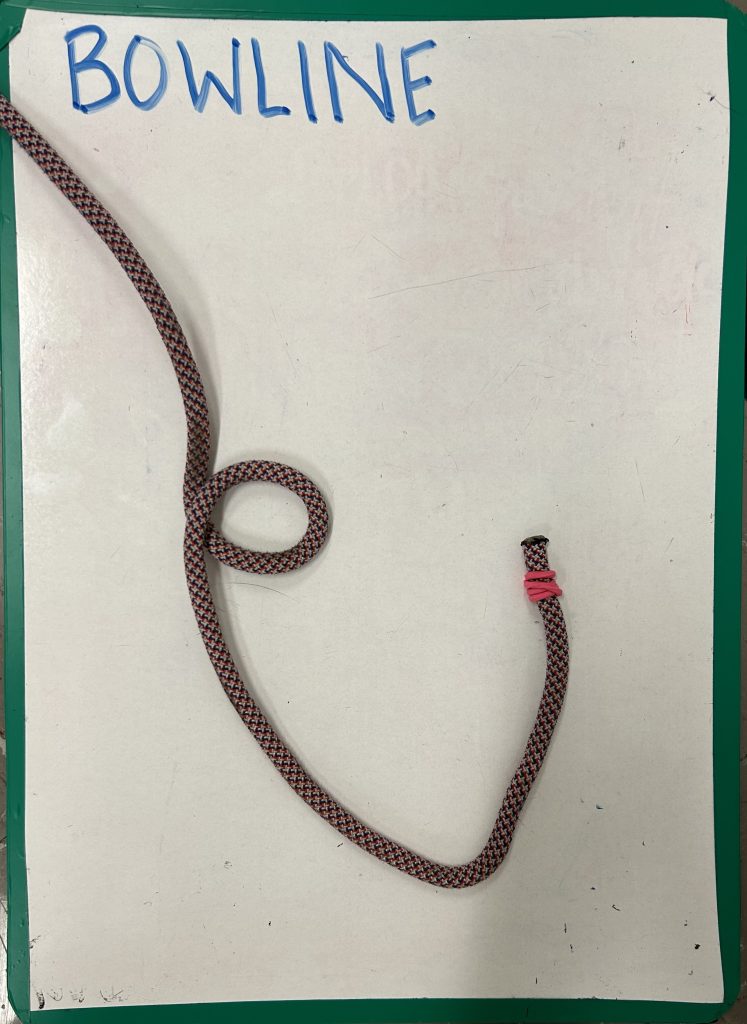 Step 2: Create loop of rope, leaving plenty of working end for next steps.
 Step 3: Feed working end under and through loop and pull through.
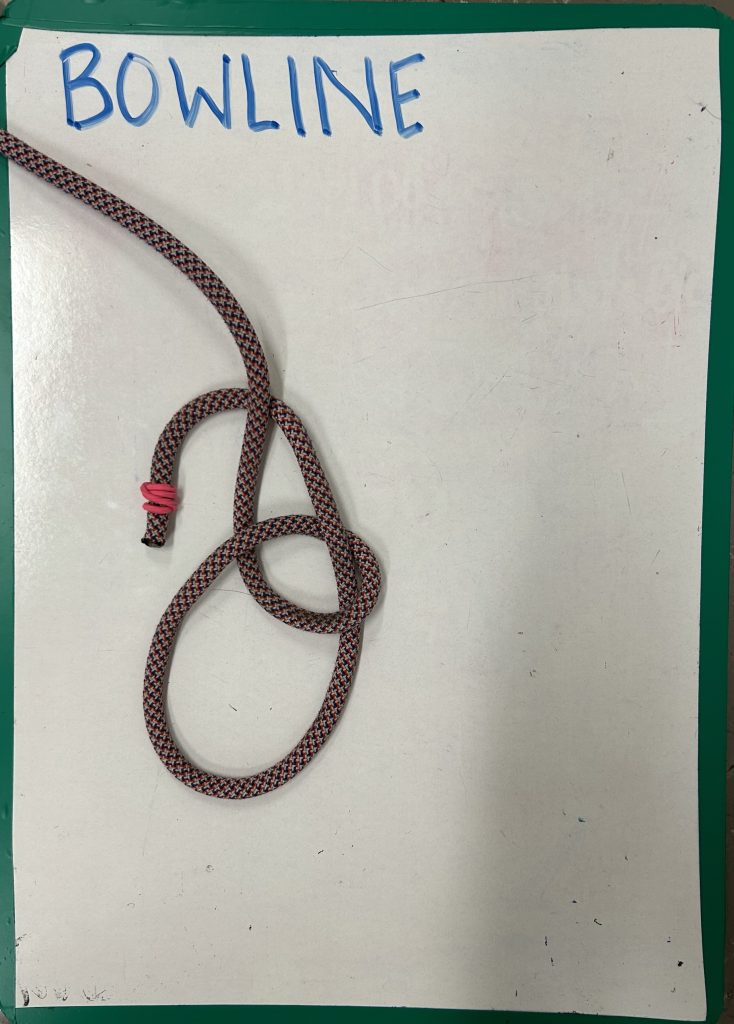 Step 4: Bring working end behind and around standing end.
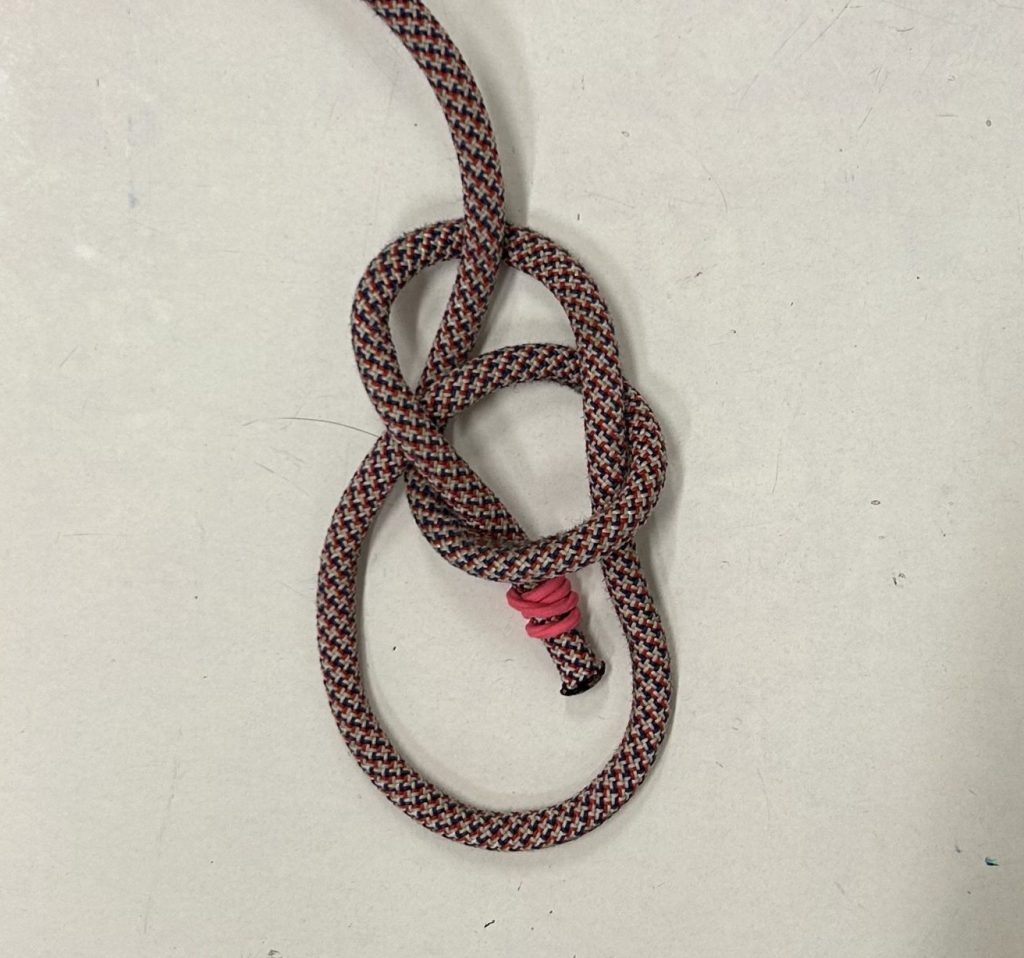 Step 5: Feed working end back through the same loop, tracing back in the opposite direction.


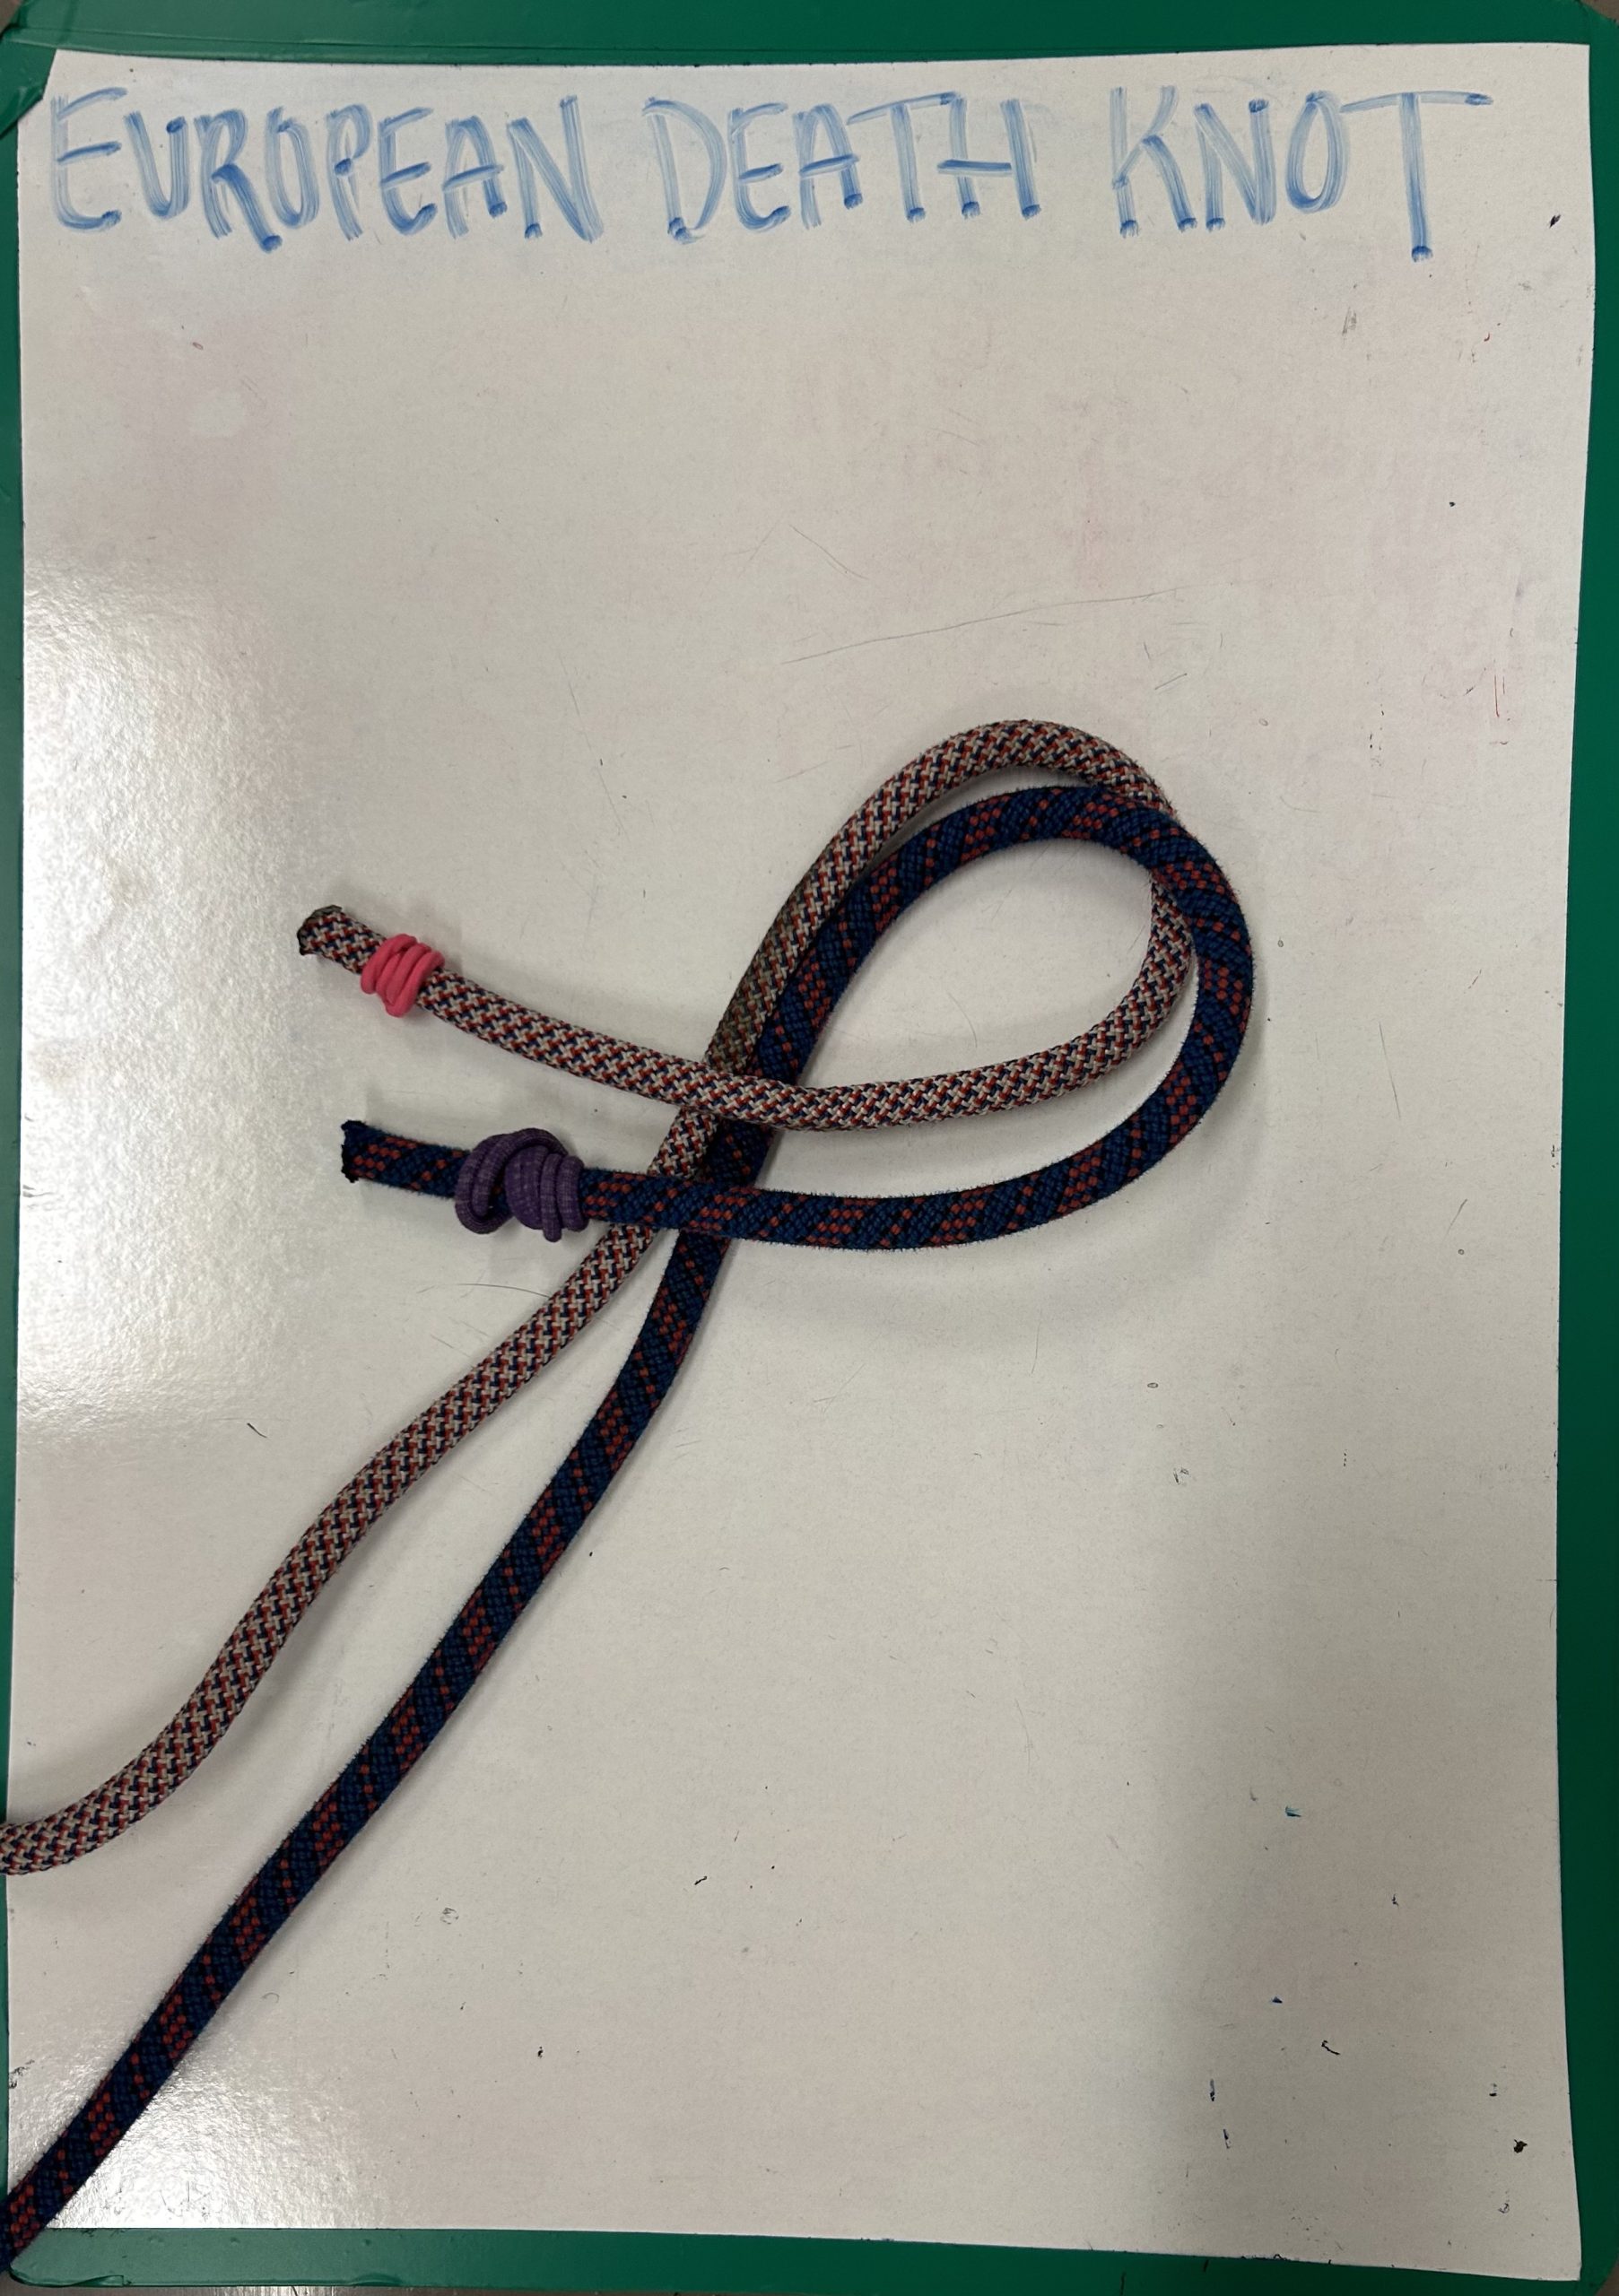
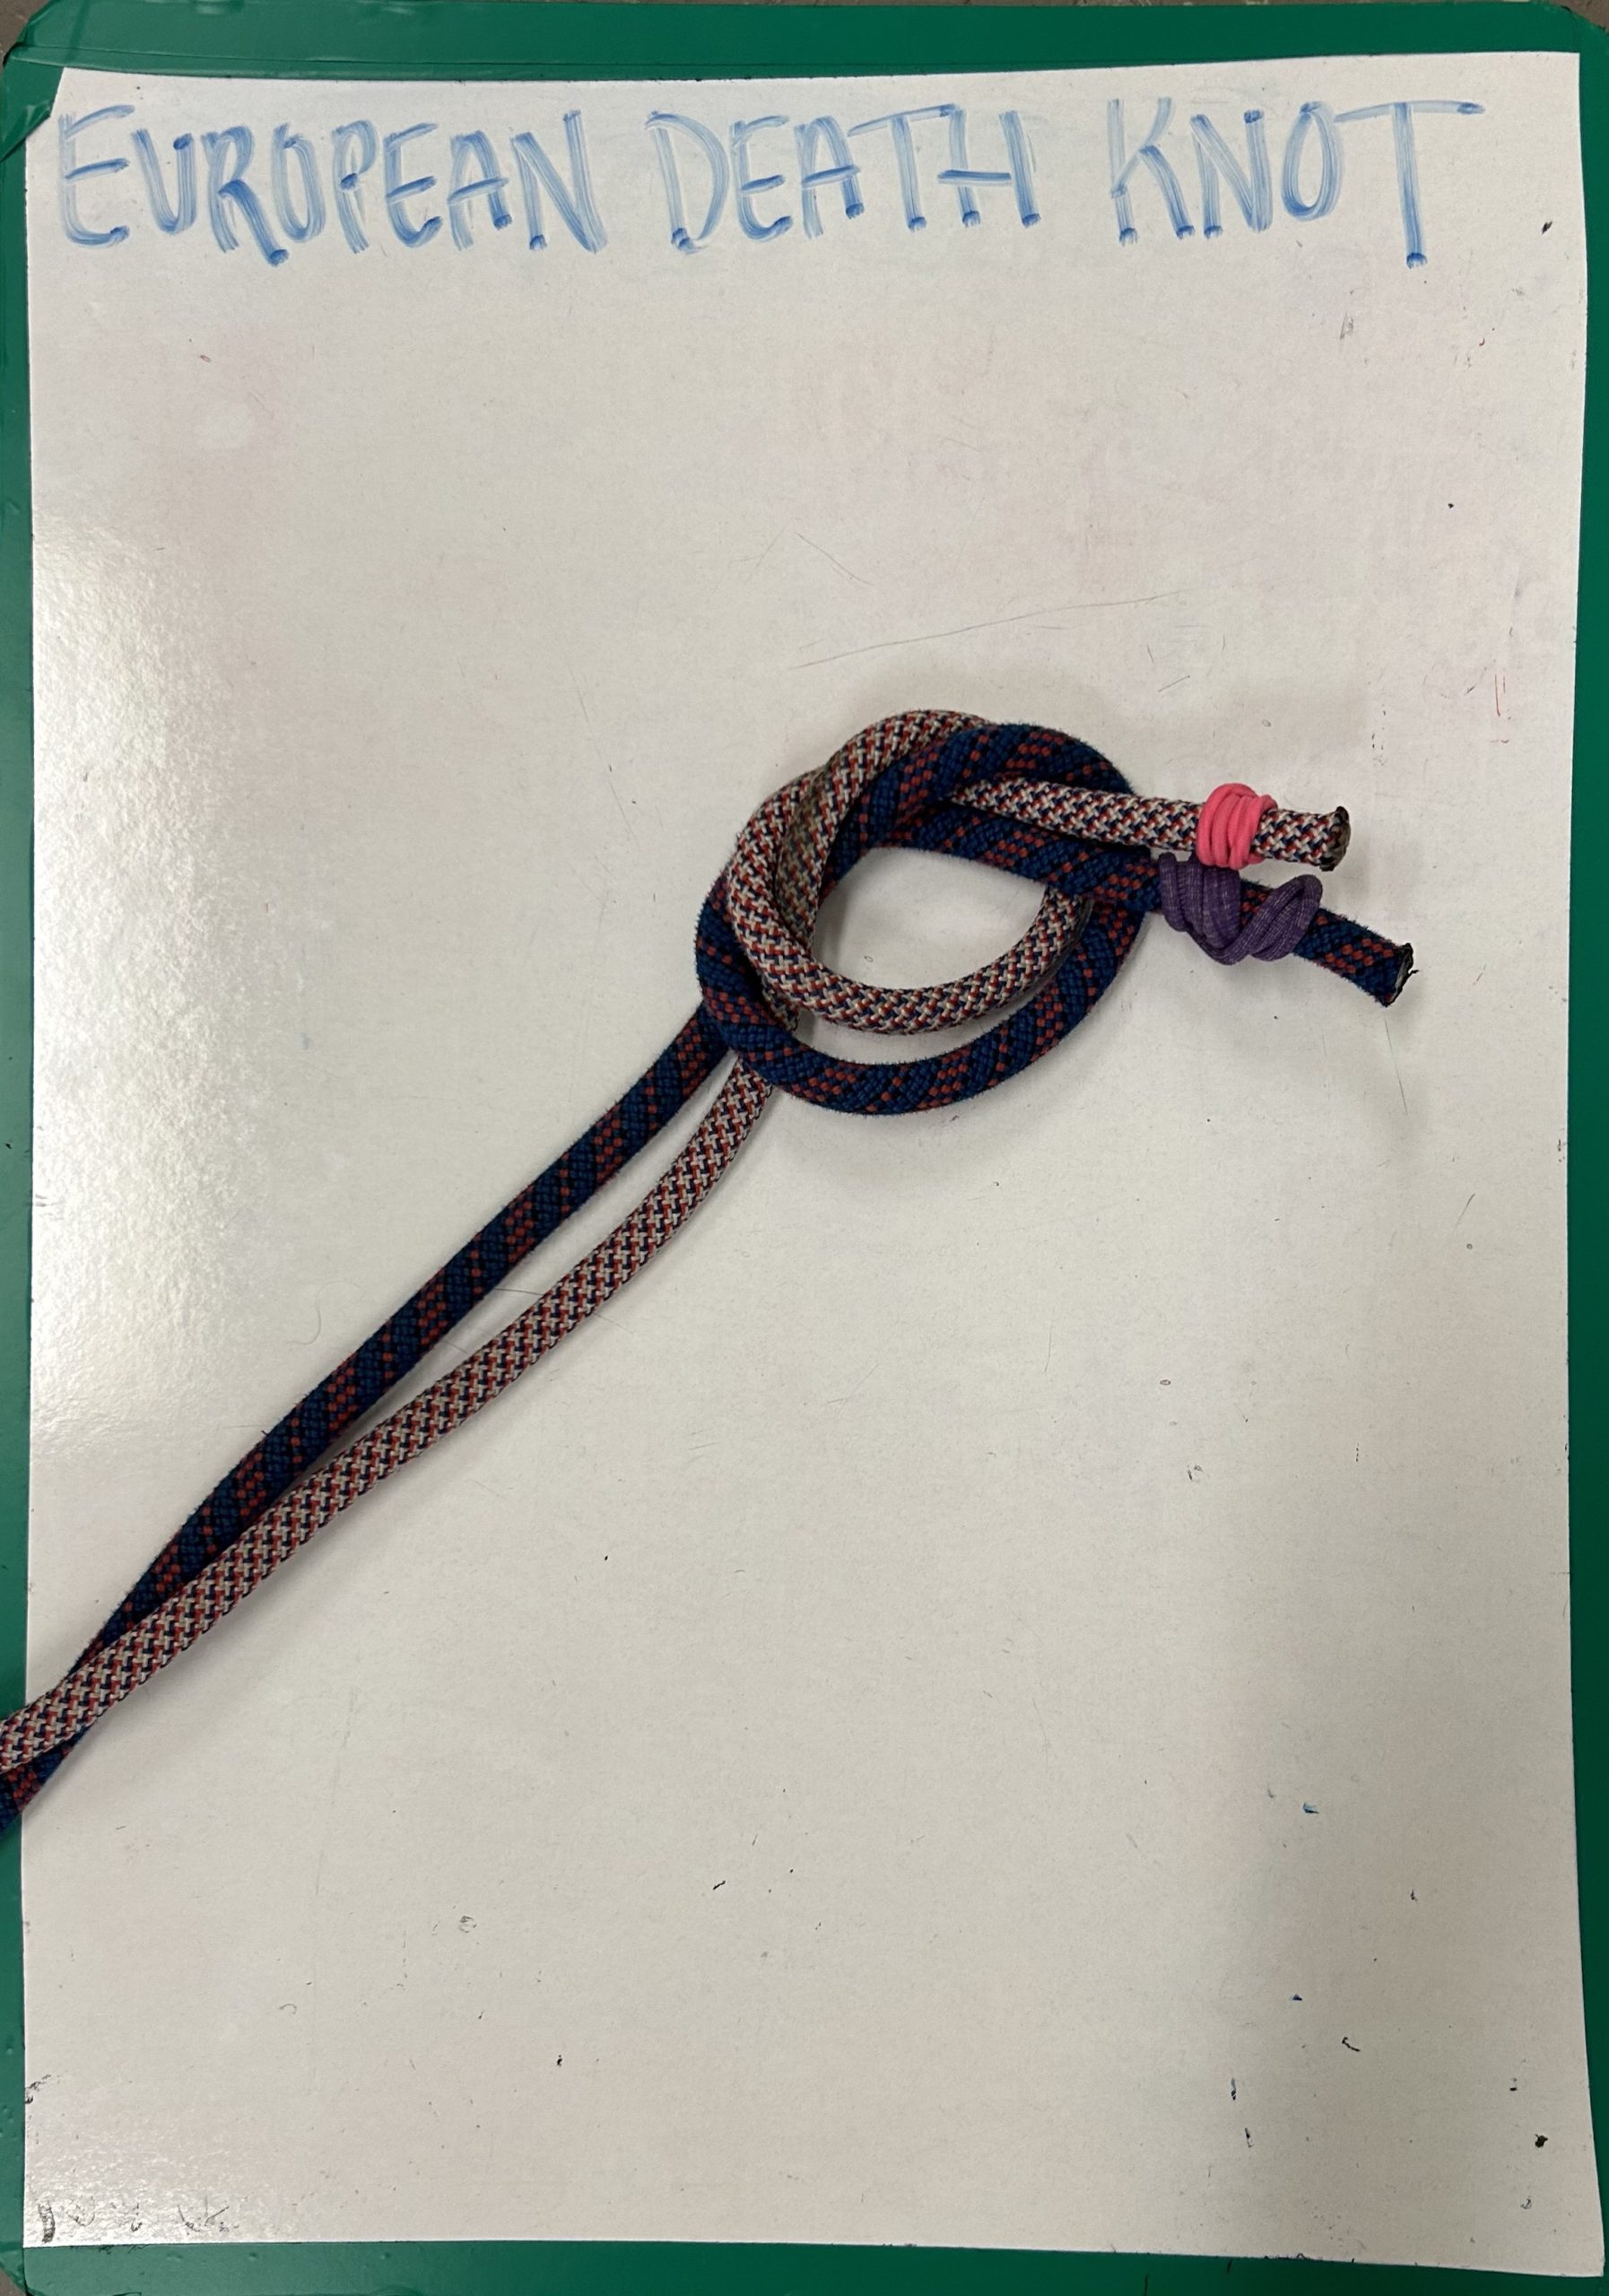
Fast way to join two ropes together. Easy to tie and rarely gets stuck, must be dressed well in order to work.
 Step 1: Hold ropes together, with working ends together.
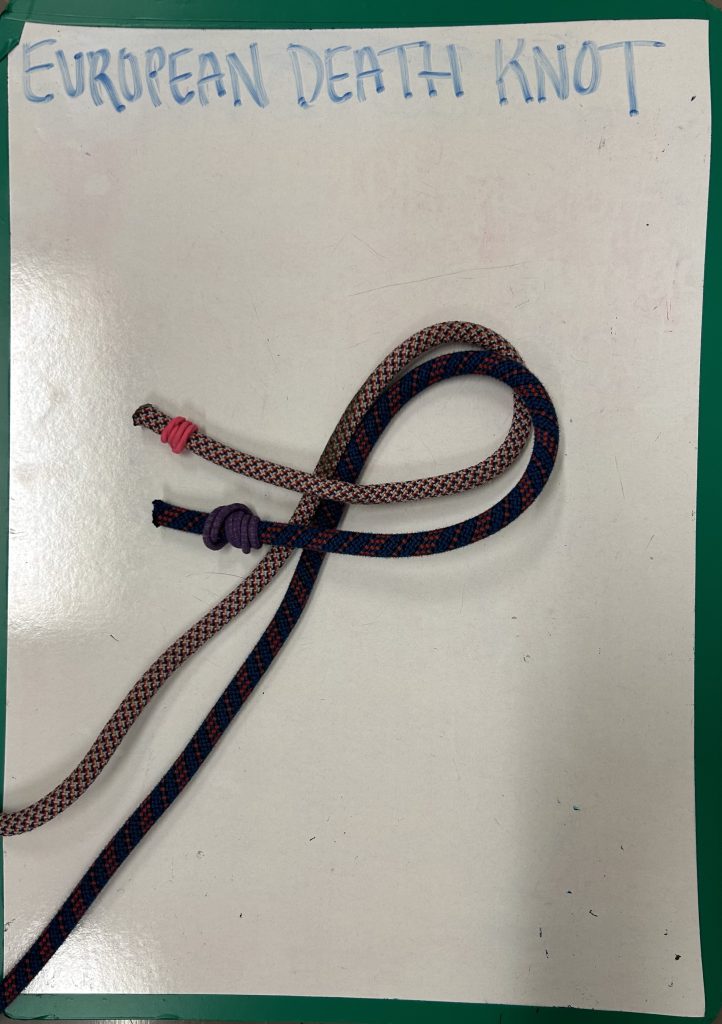 Step 2: Create loop of ropes, keeping strands together.
 Step 3: Pull both working ends back through loop of rope that was created.
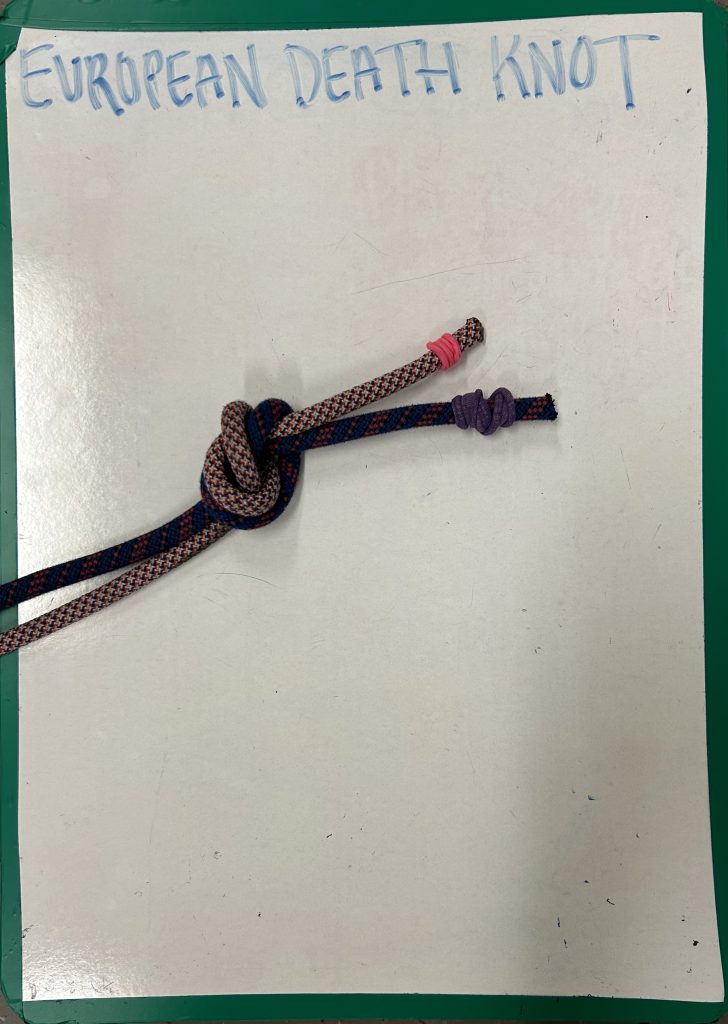 Step 4: Pull on both working ends and both standing ends to cinch. Dress as needed.


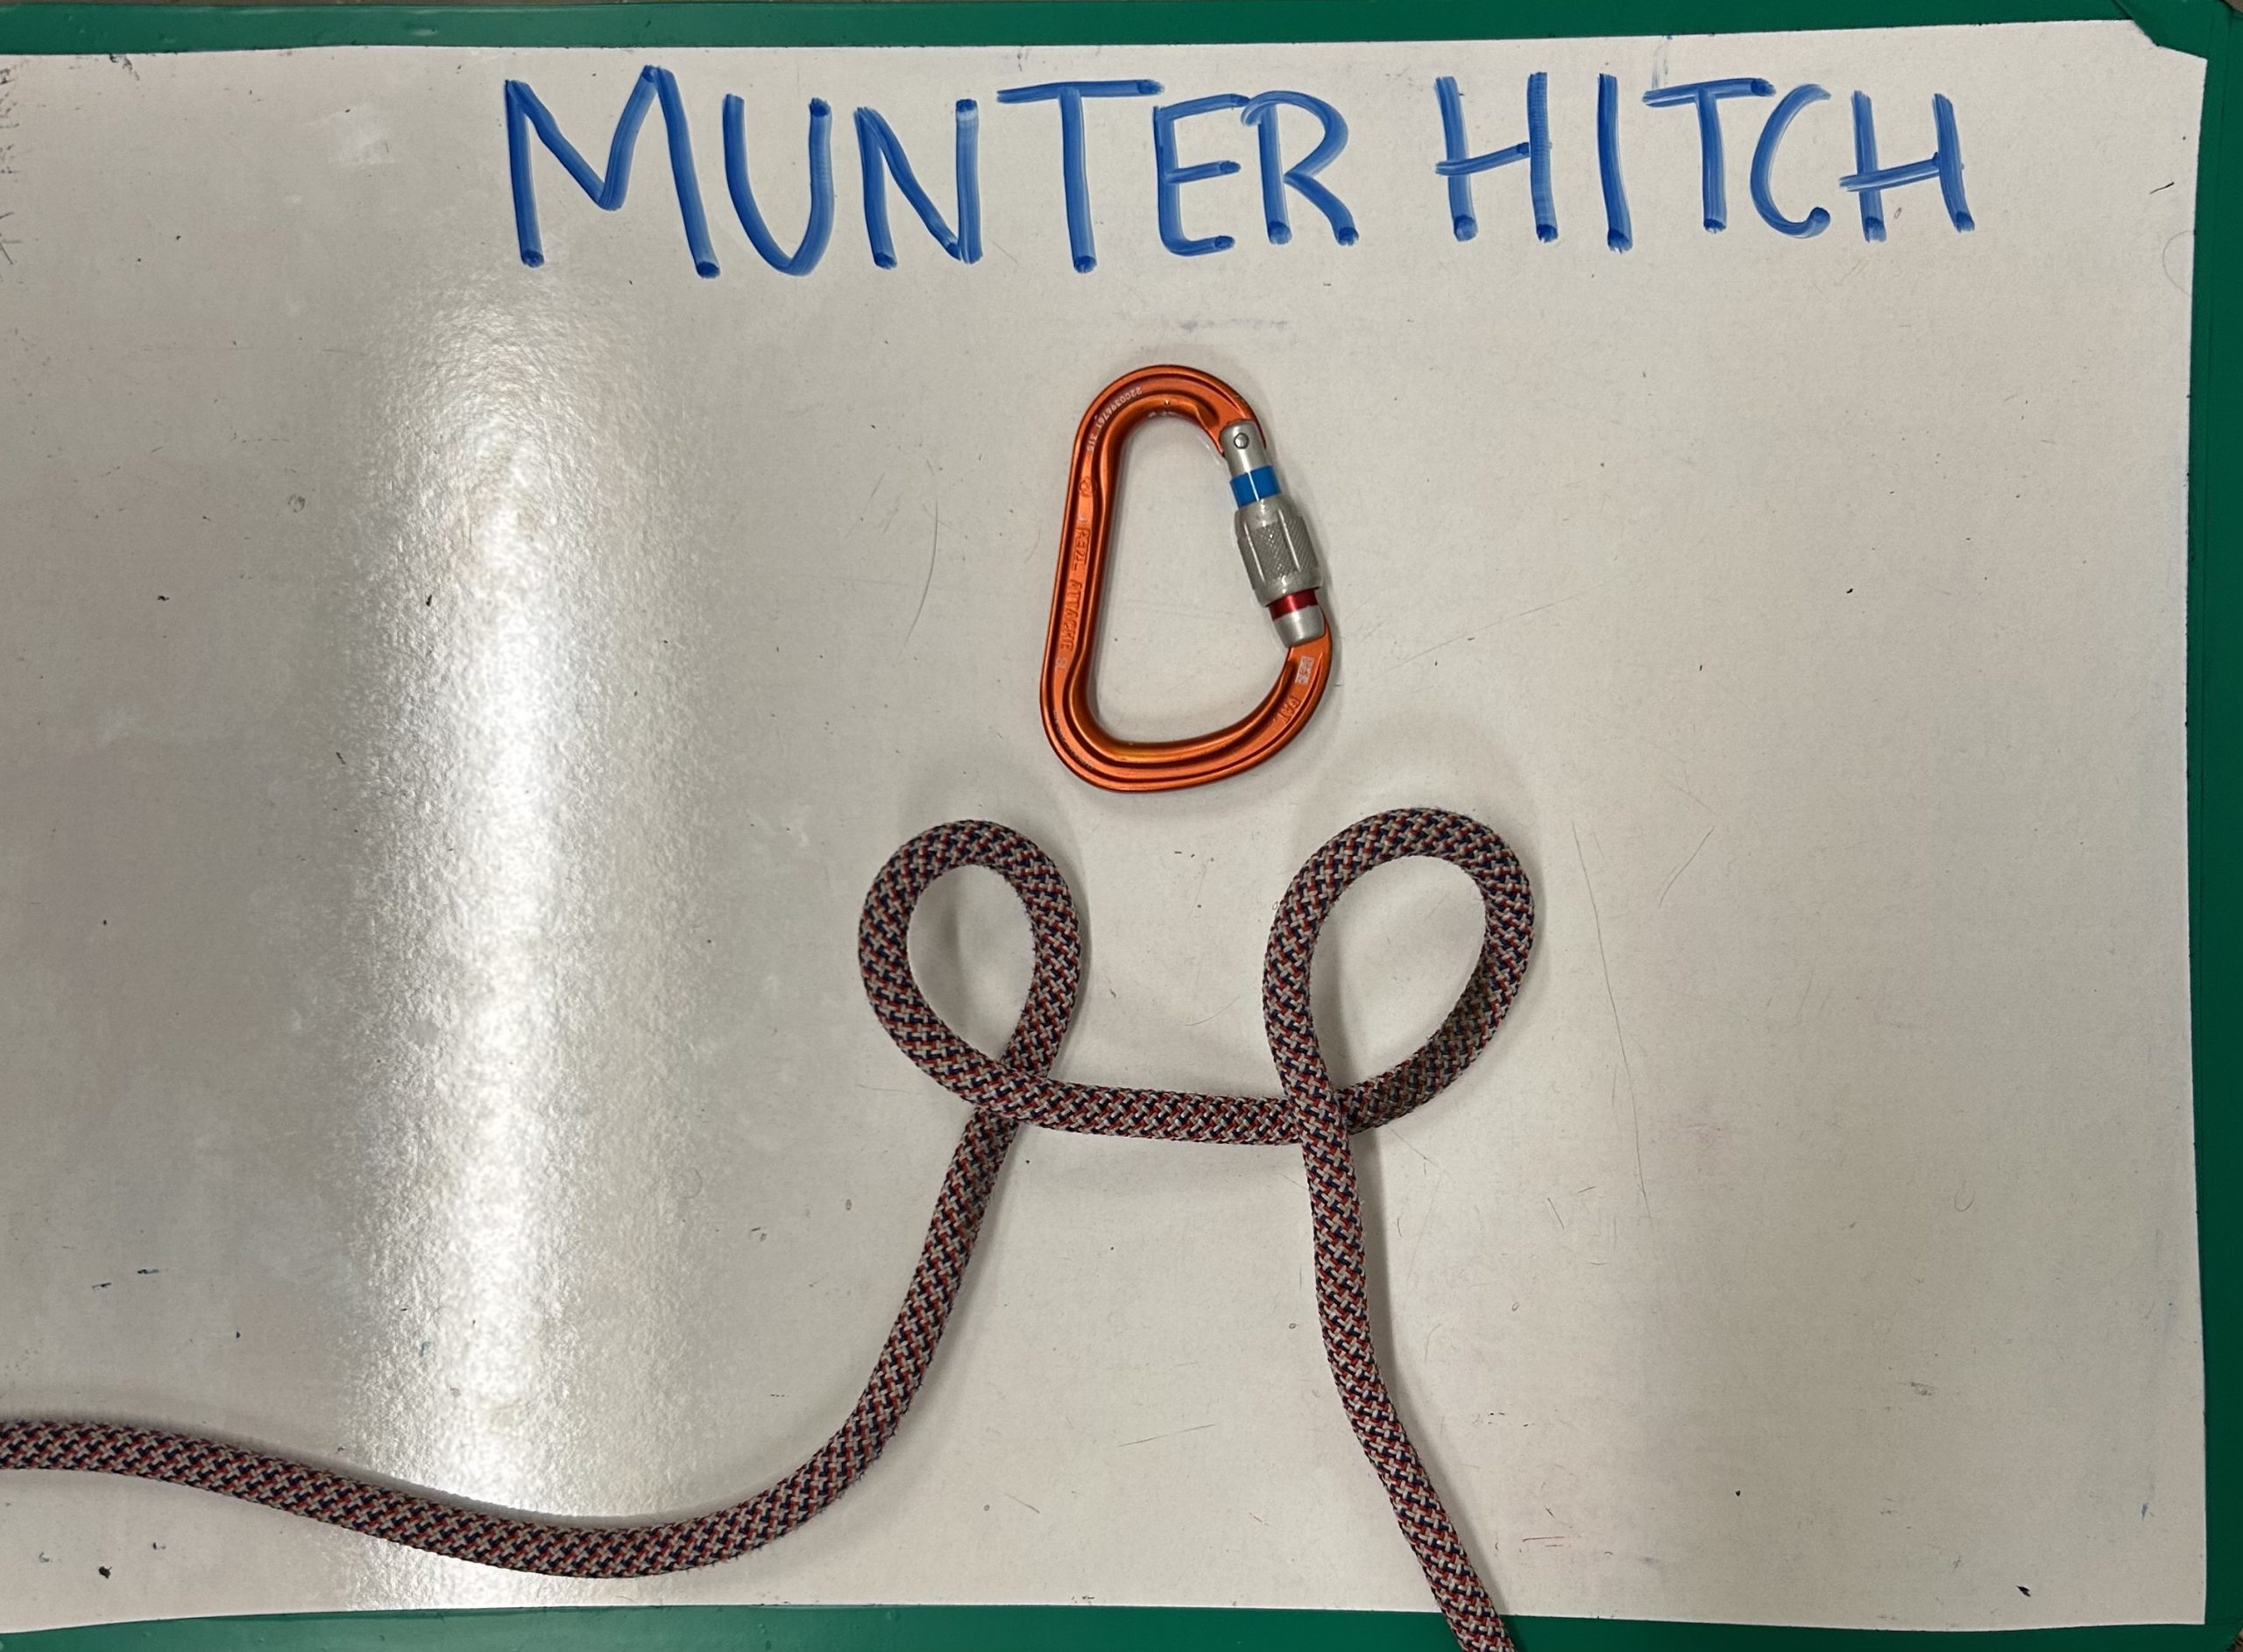
Step 2: Create a “q” and a “p”

Step 3: Hold the “q” and “p” in each hand
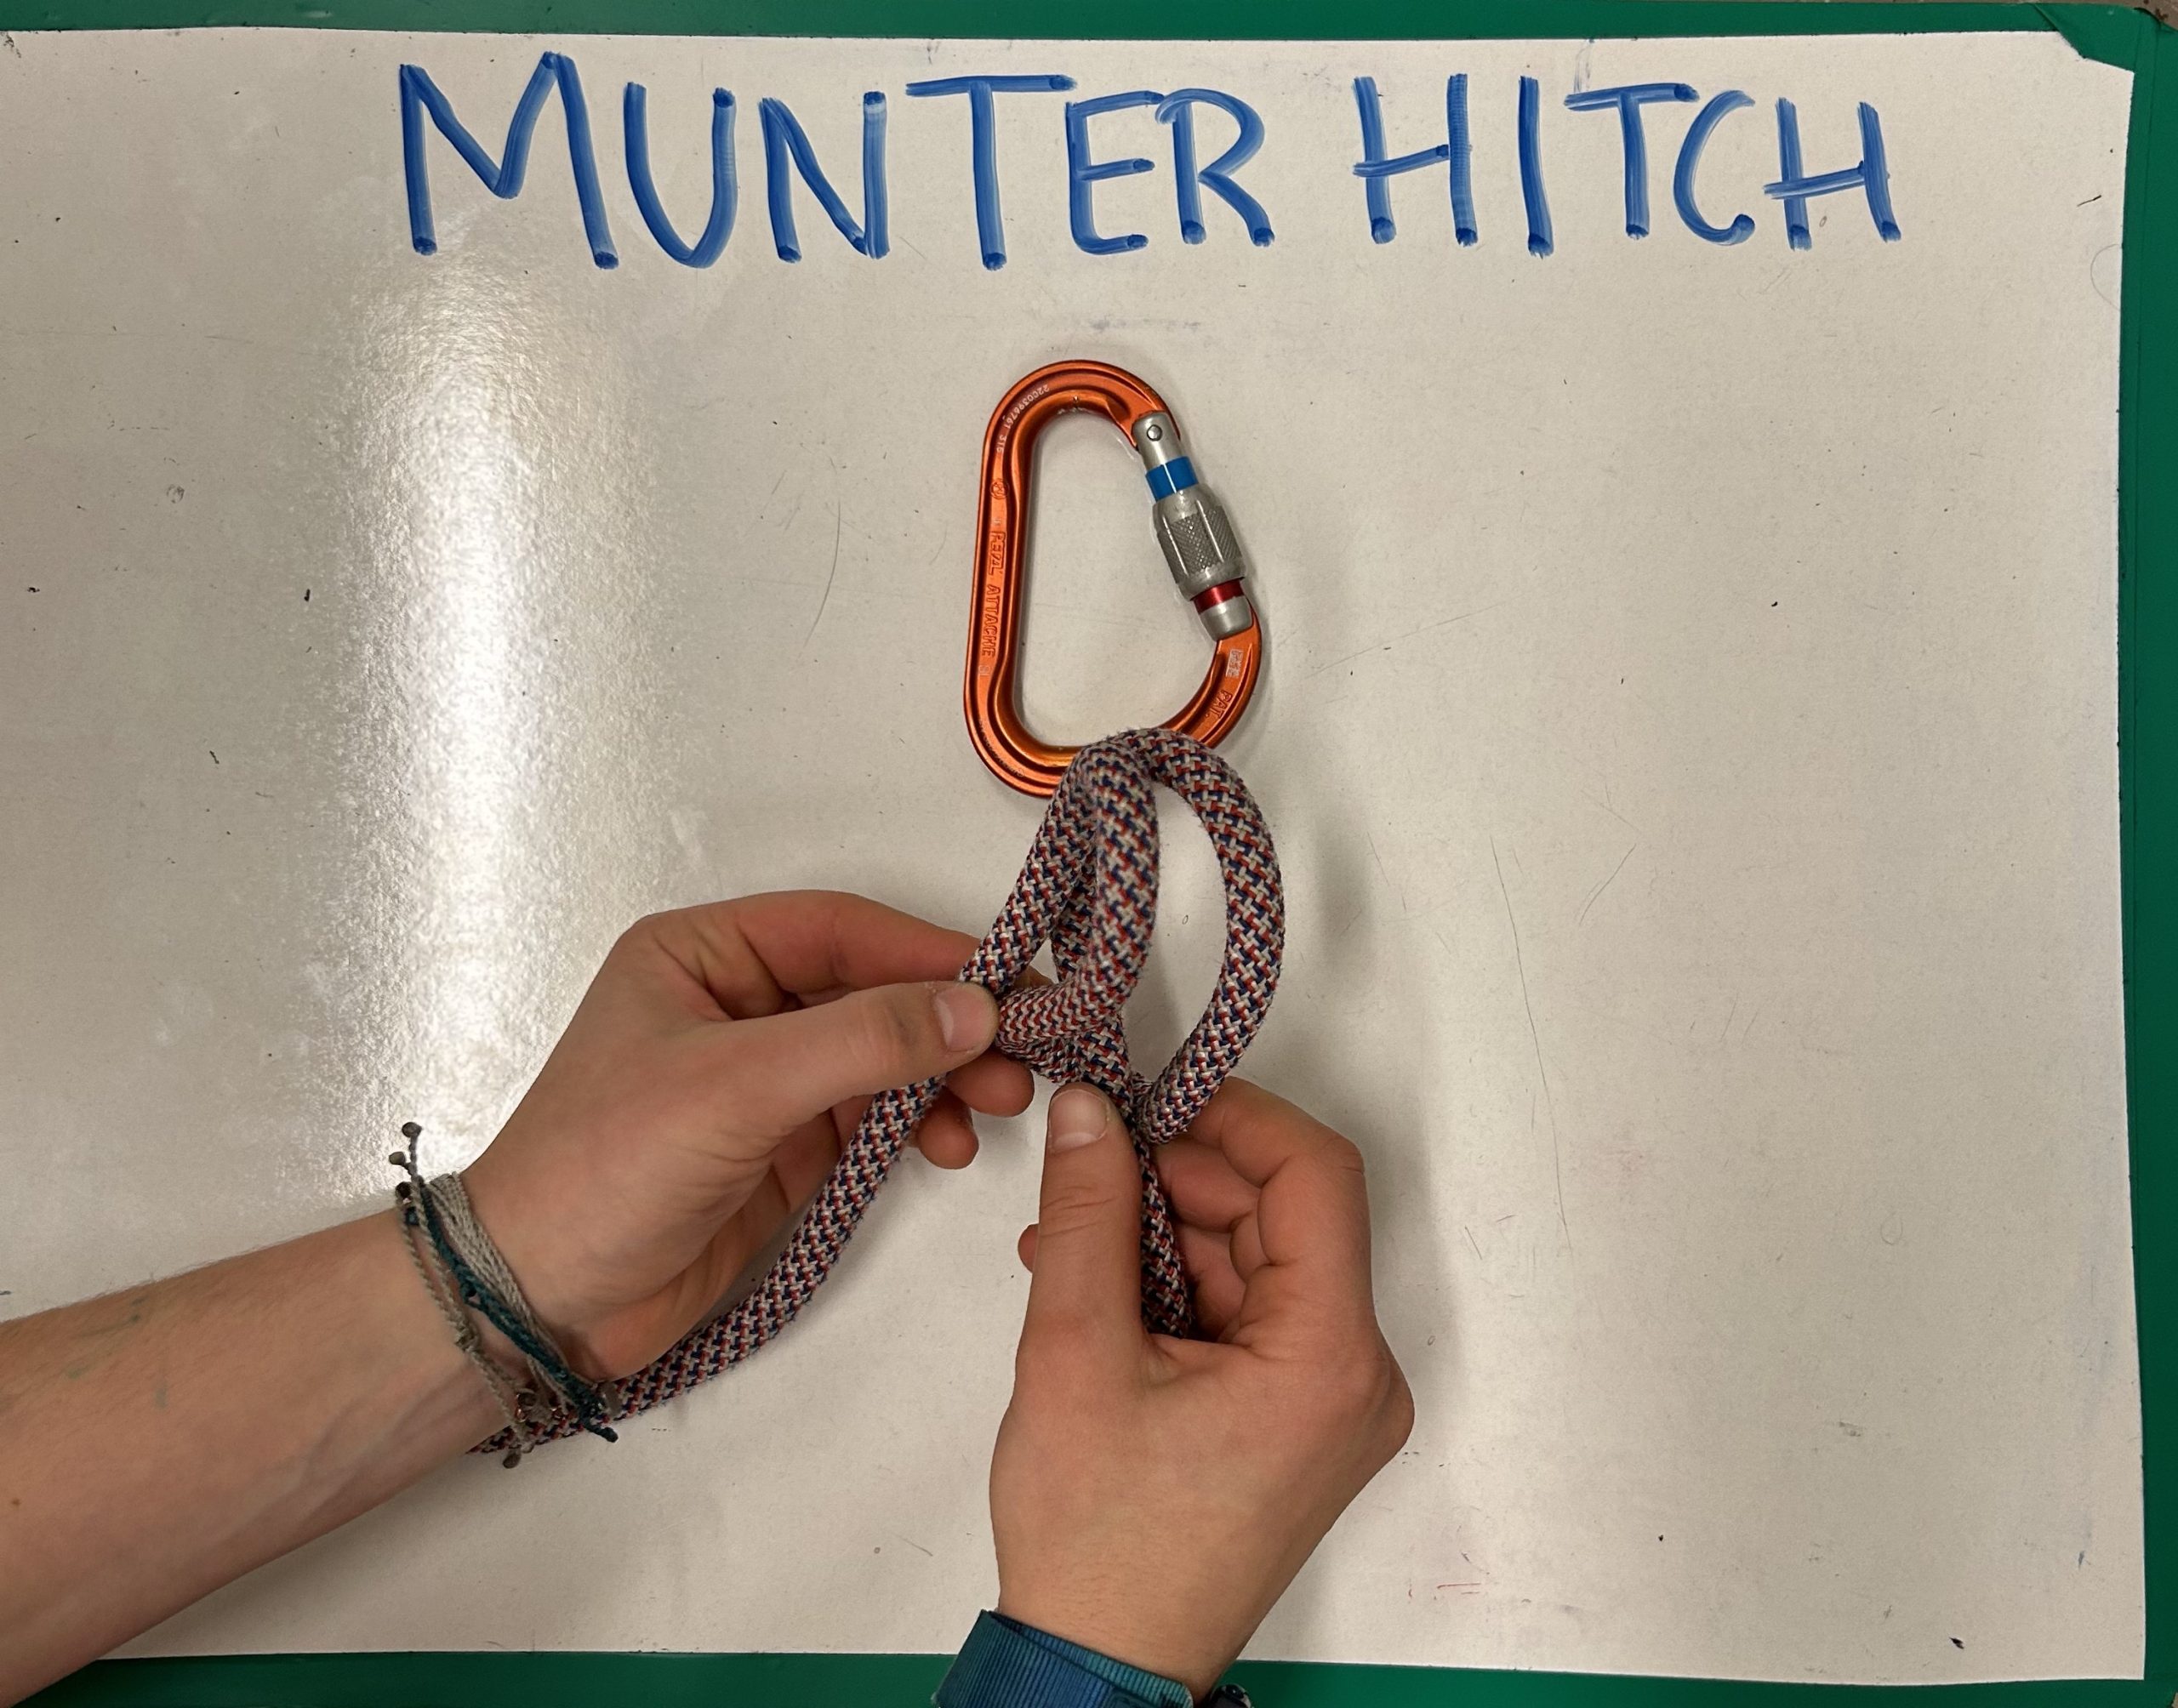
Step 4: Fold them towards each other as if you were closing a book

Step 5: Put carabiner through resulting two loops
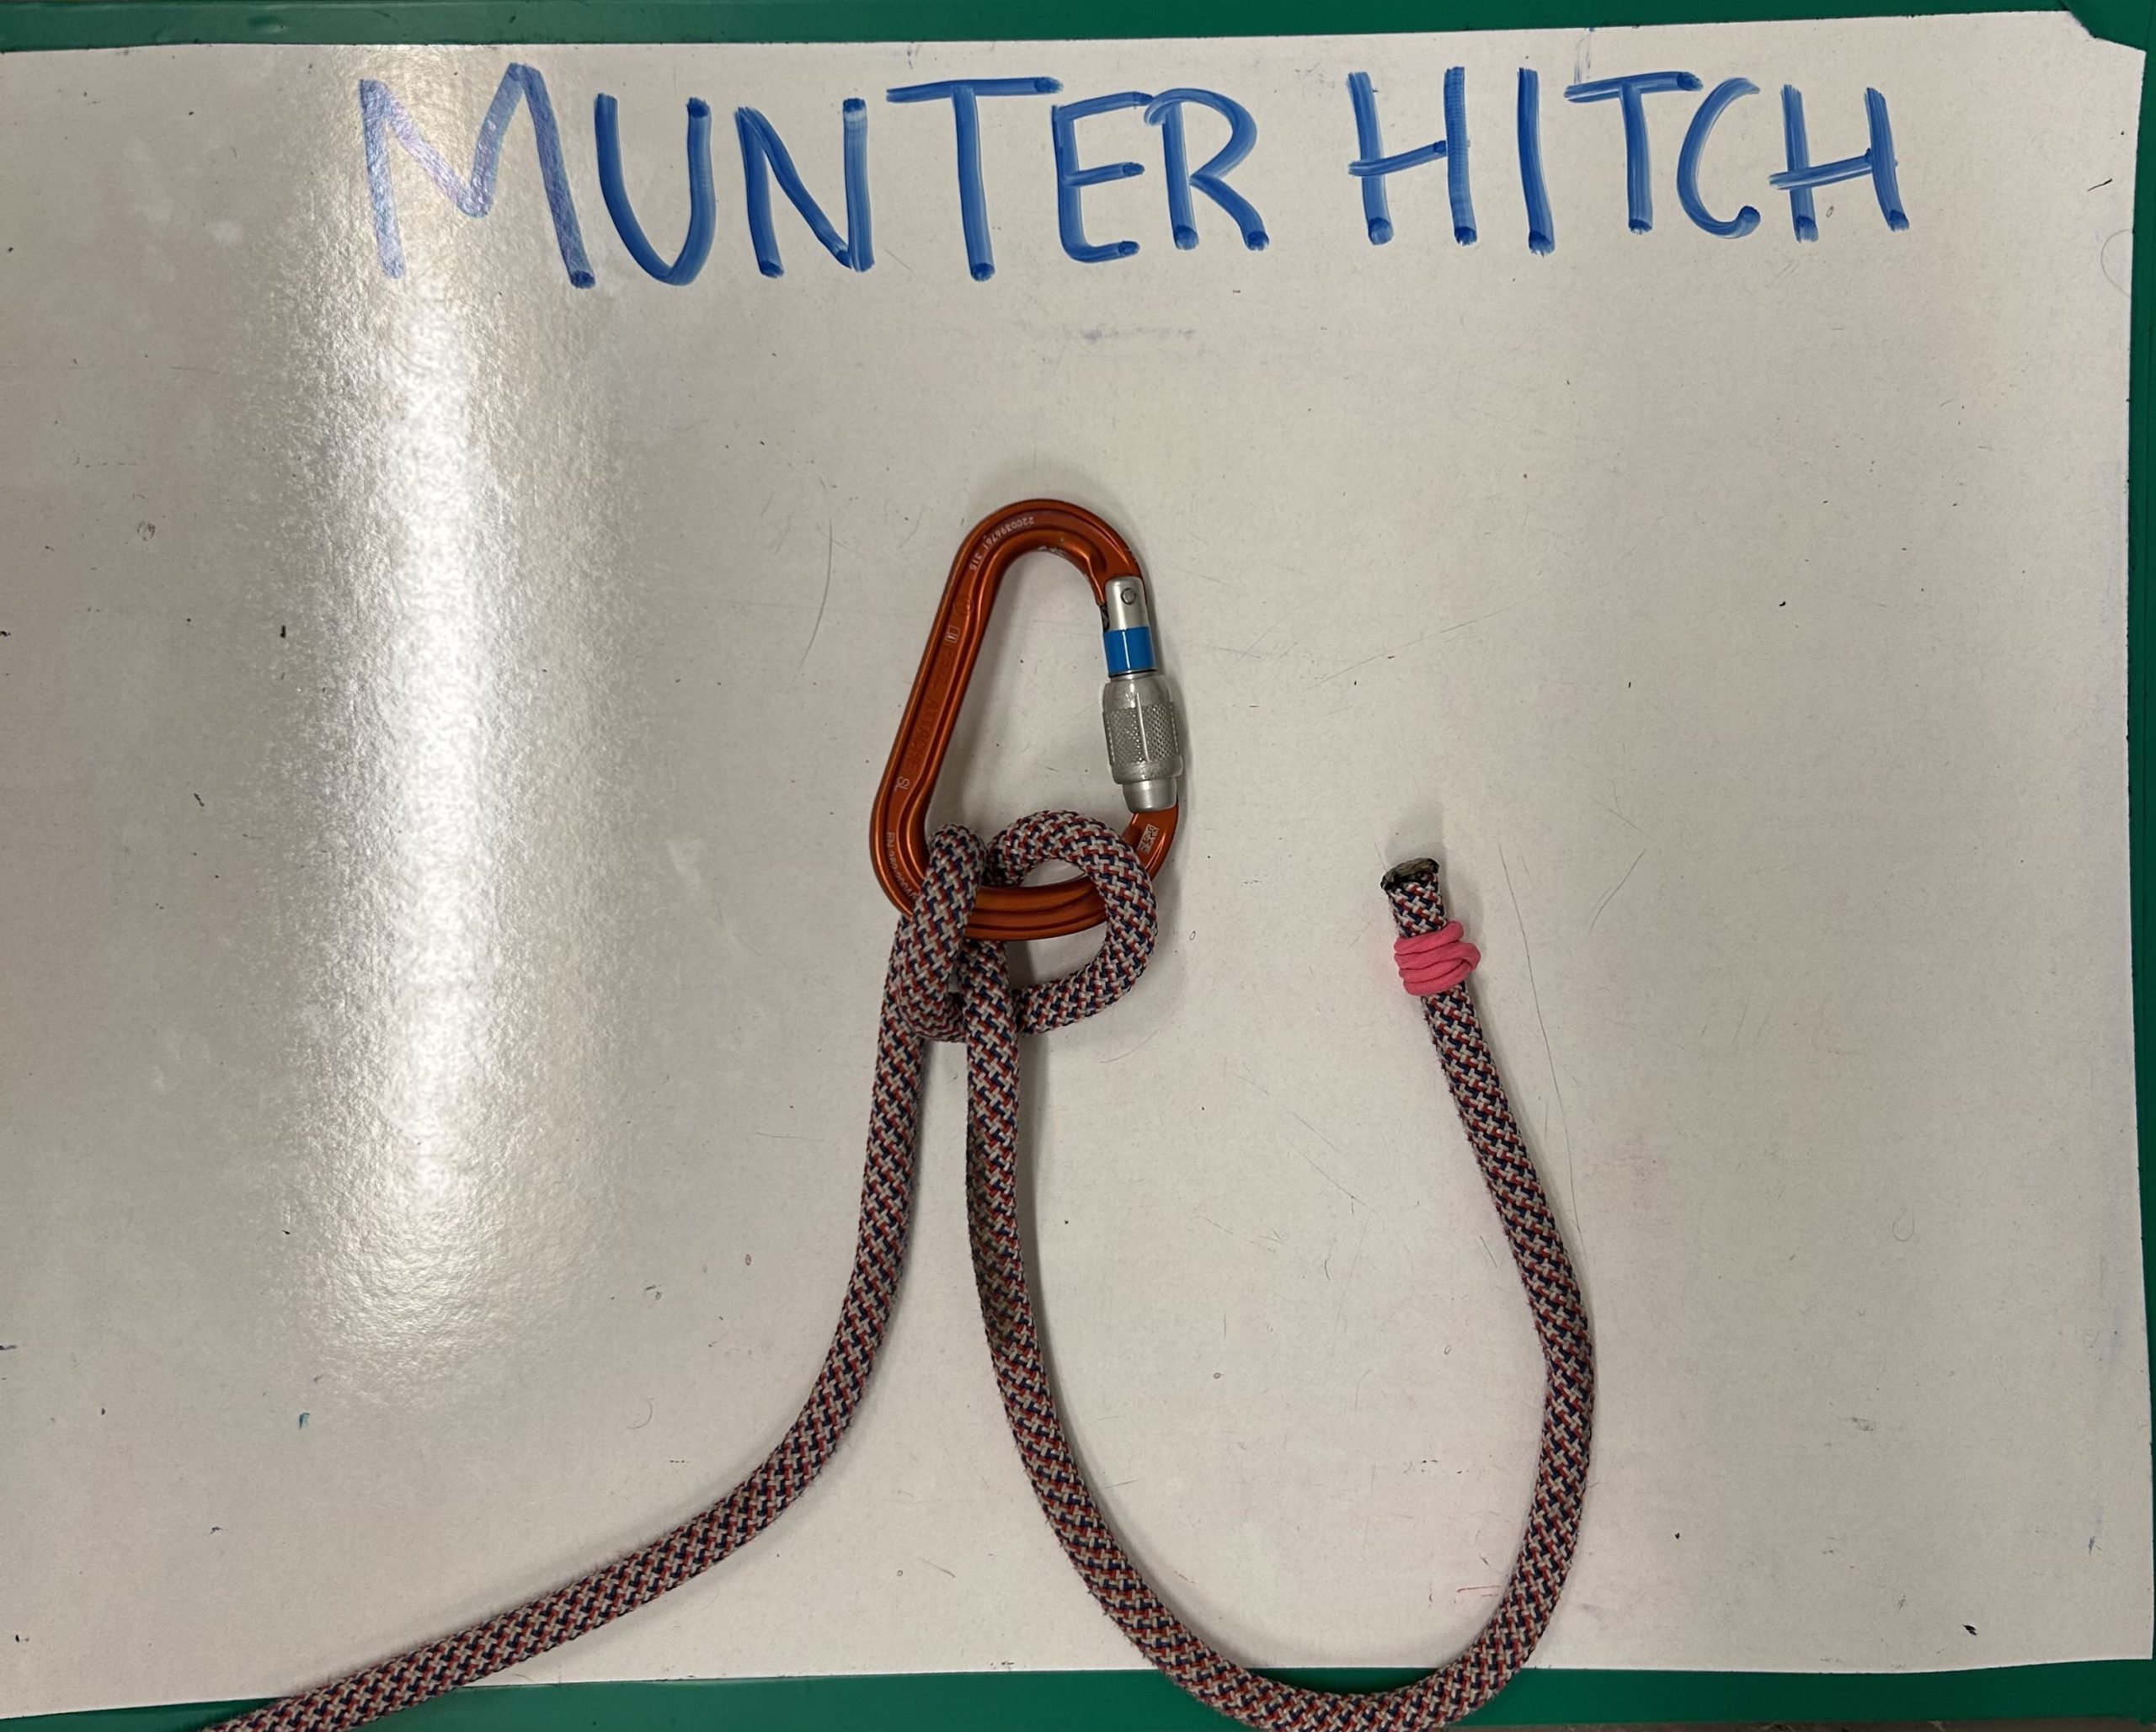
Step 6: If you tug on working end, it should slide
Used to rappel and belay without a belay device. Adjustable and acts as friction device to help control descent.
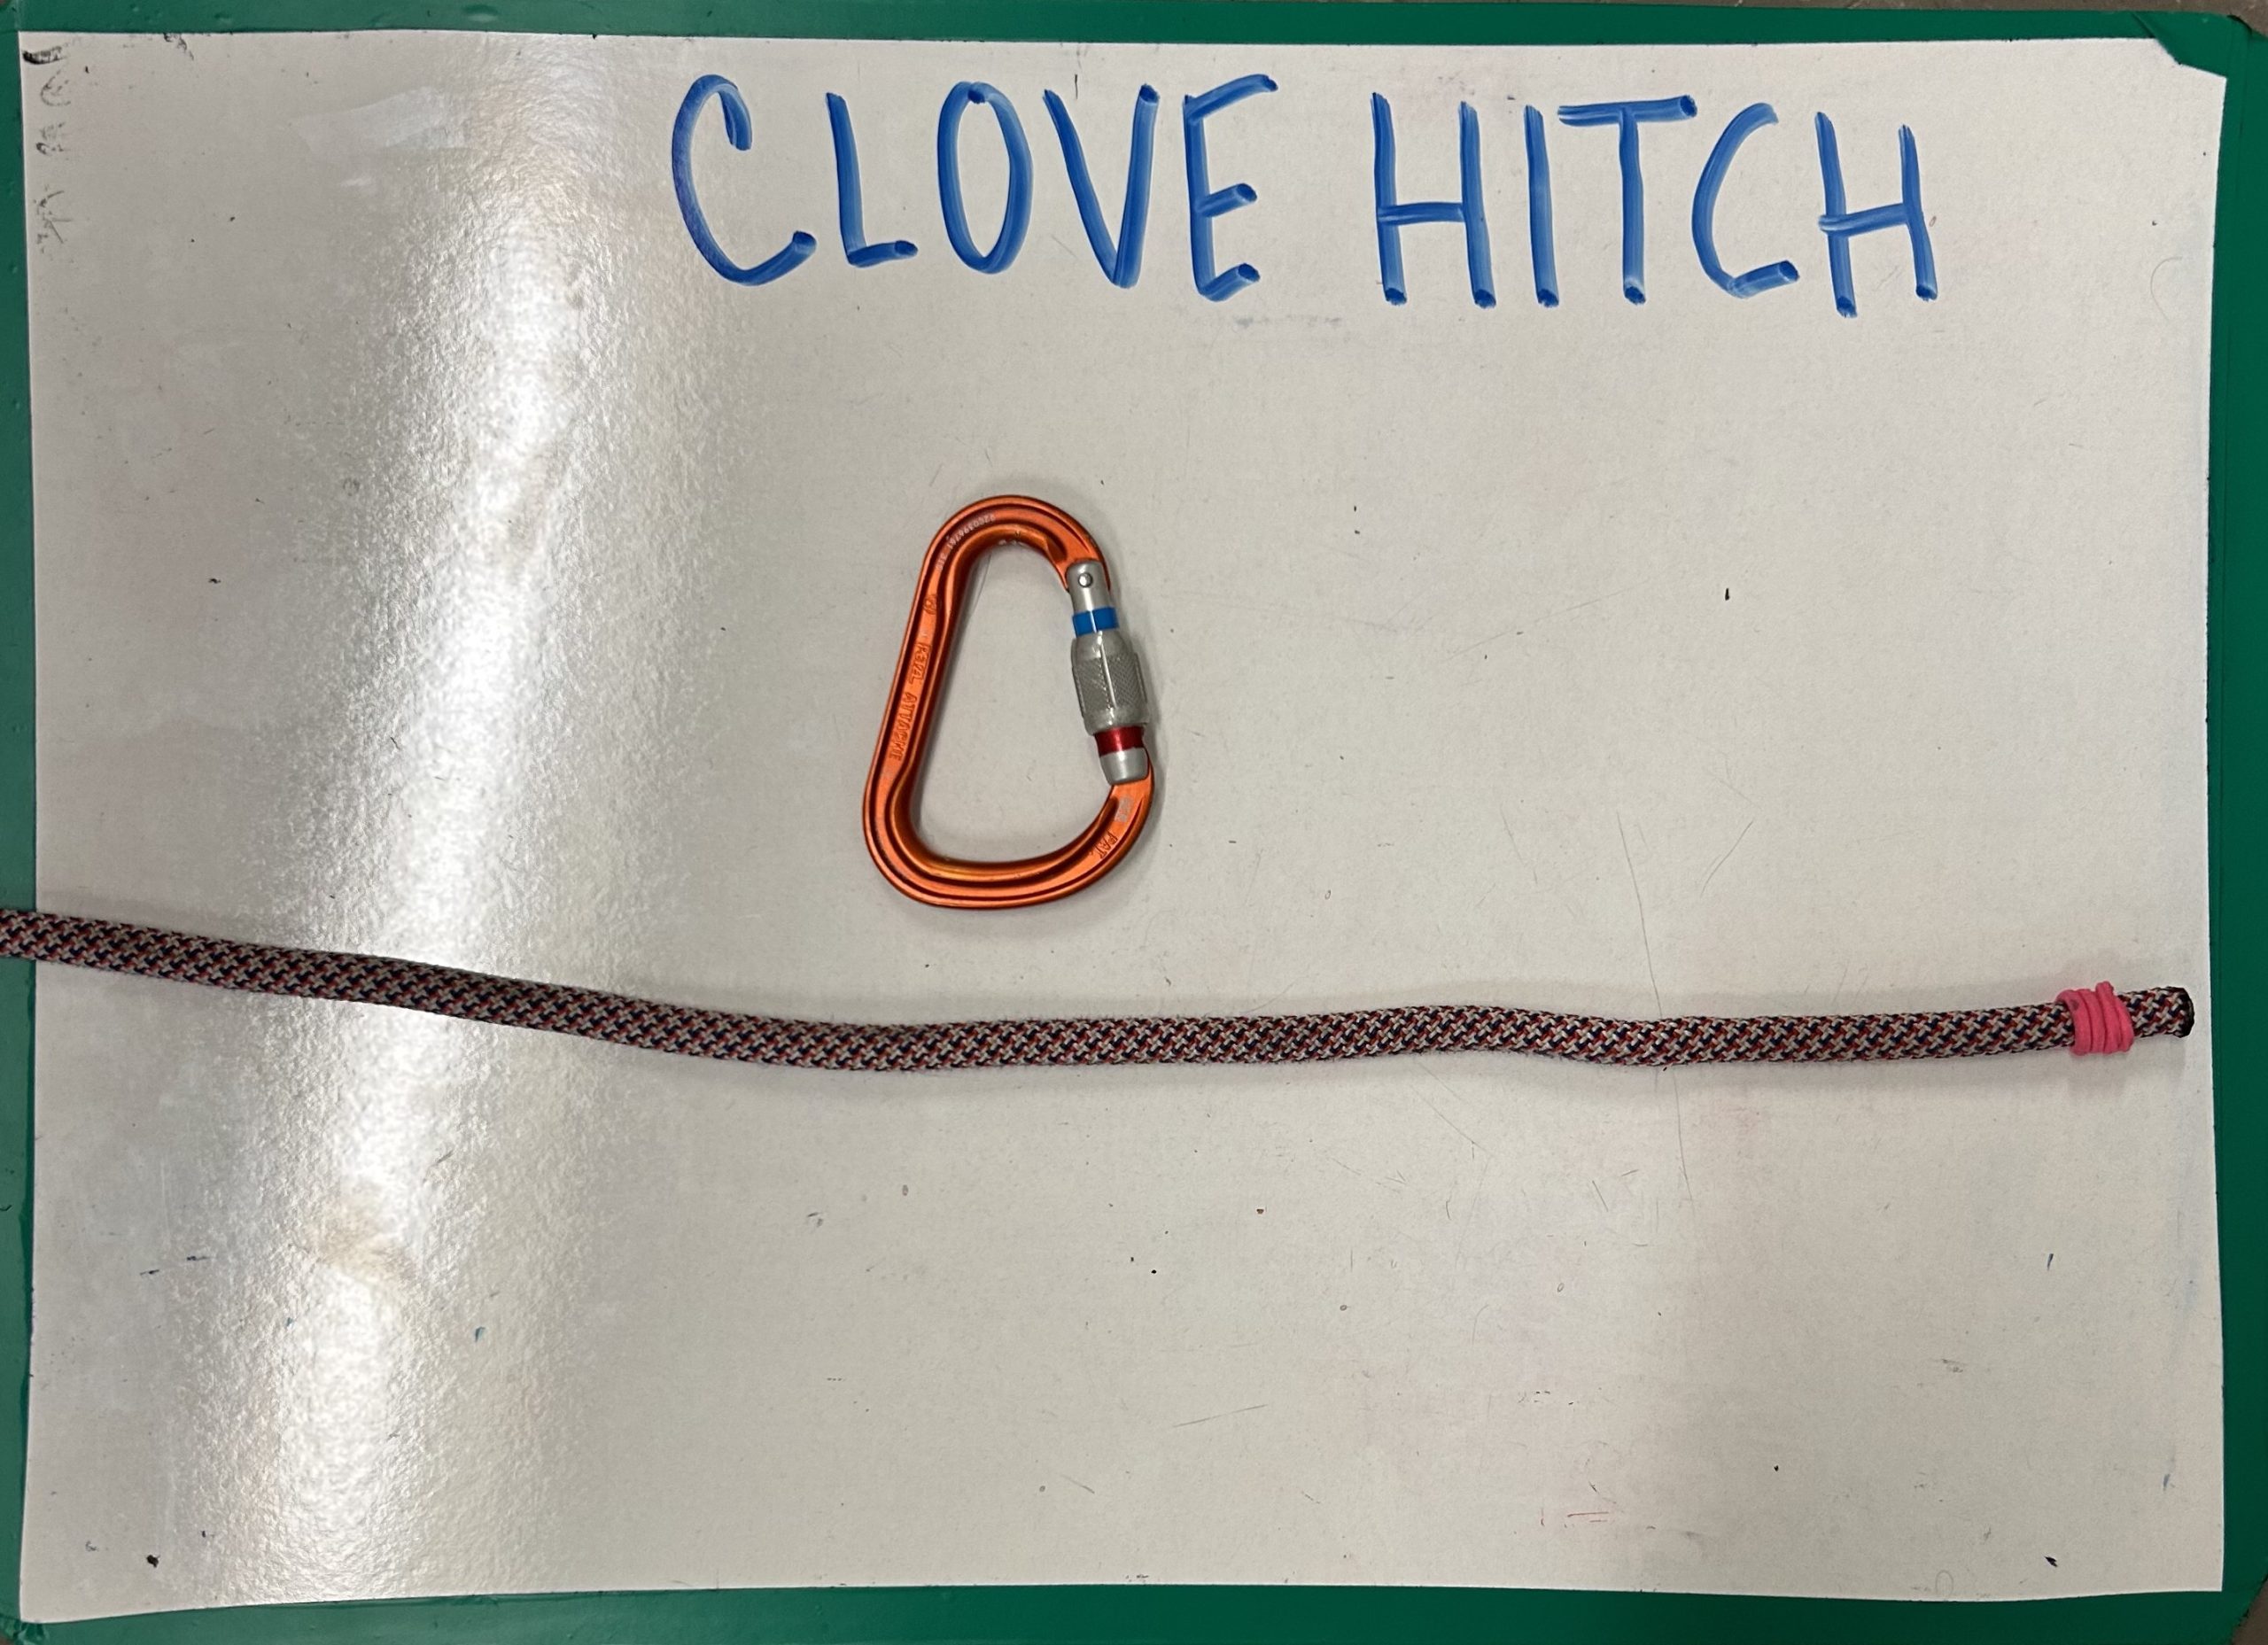
Way to attach rope or cord to pole, ring, or carabiner. Can be weighted and does not slip, used as a temporary hold. Way to attach yourself into a rope system or to secure rope without untying.
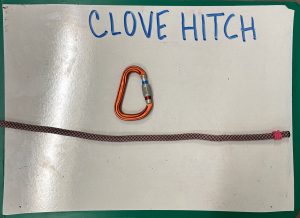 Step 1: Get your rope and object you’ll be attaching it to.
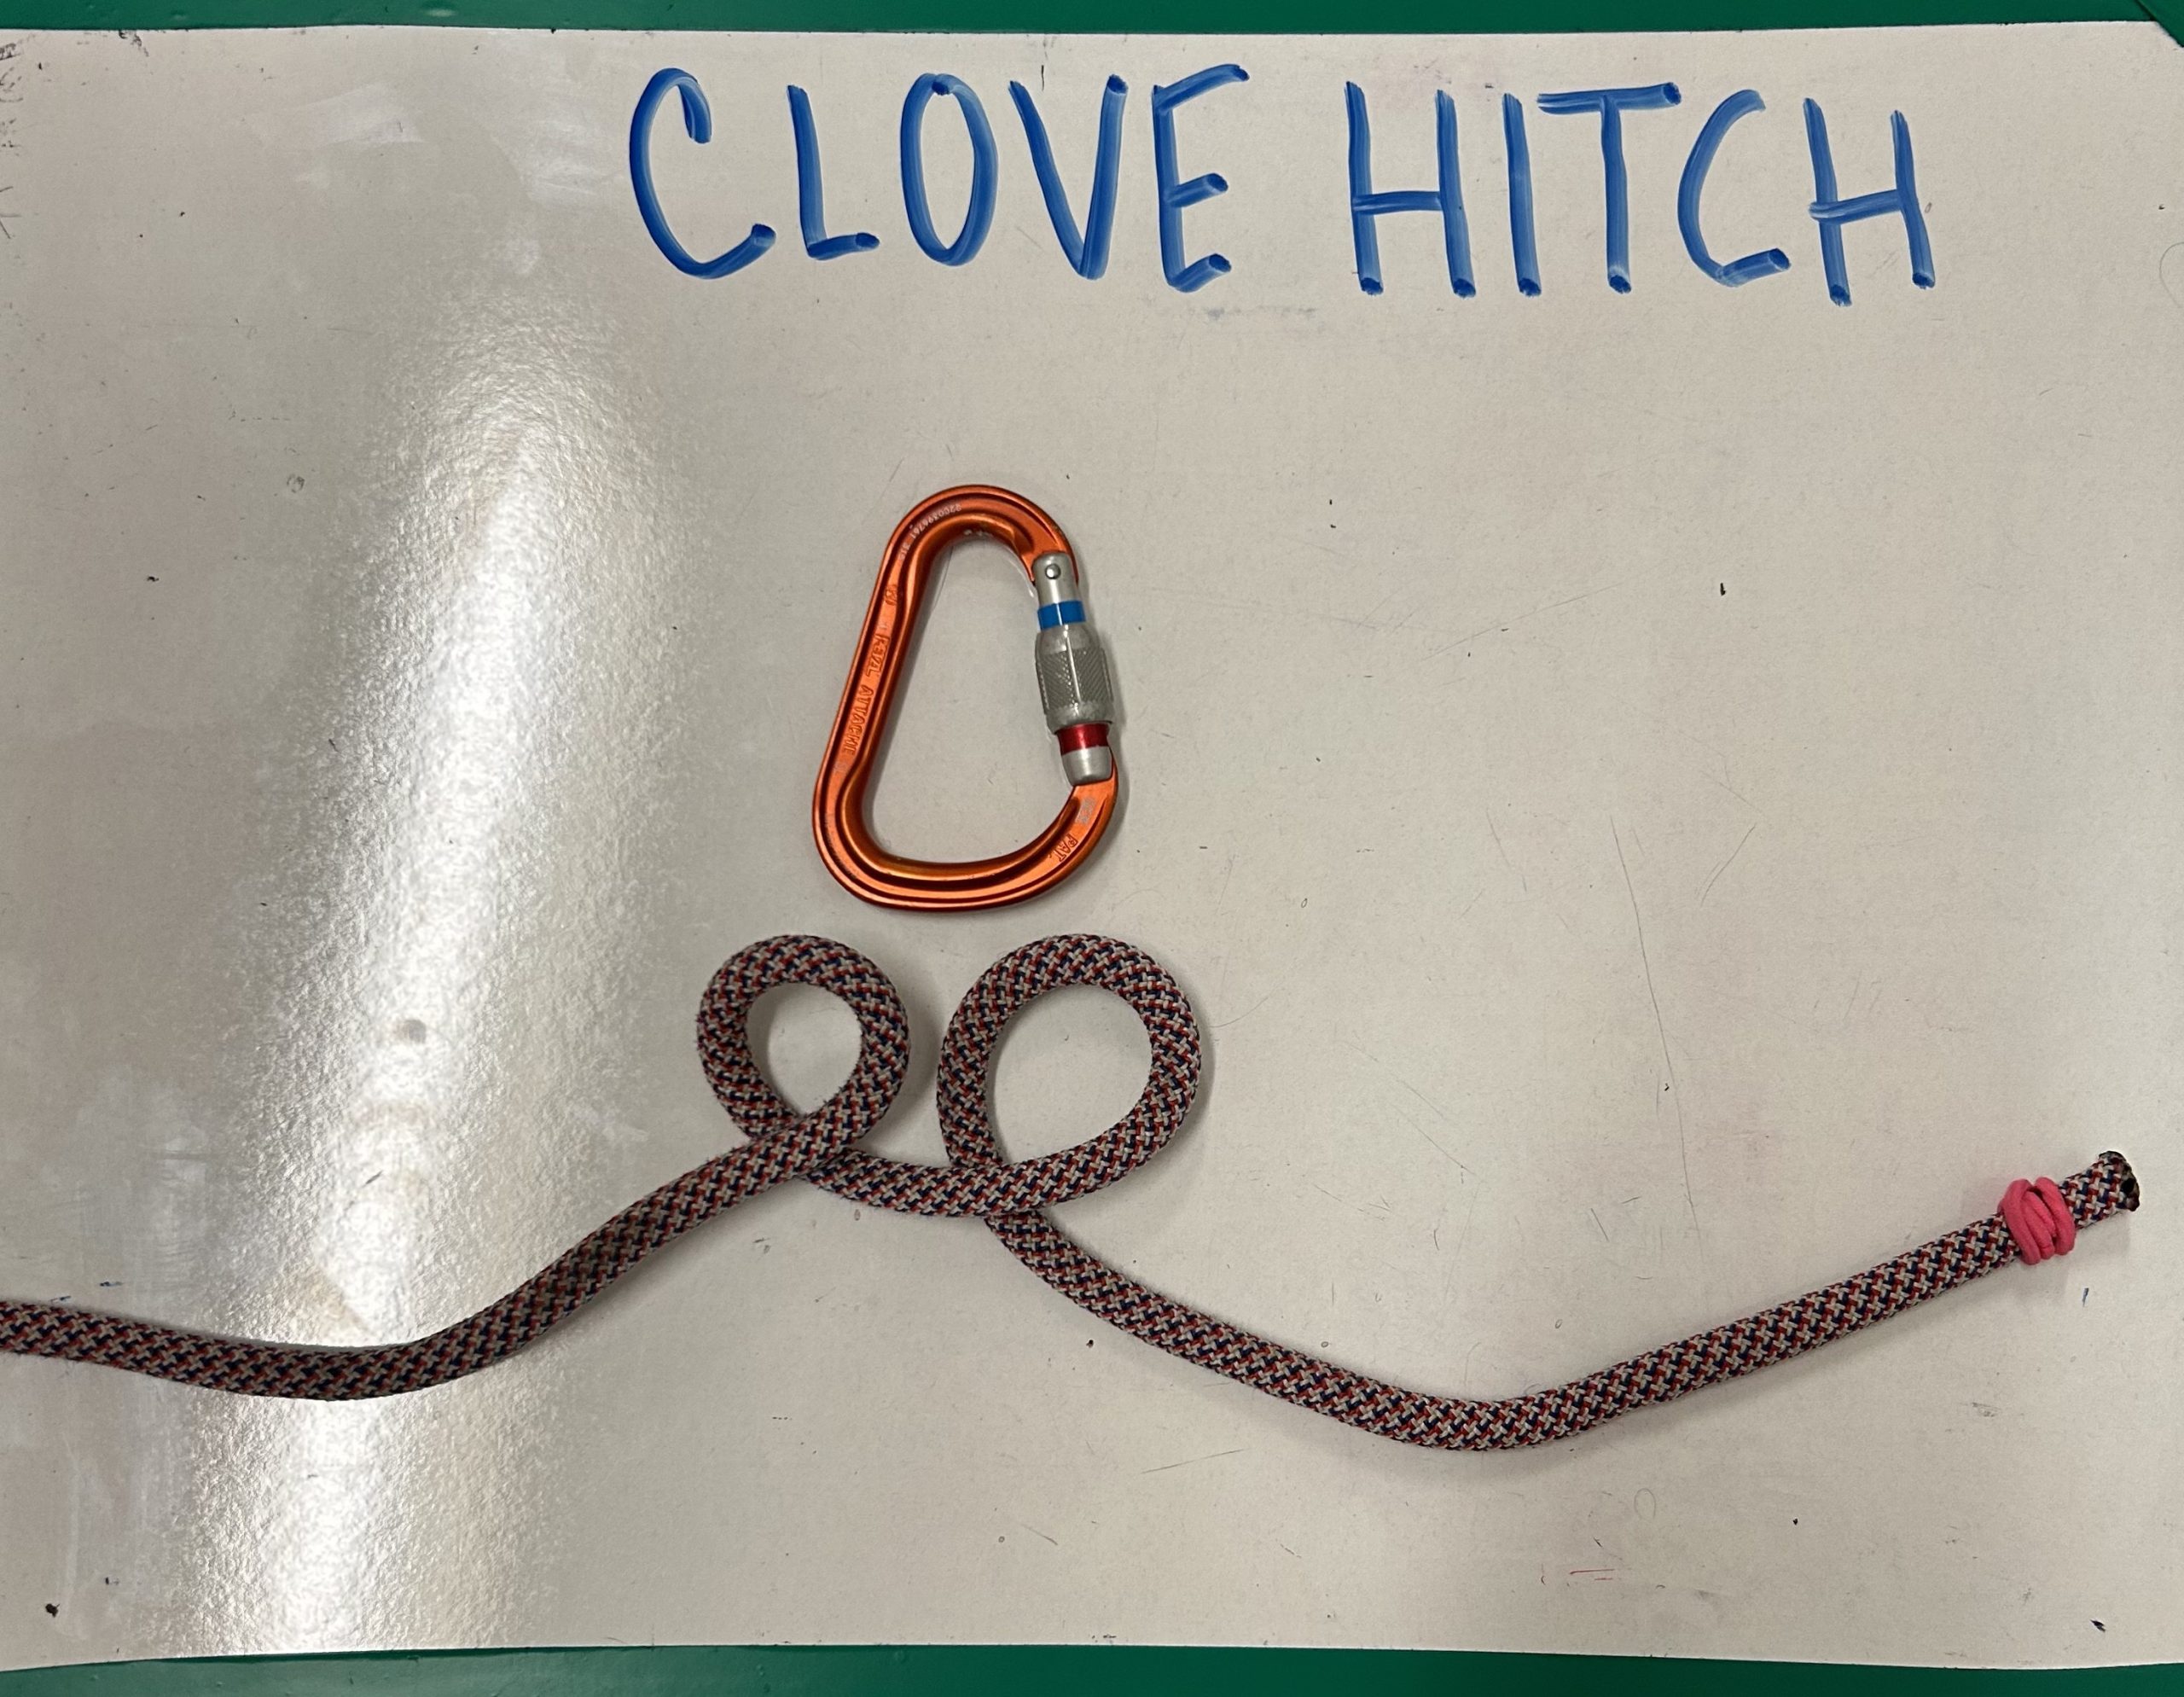
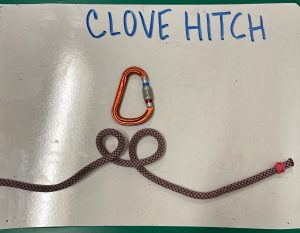 Step 2: Create a “q” and “p” in the rope
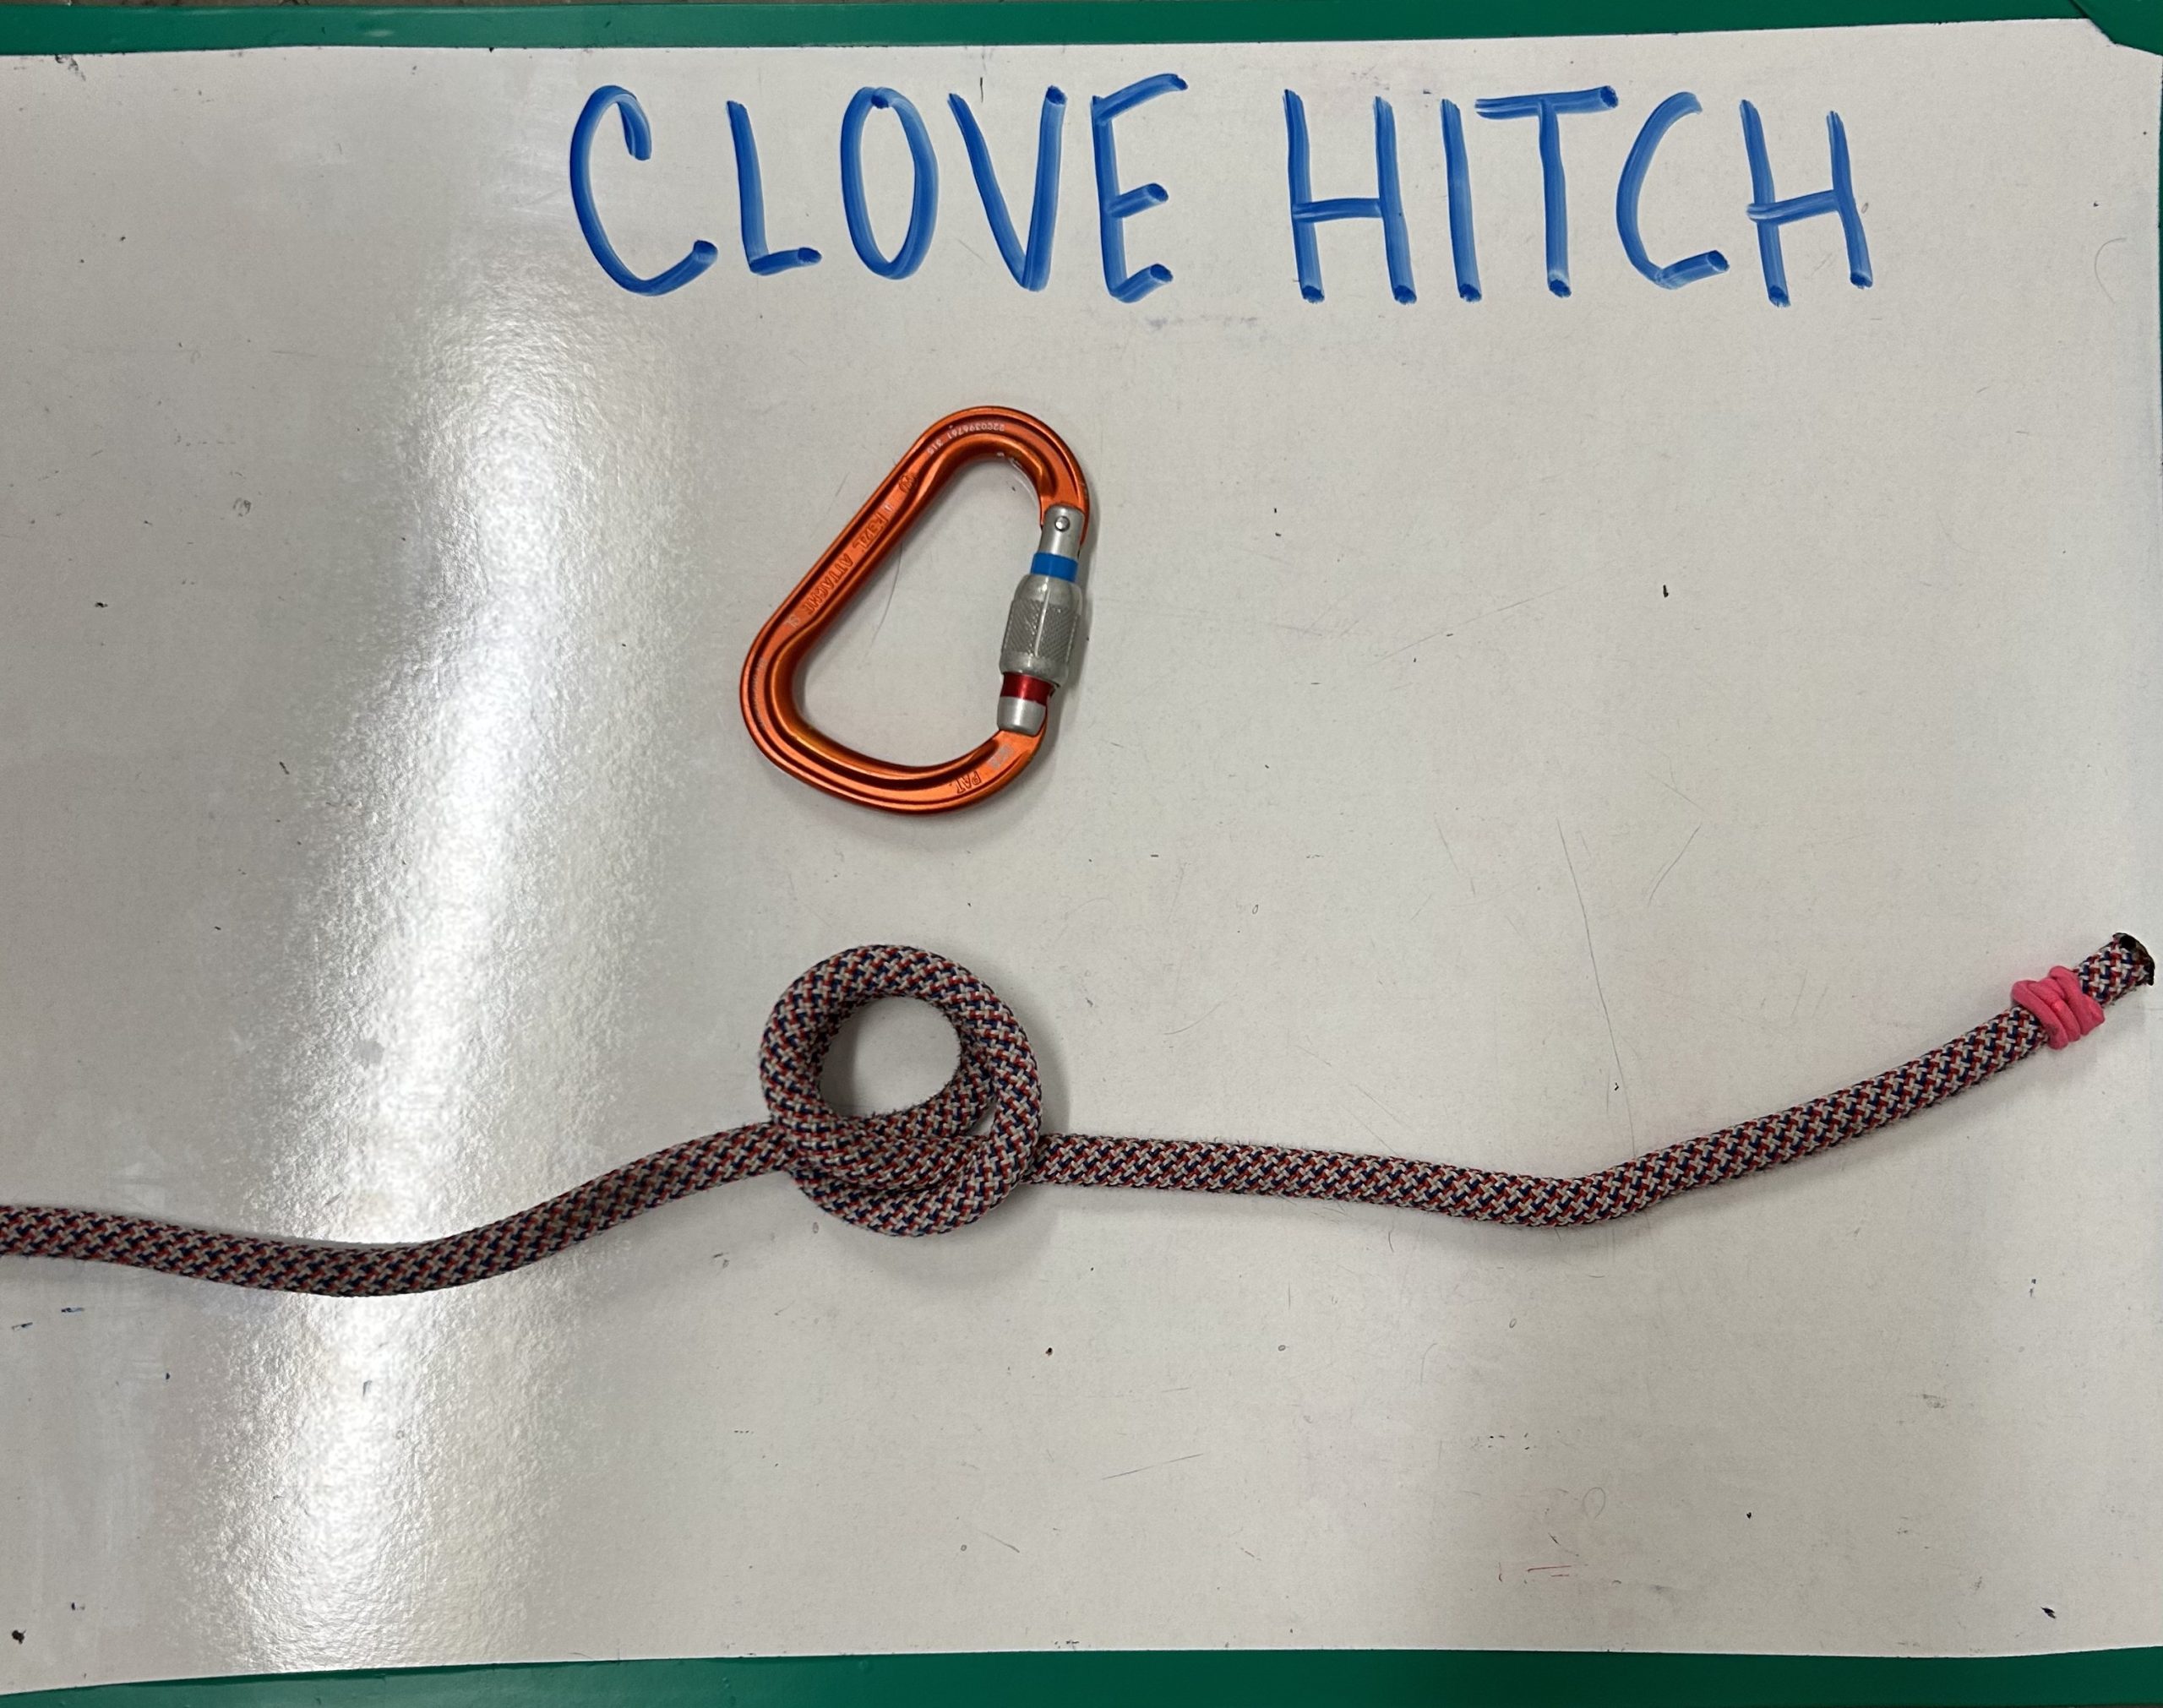
 Step 3: Slide the “p” behind the “q”
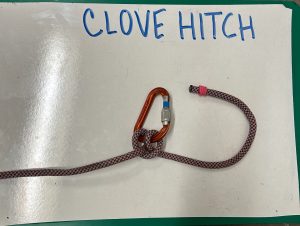 Step 5: Tug down to cinch hitch
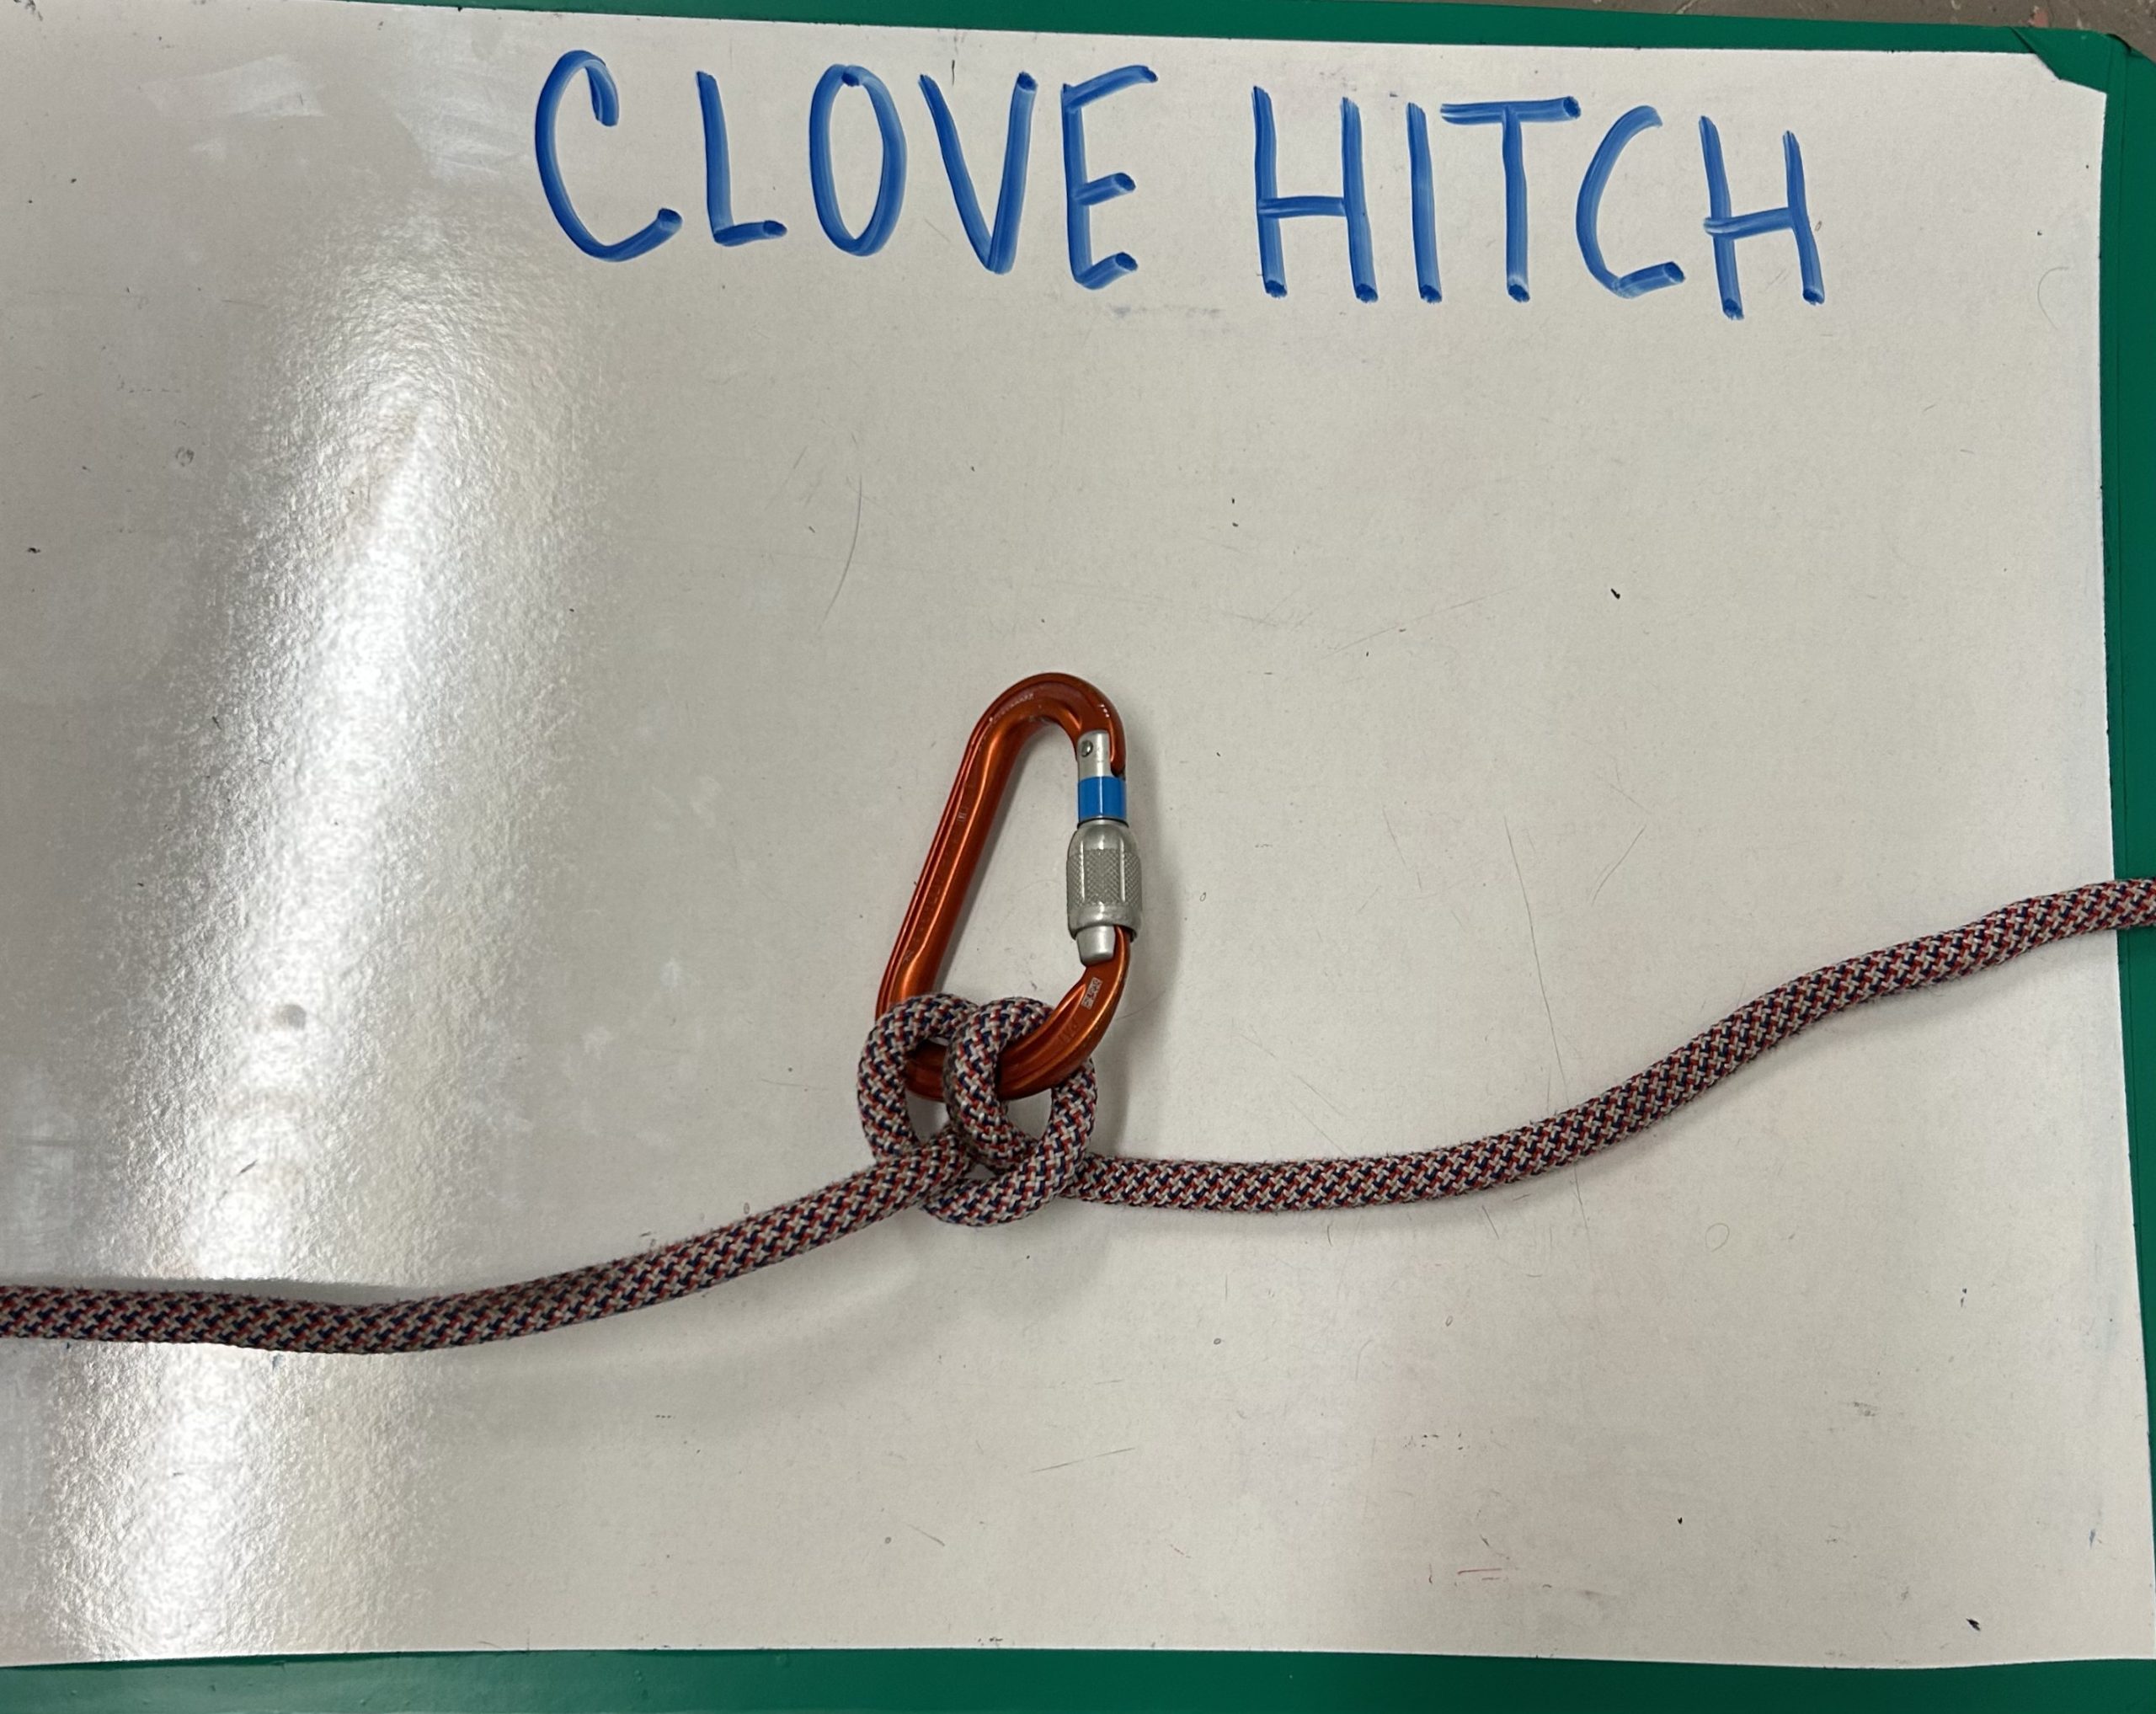
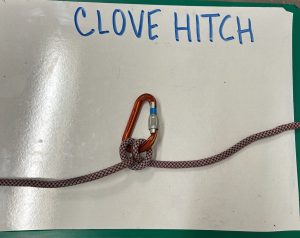 Step 4: Put the two resulting loops onto your object.

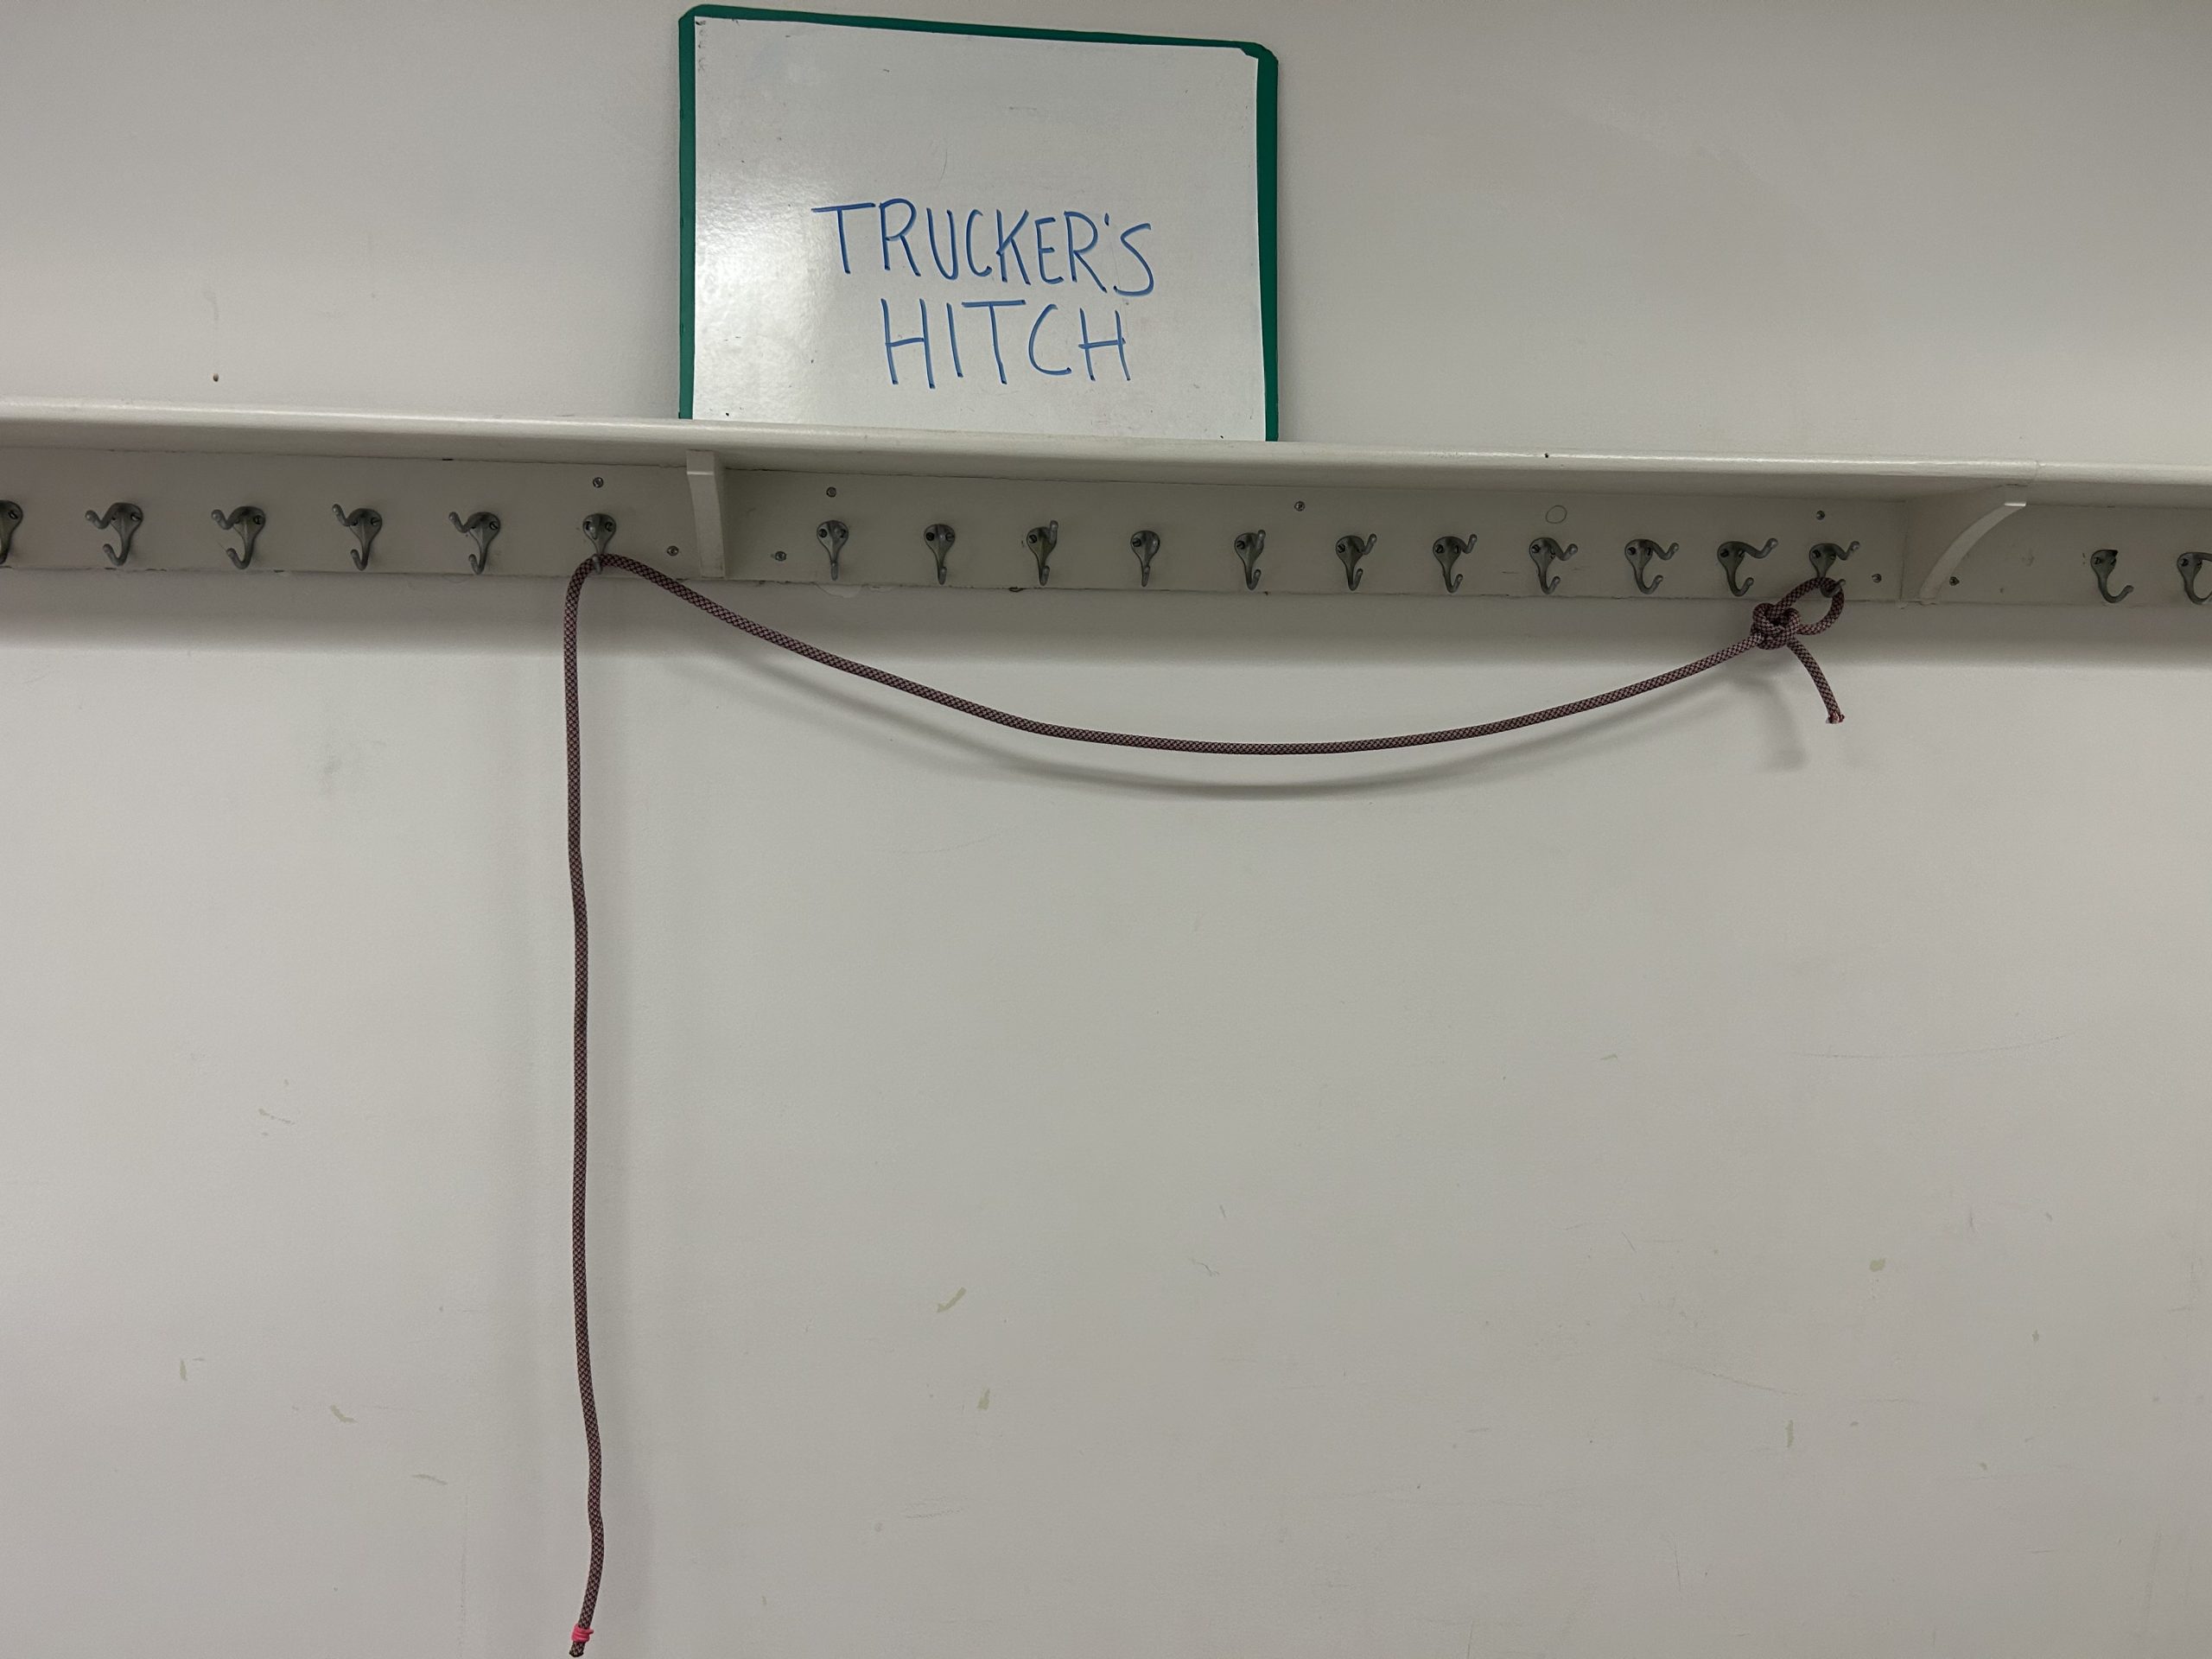
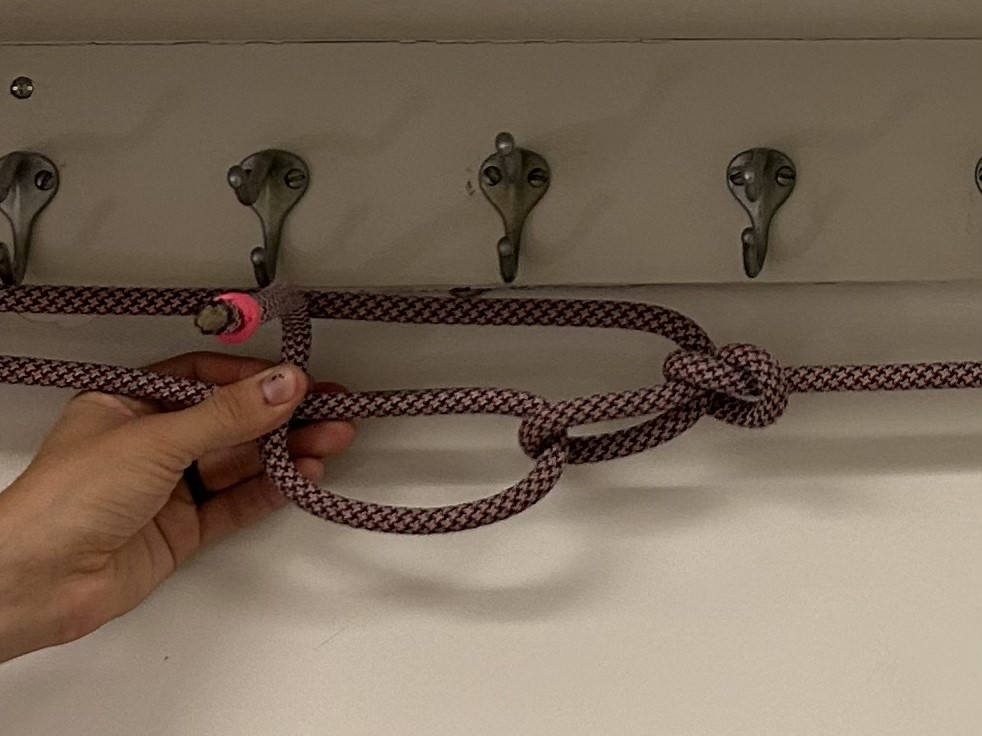
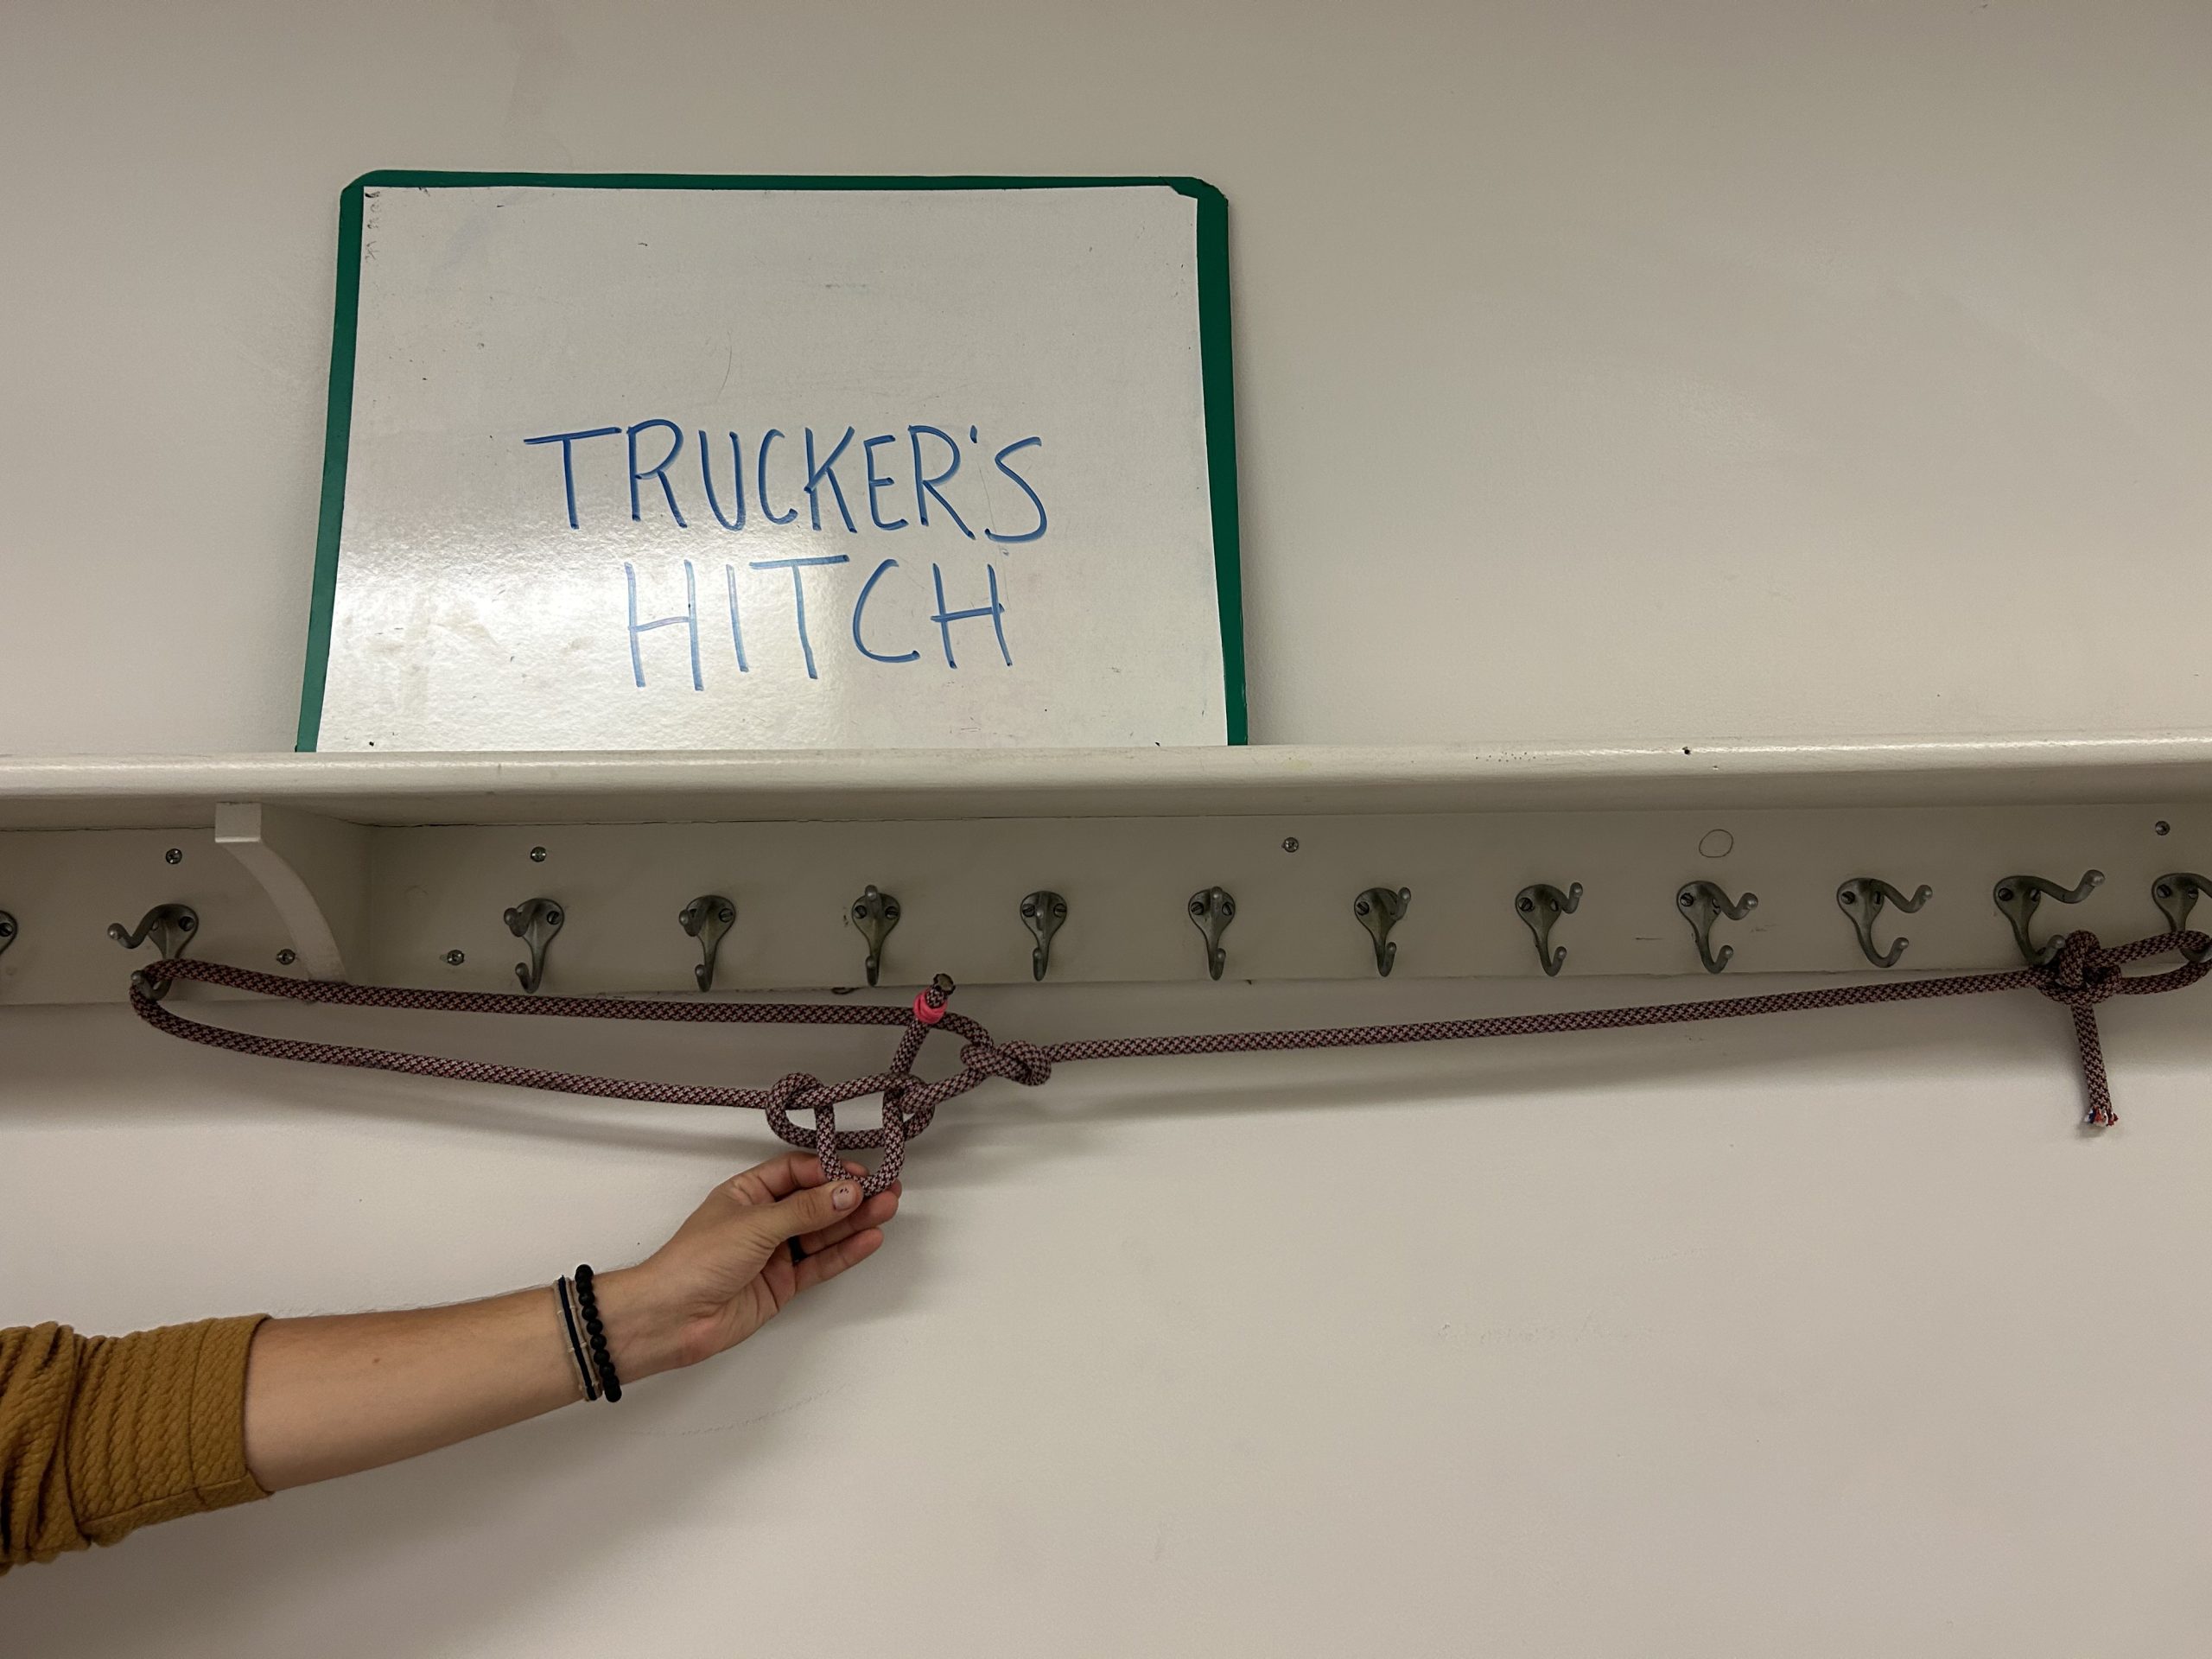
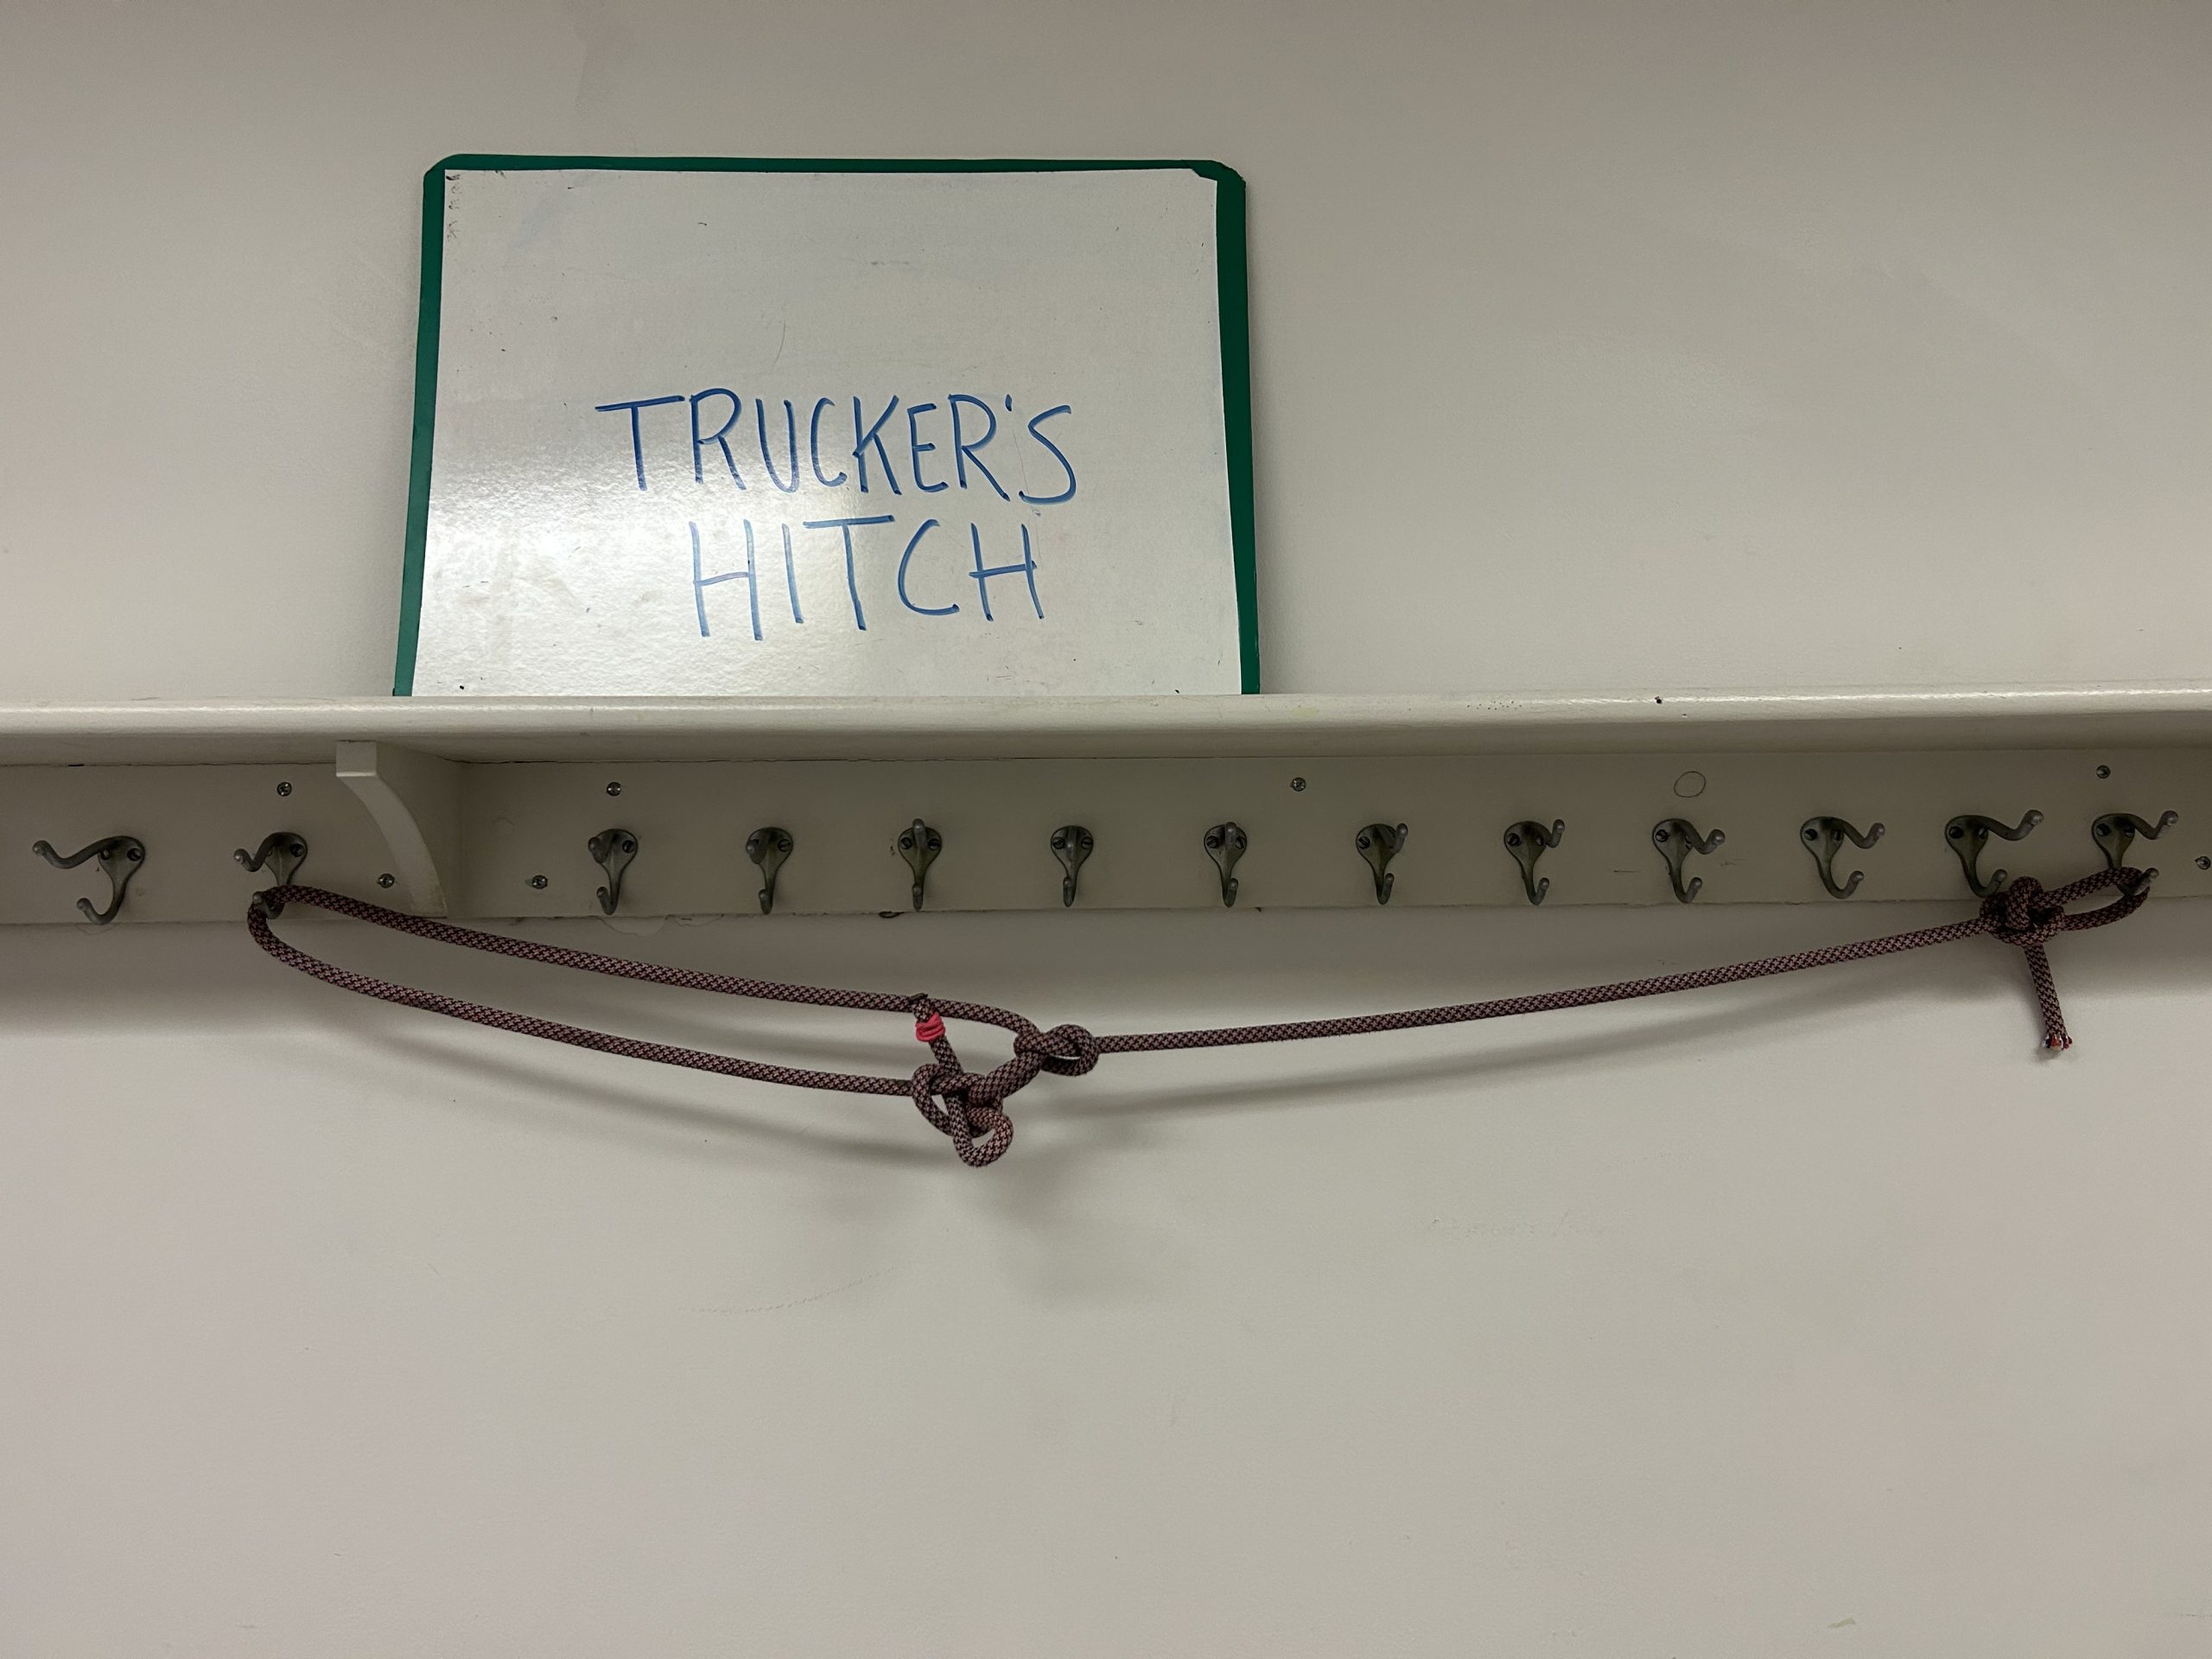
Way to secure loads or tarps, adjustable. Can be used to secure boats to a trailer, tie down tarps and tents etc.
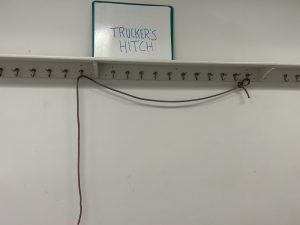 Find area to attach.
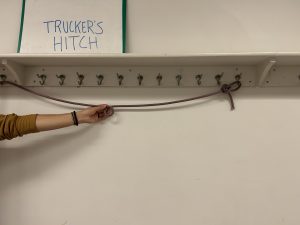 Create loop in the line.
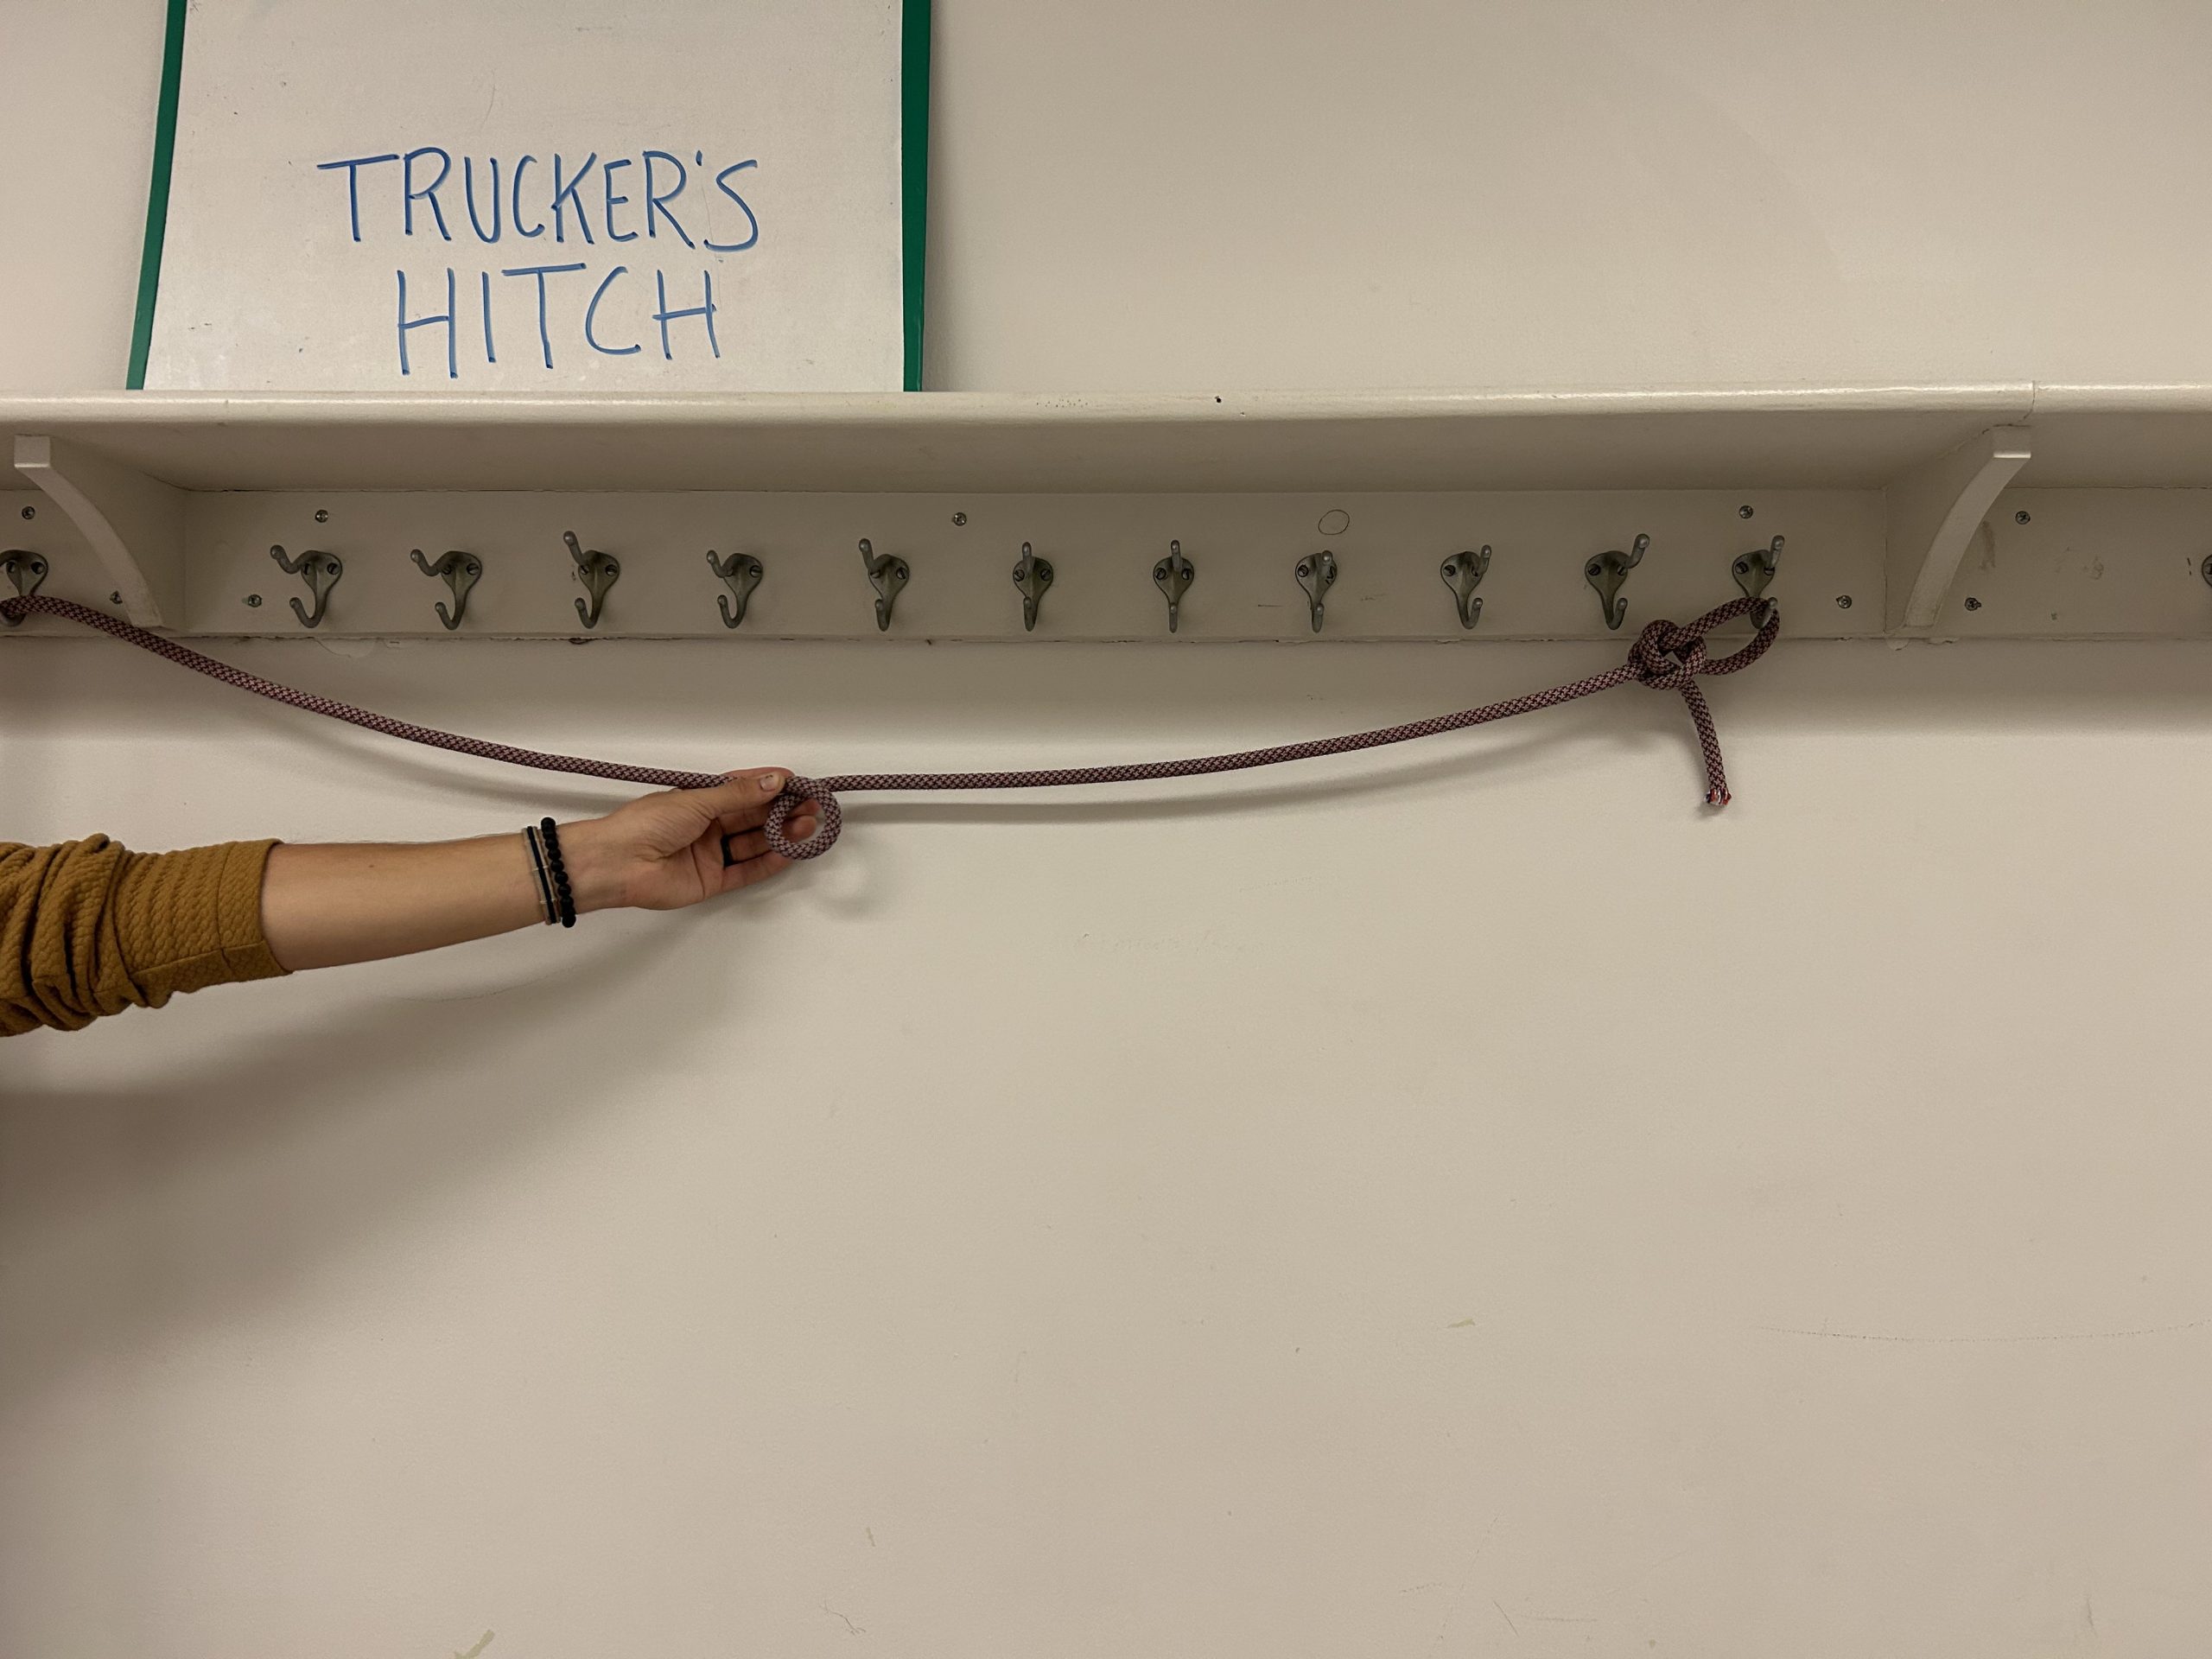
 Close-up view of loop. Twist loop 2-3 times.
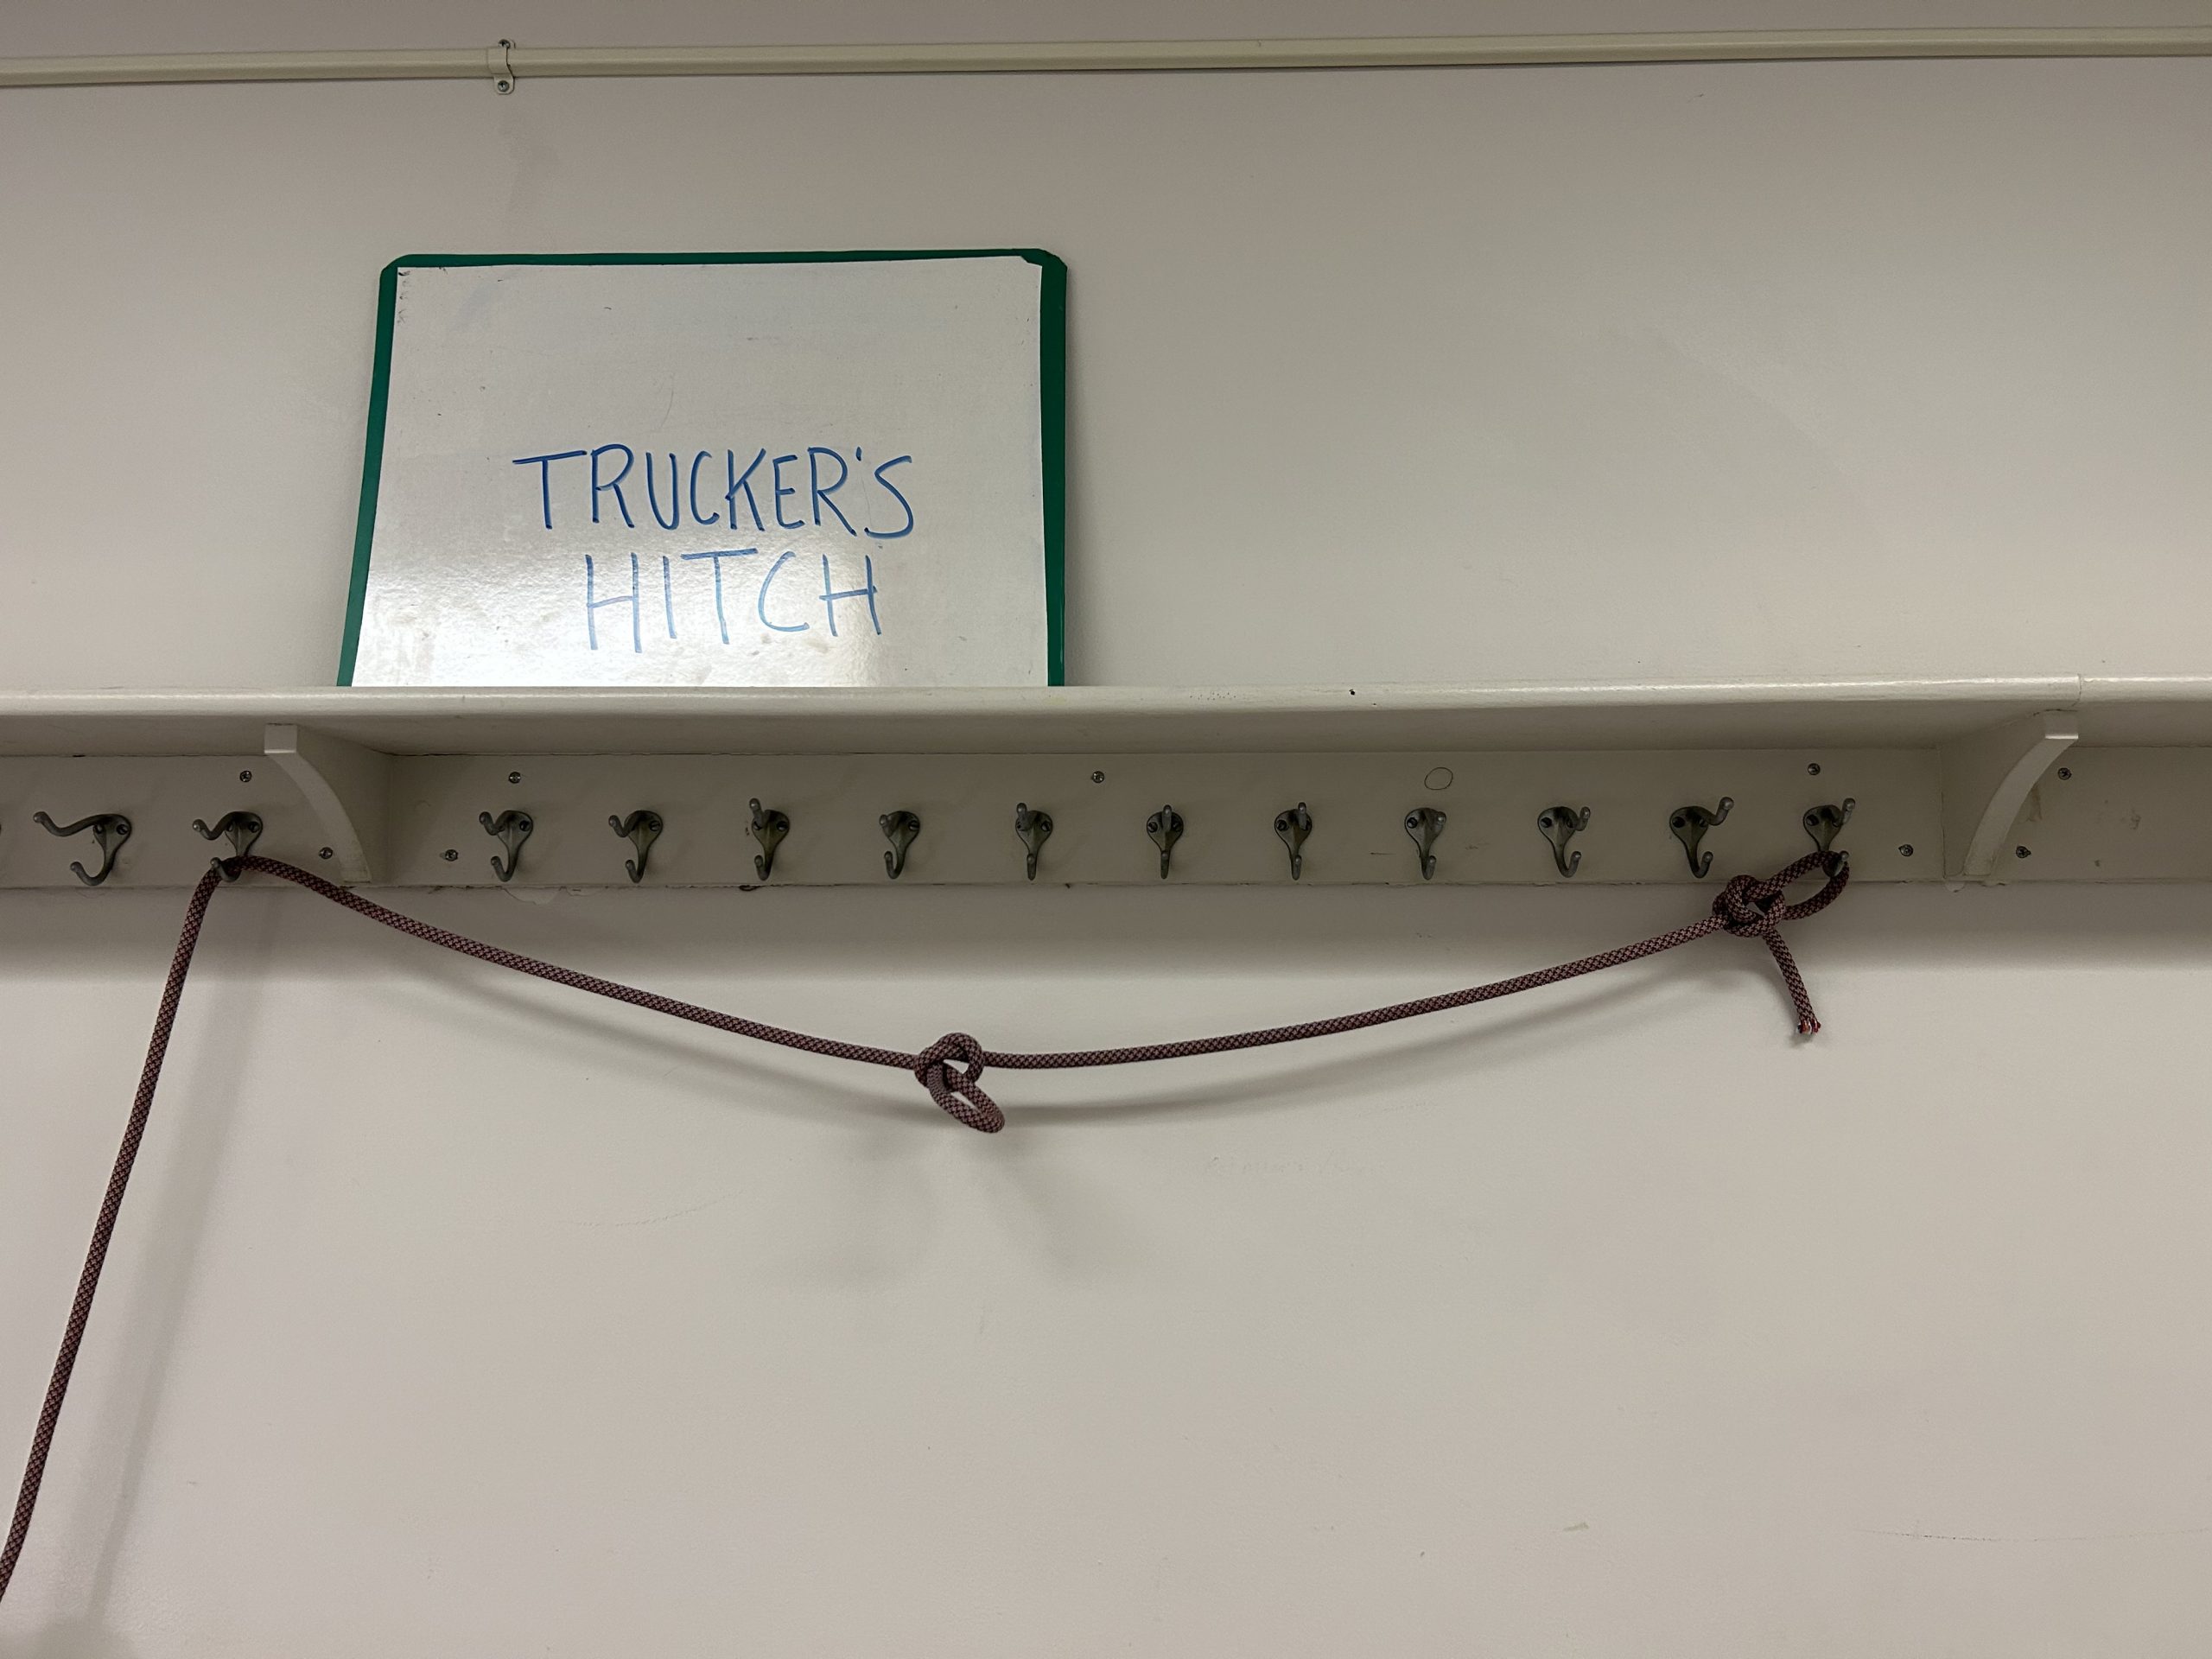
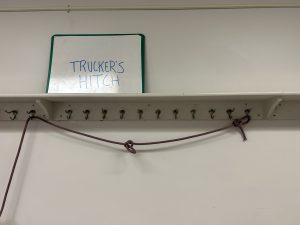 Pull bight of rope through loop to create a slip knot.
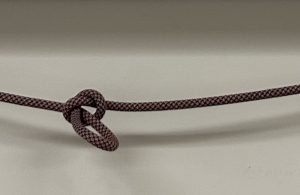 Close-up view of slipknot.
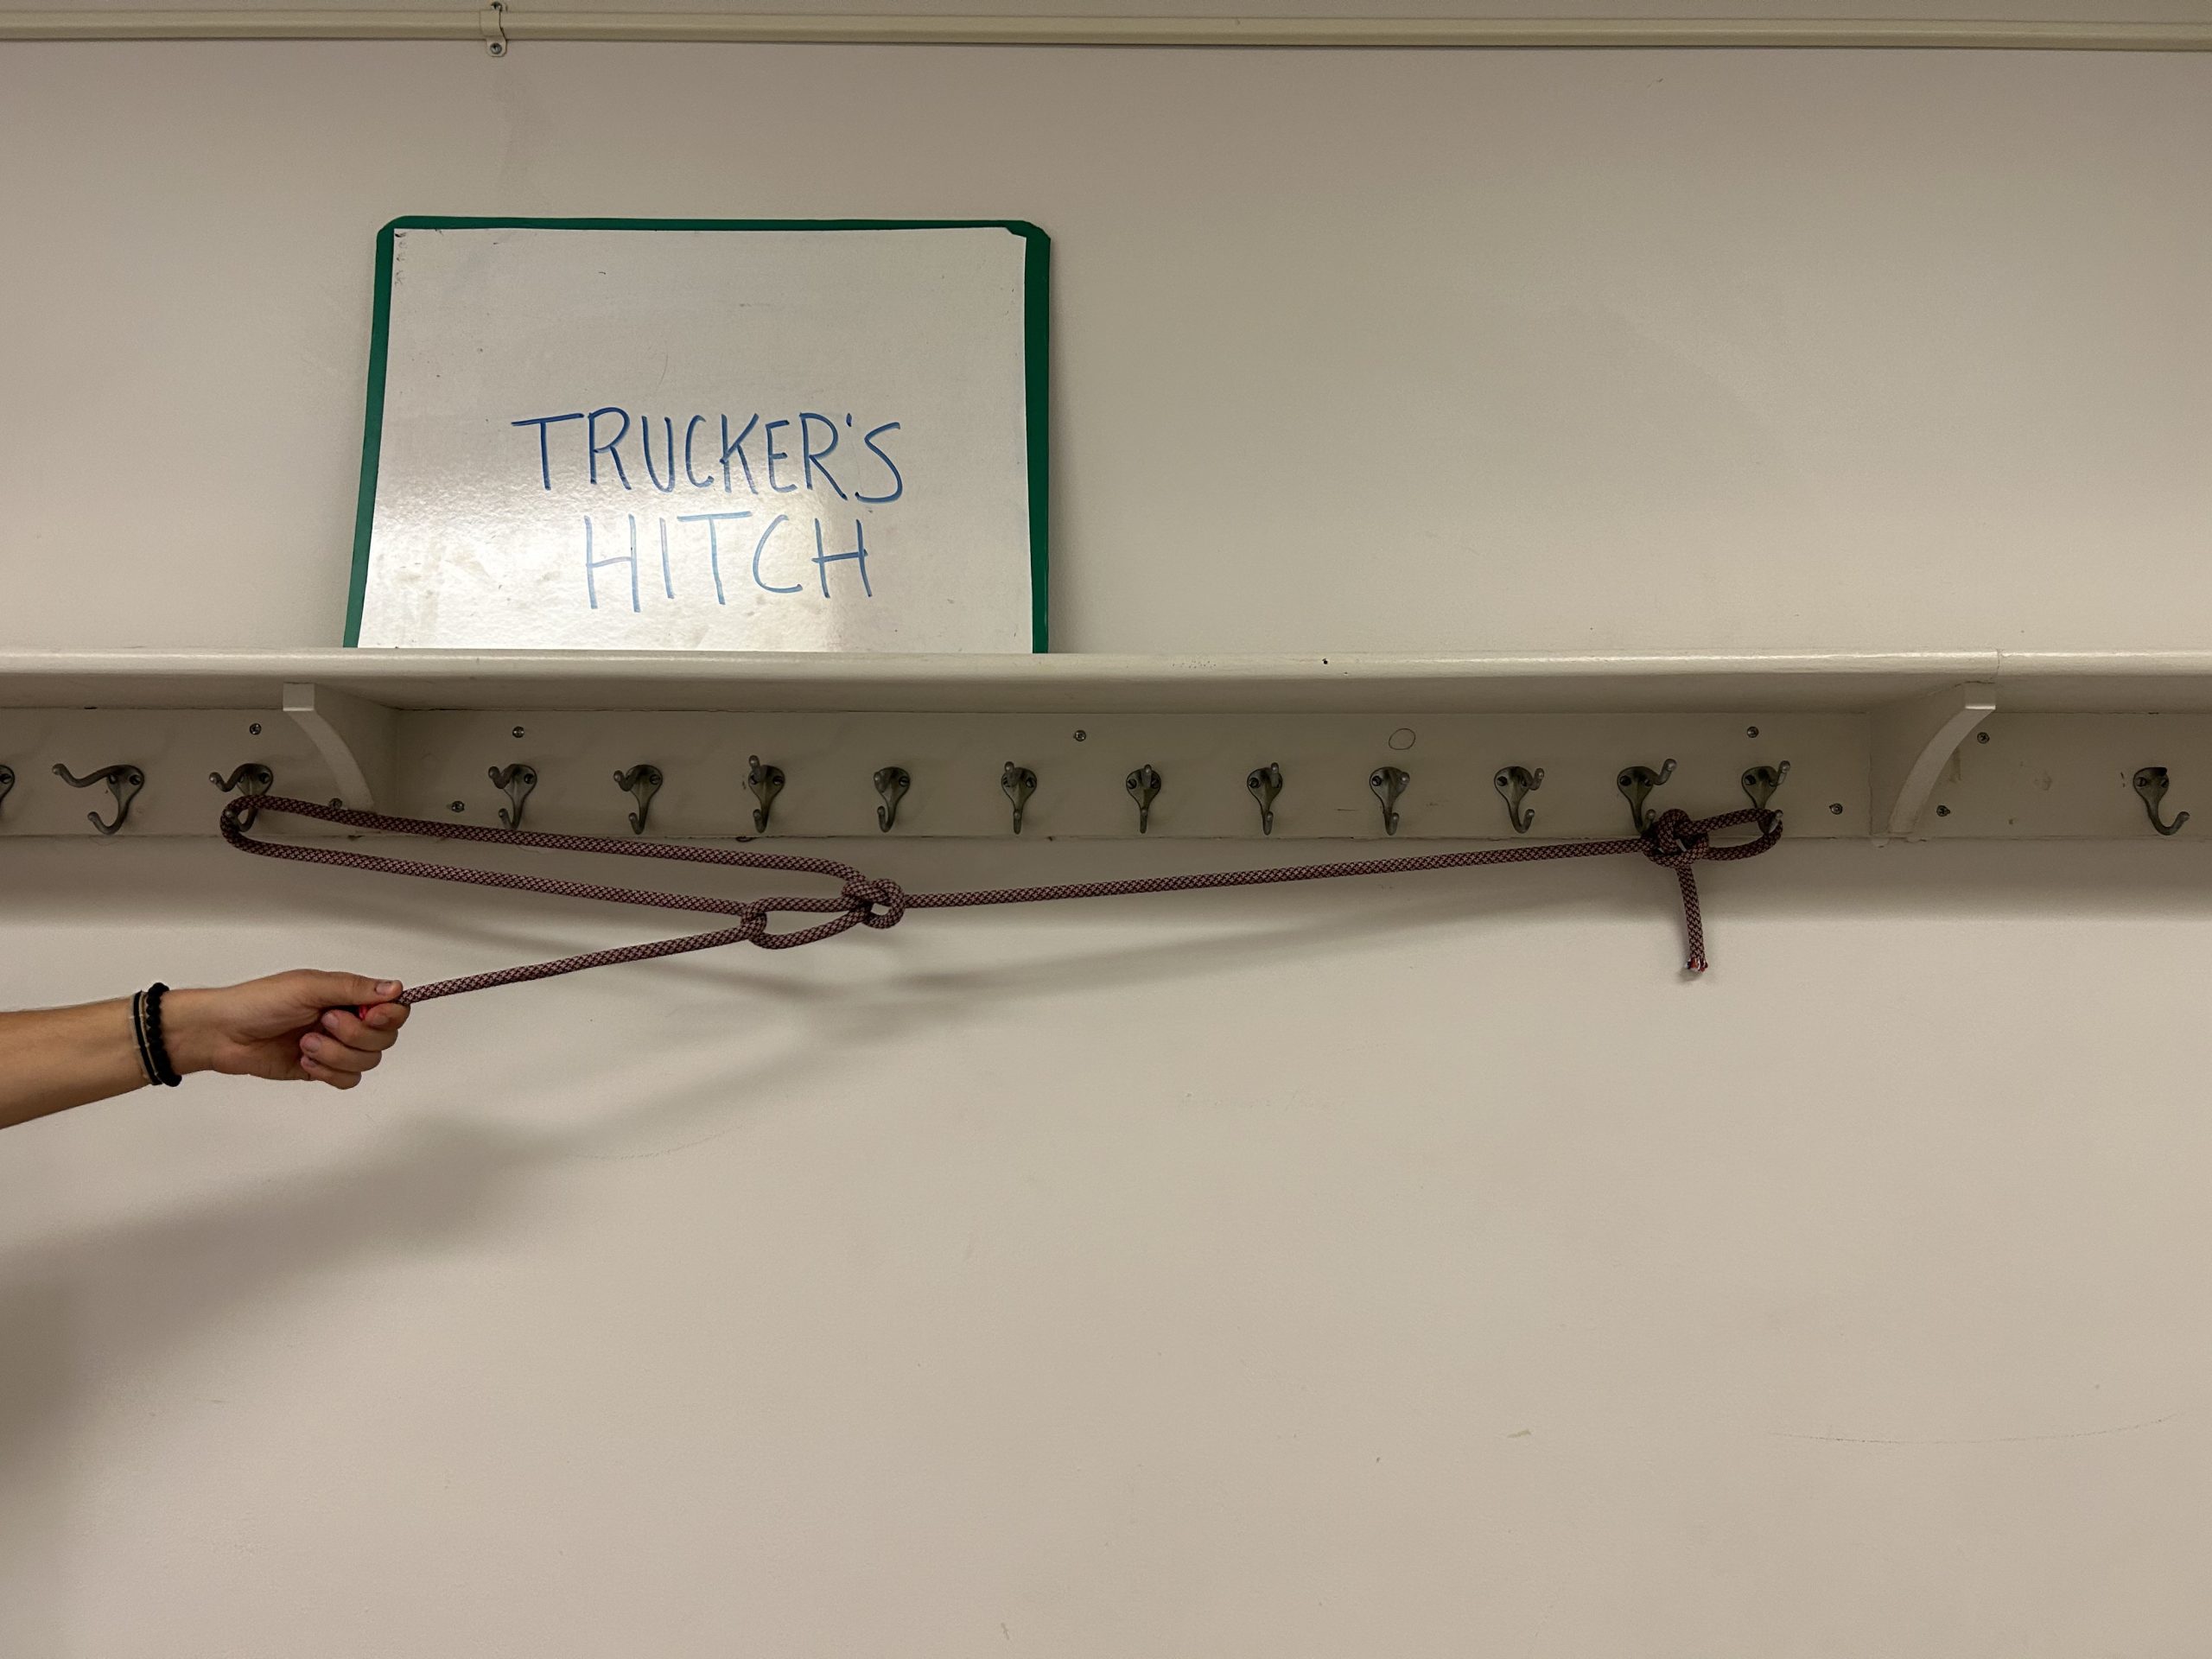
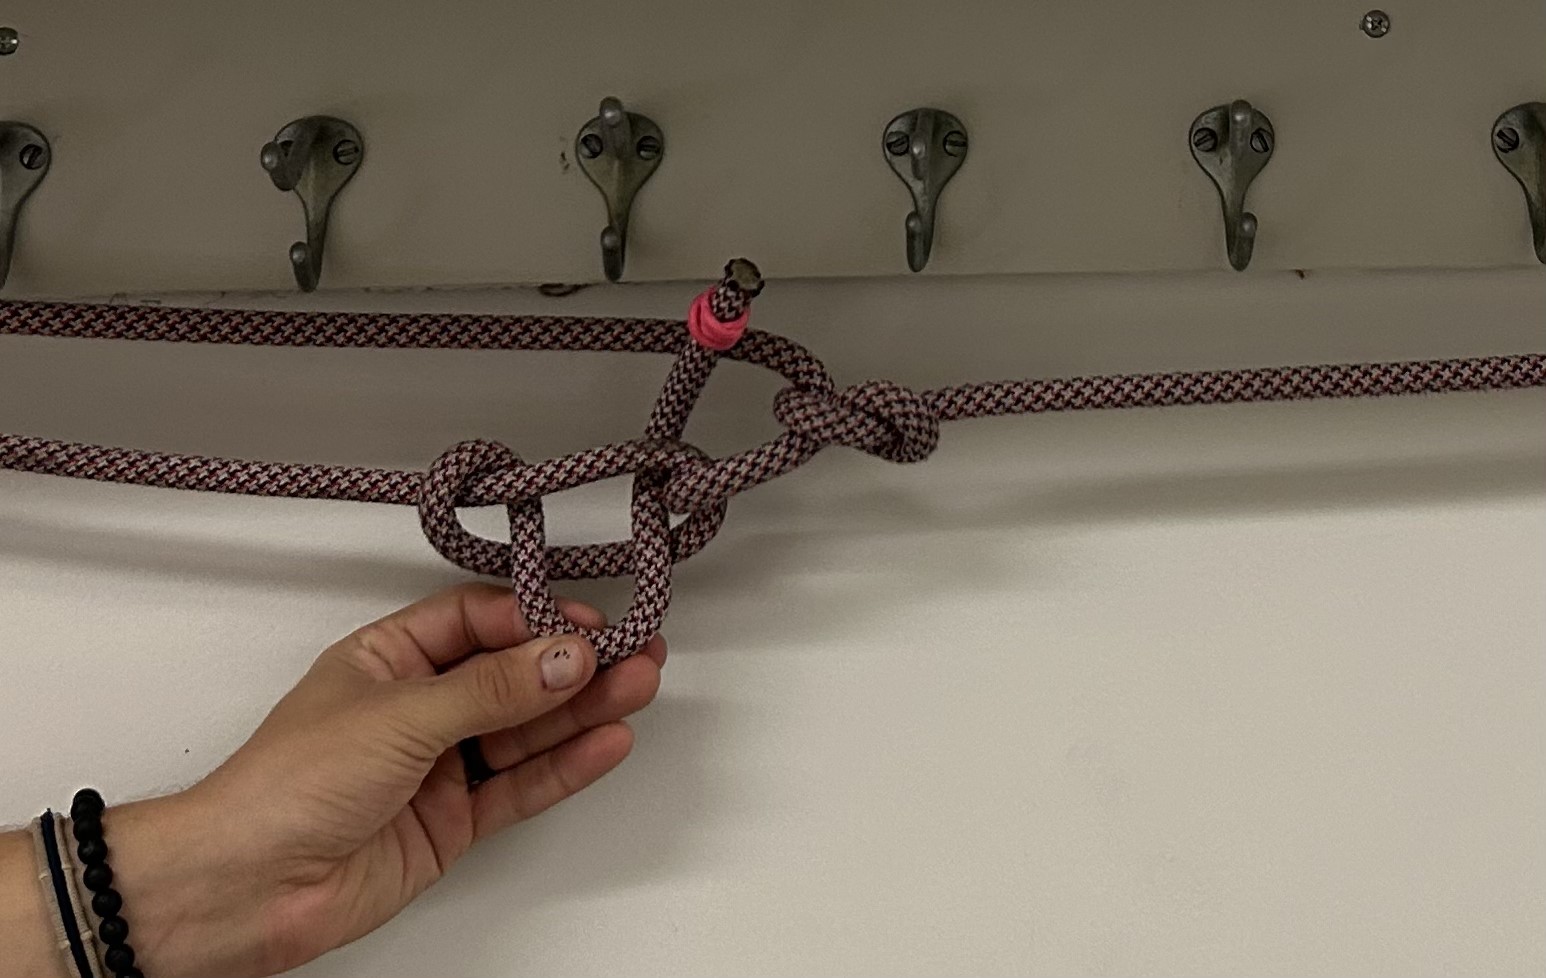
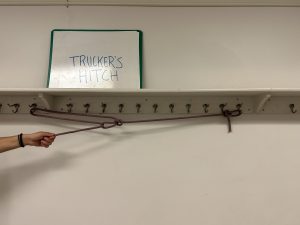 Pull working end through loop of slipknot, and pull tight.
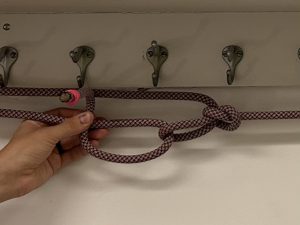 While pinching the bend in the working end rope (not shown), cross working end over rope that was pulled through. This is the start of a half-hitch.
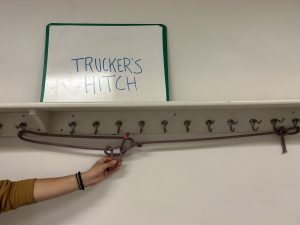 Pull a bight through and pull tight.
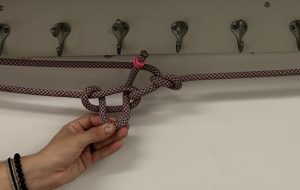 Close-up of half-hitch with a bight.
 Finished product, but can be made tighter!


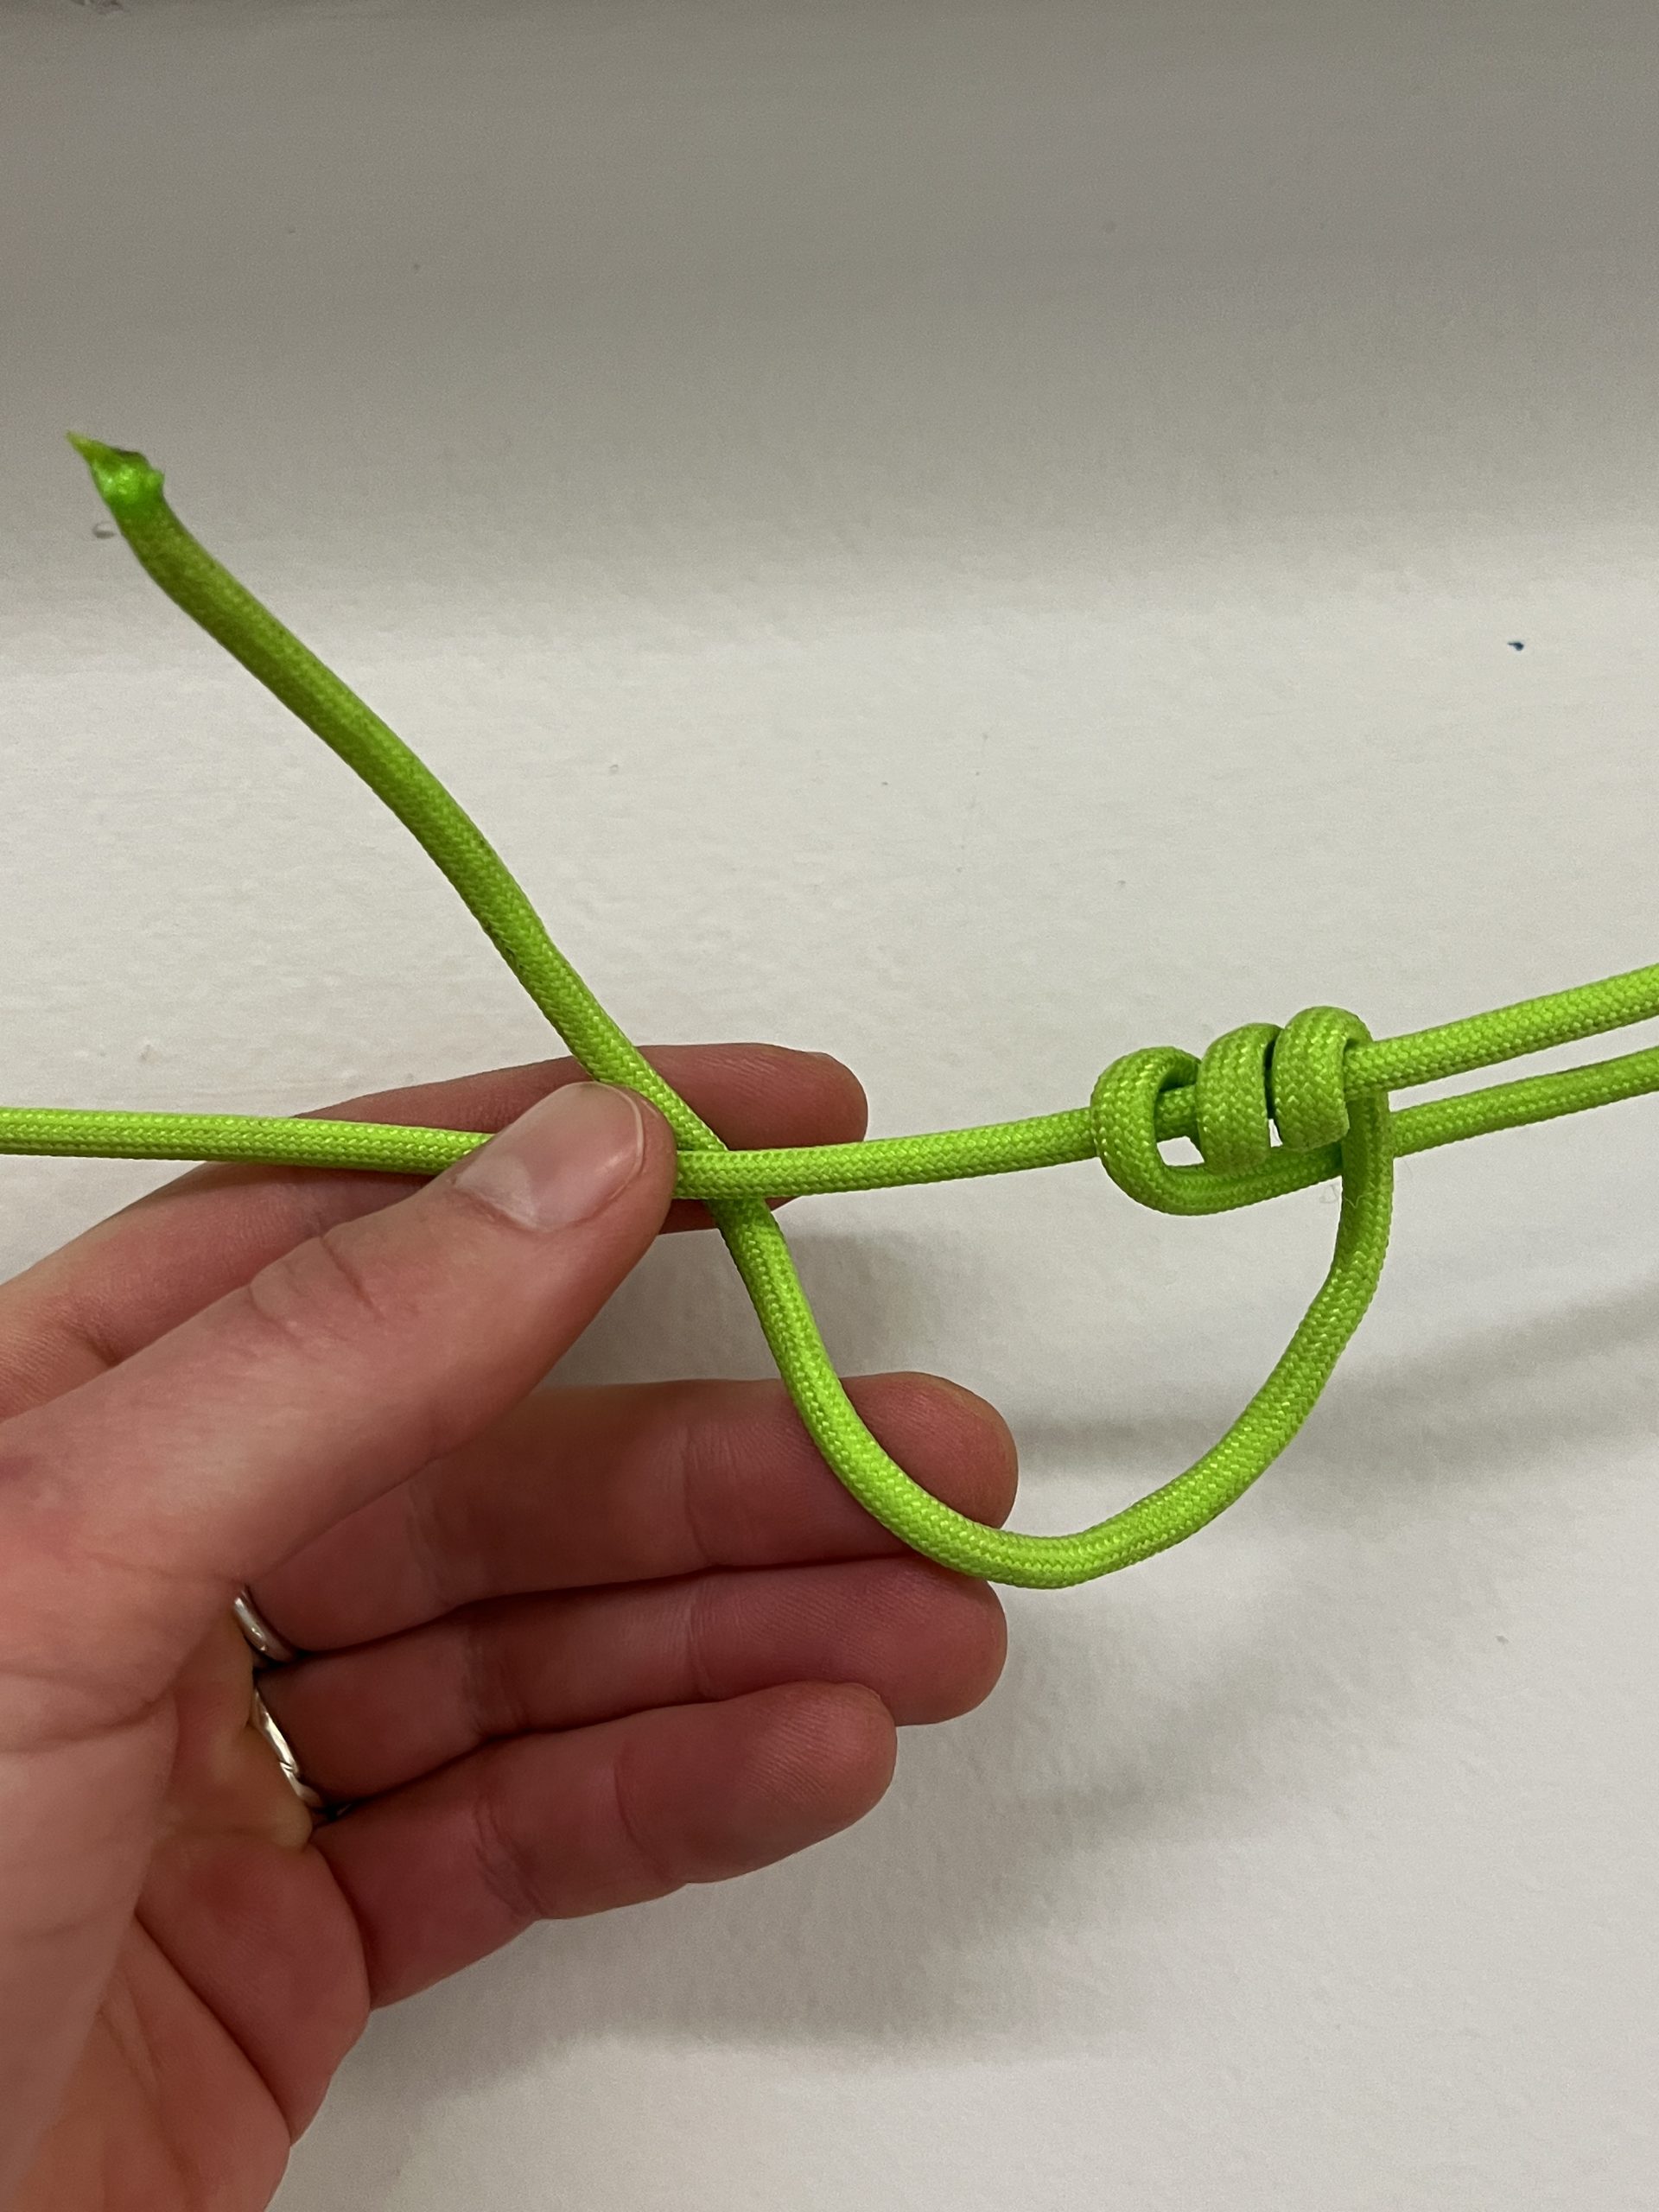
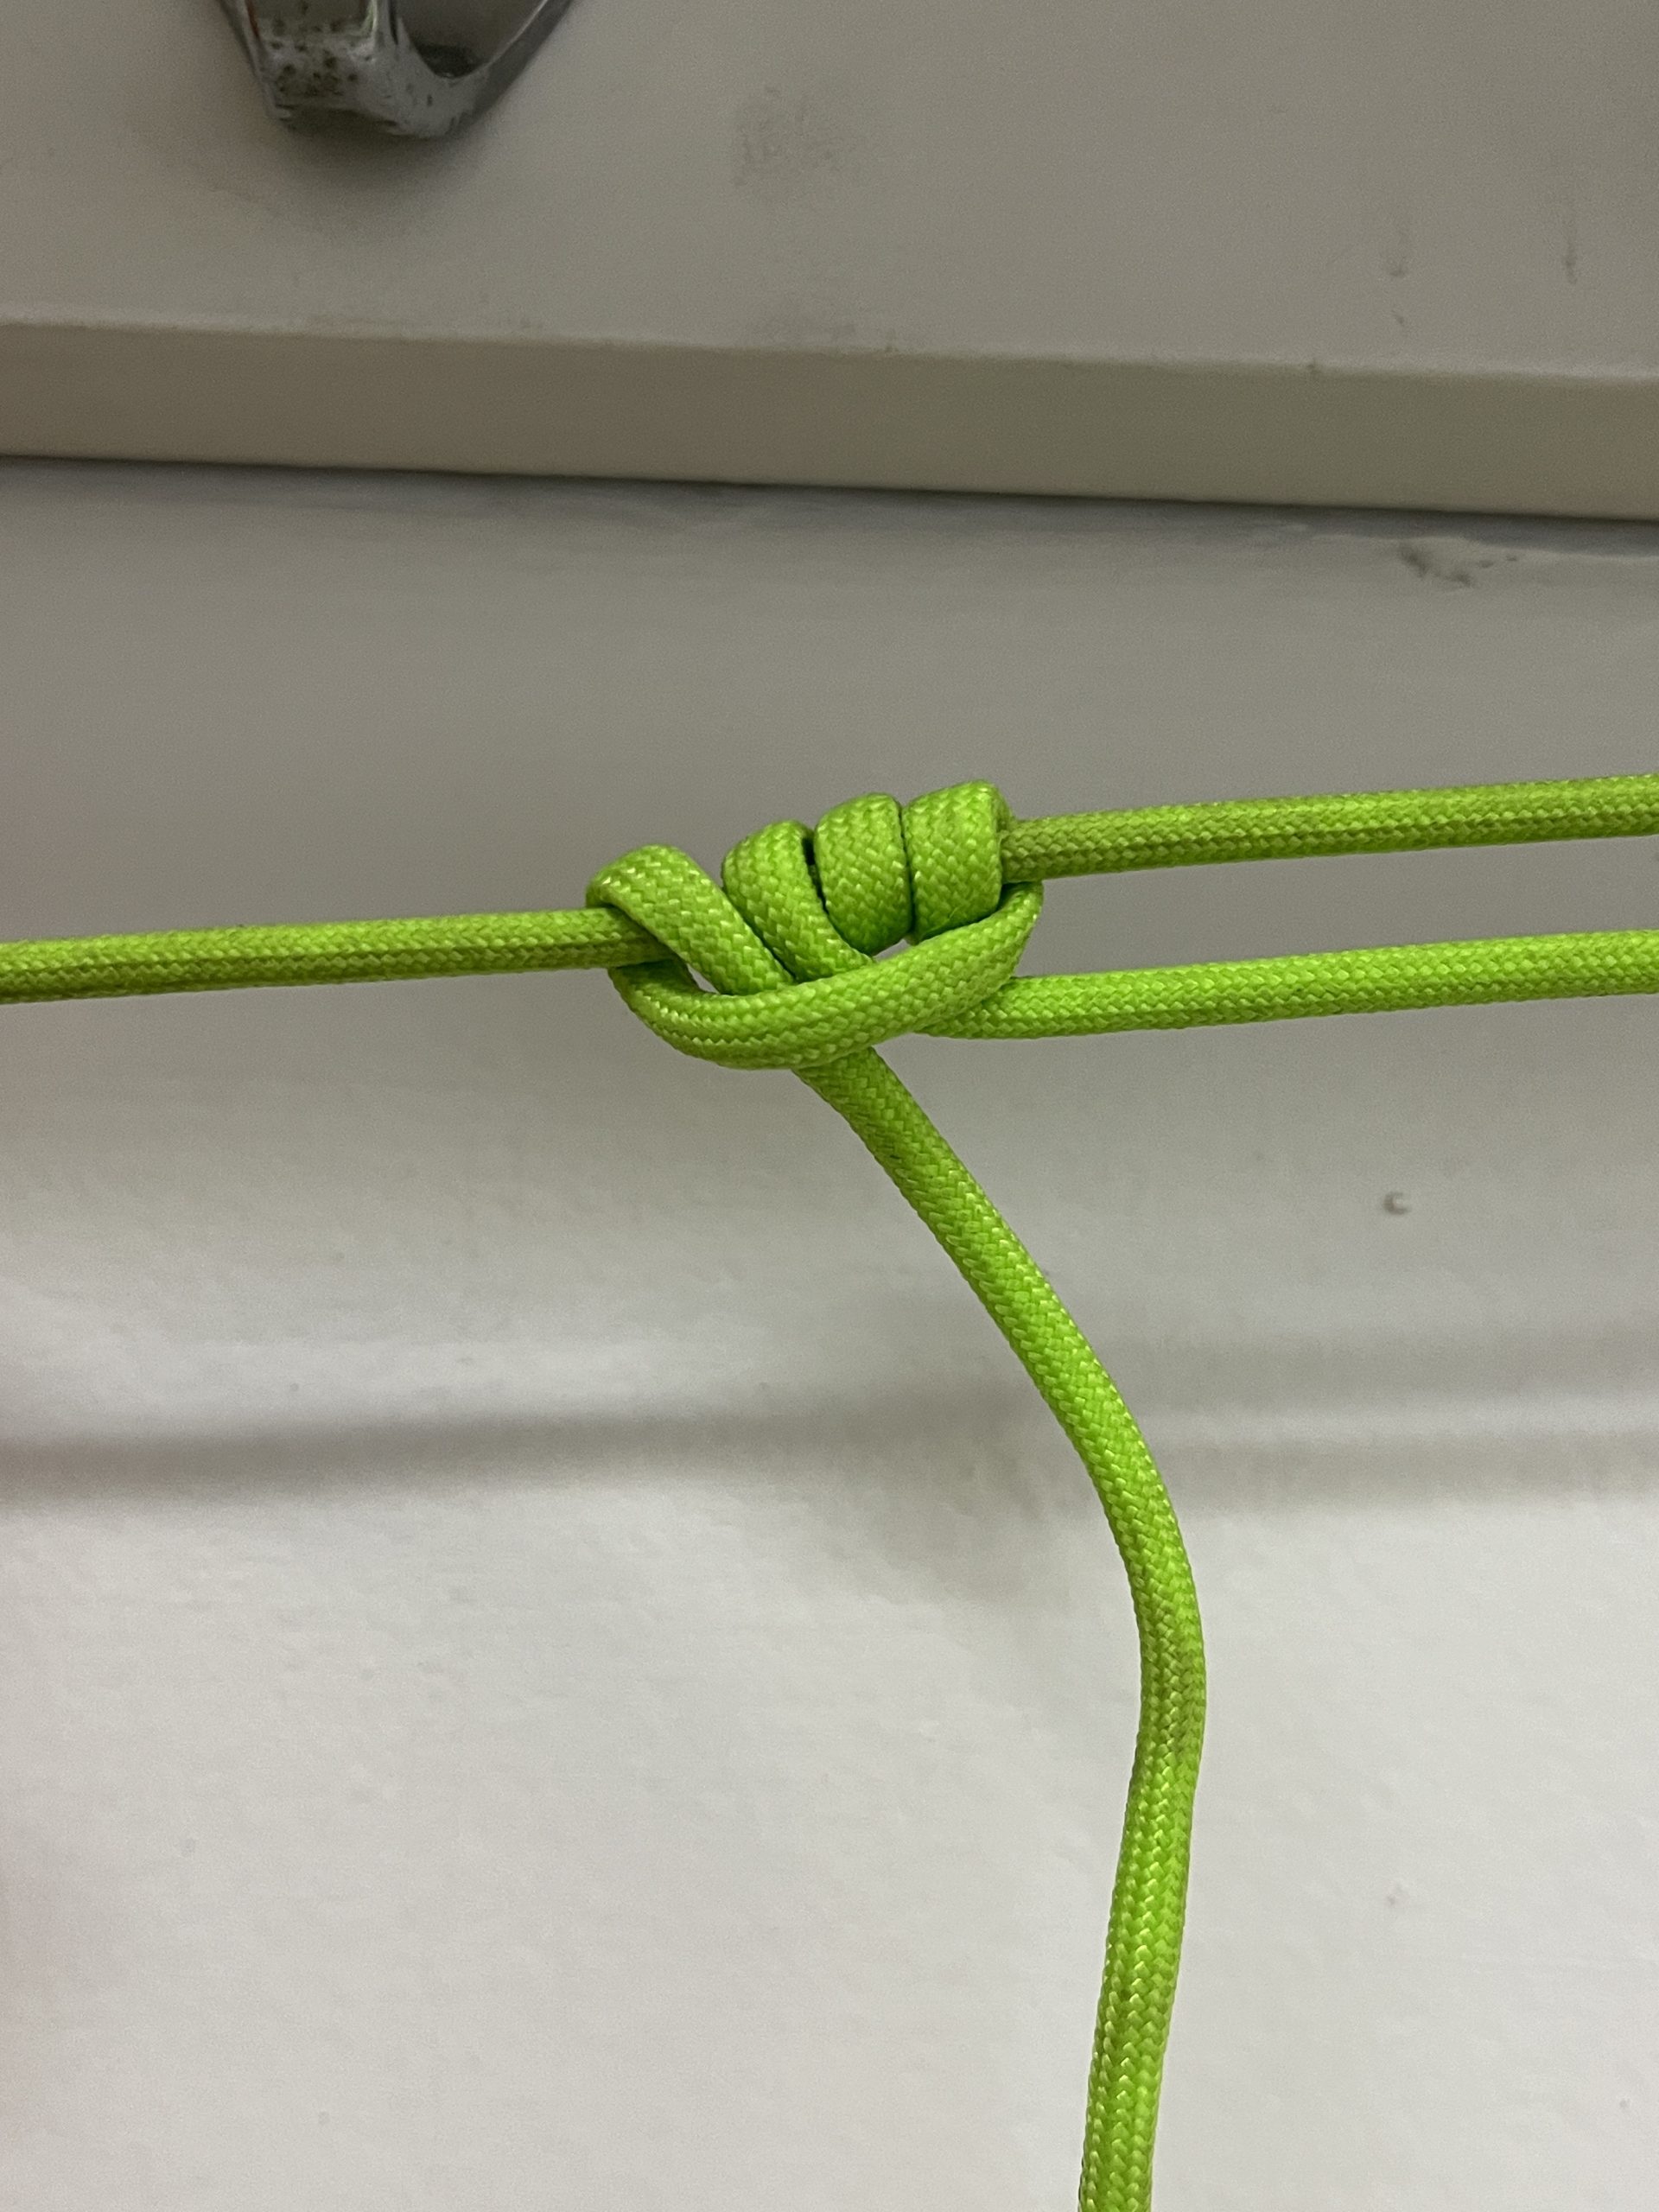
Mainly used for securing tent lines. Adjustable and can slide, without completely undoing the hitch (unlike the trucker’s hitch).
 Put line you want to tighten between two points, create loop at the end where you will tighten.
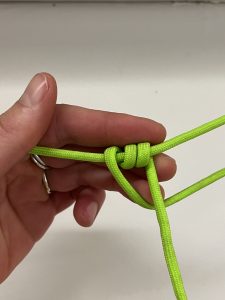 Wrap working end around original standing end 2-3 full times, working up towards the point you’re tightening off of.
 Take the working end and create a cross below the small loops, further away from the tightening point.
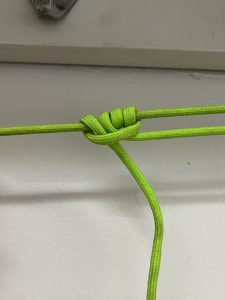 Put working end back down through the final loop created, so that the working end is parallel to the original loop. Cinch down and dress. Can be adjusted by moving the hitch while holding the original line.

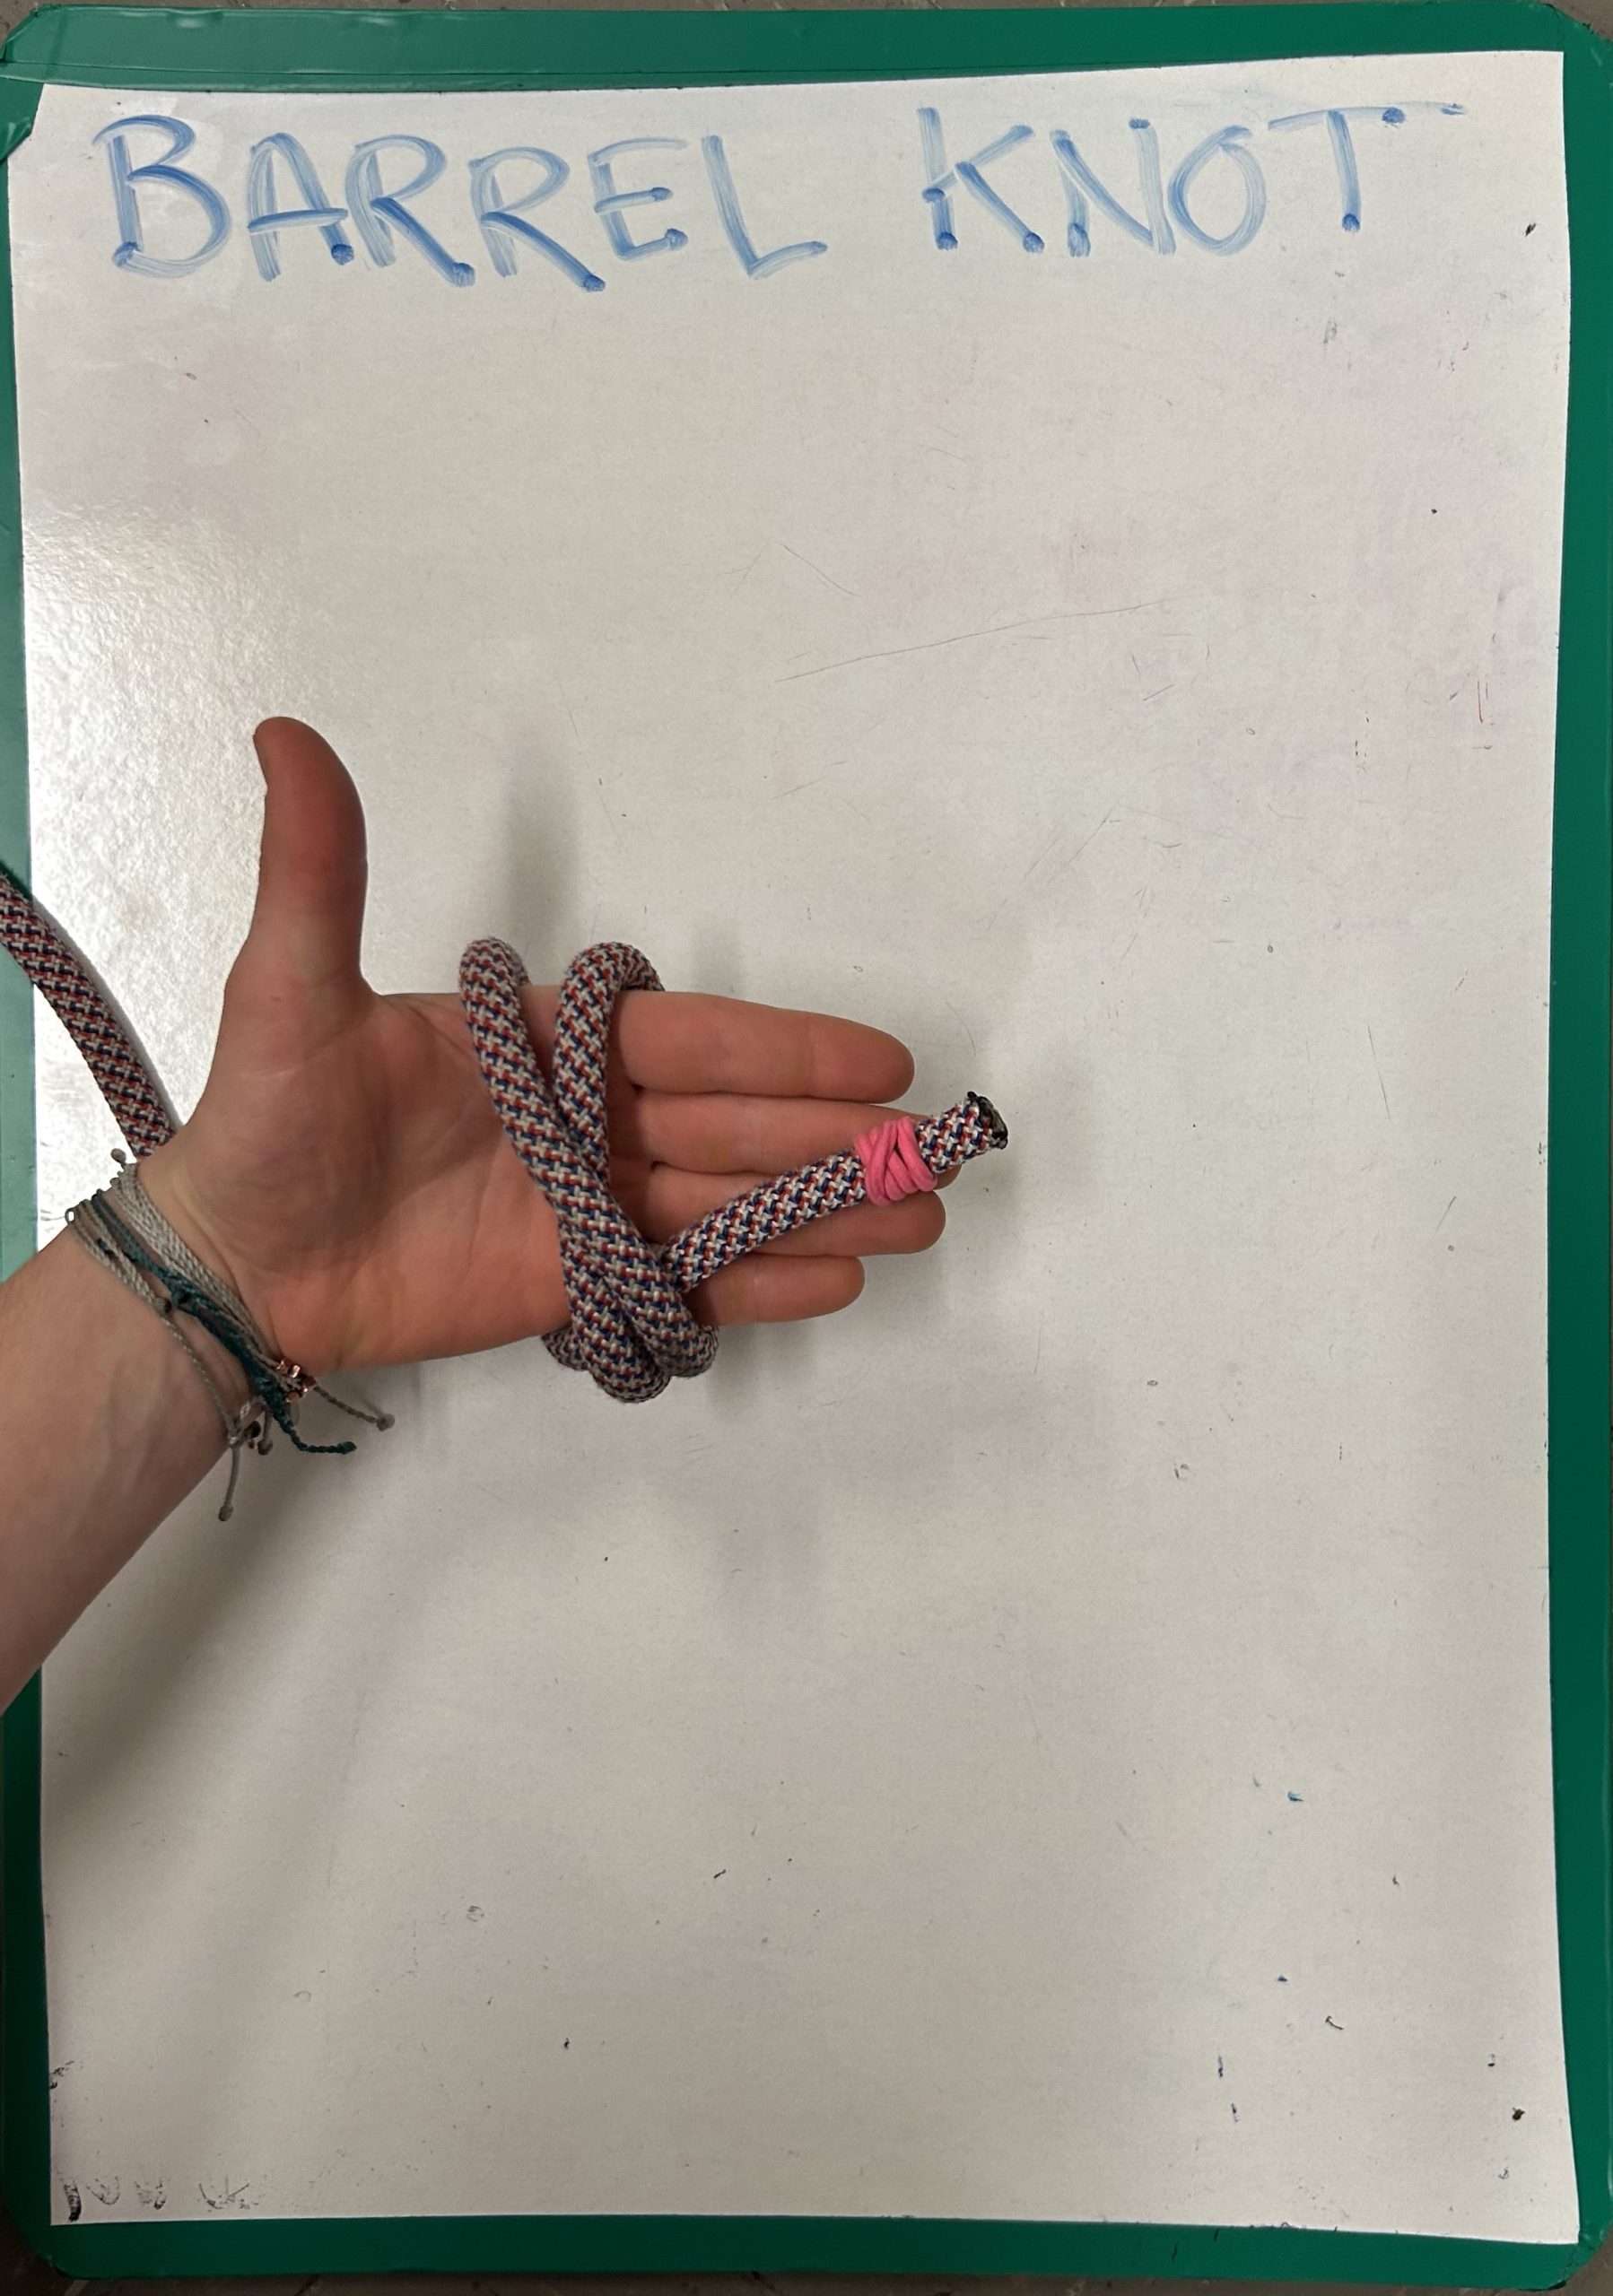
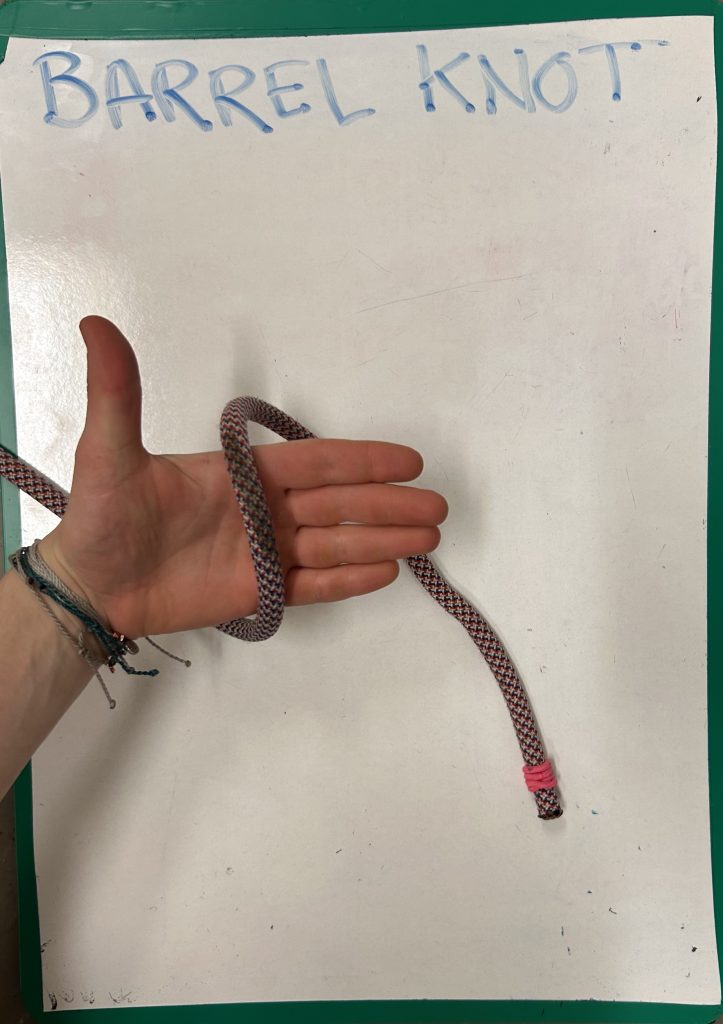 Hold rope across hand, with the working end towards your fingers.
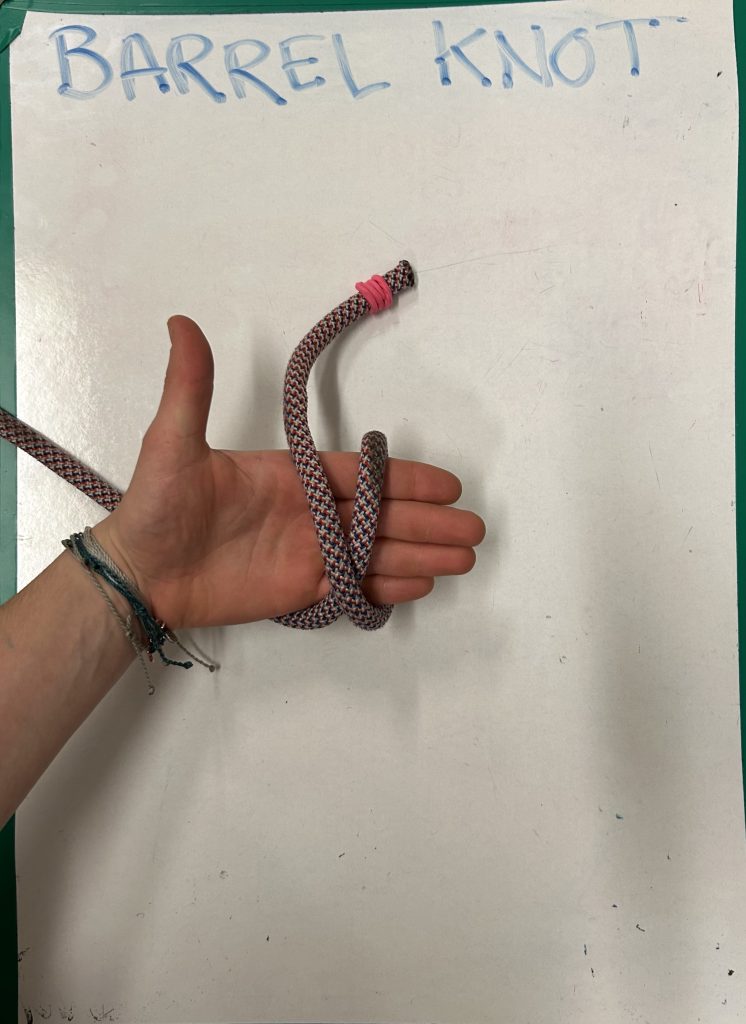 Bring the working end around your hand and across your palm, forming and X.
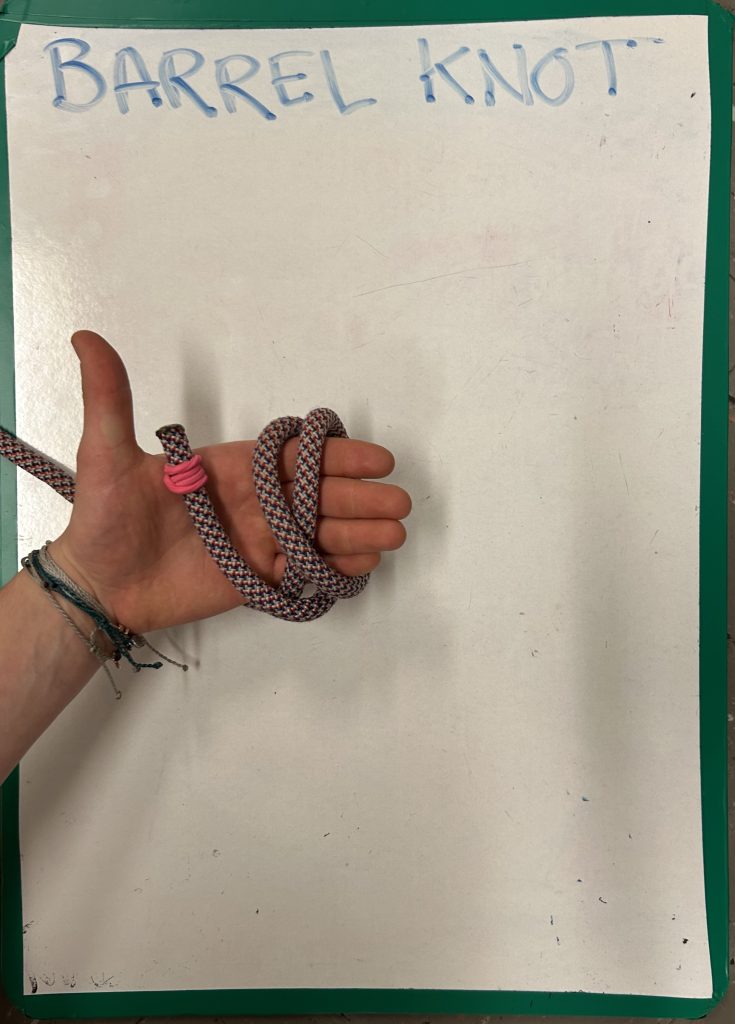 Bring the working end around your hand once more, following the same path.
 Feed the working hand under both strands of rope, pulling it through the loops your hand are holding.
 Pull working and standing ends of rope tight, dress as needed.


Stopper knot. Way to close a belay system and prevent rope from accidentally being fed through belay device. Friction knot and will self tighten.
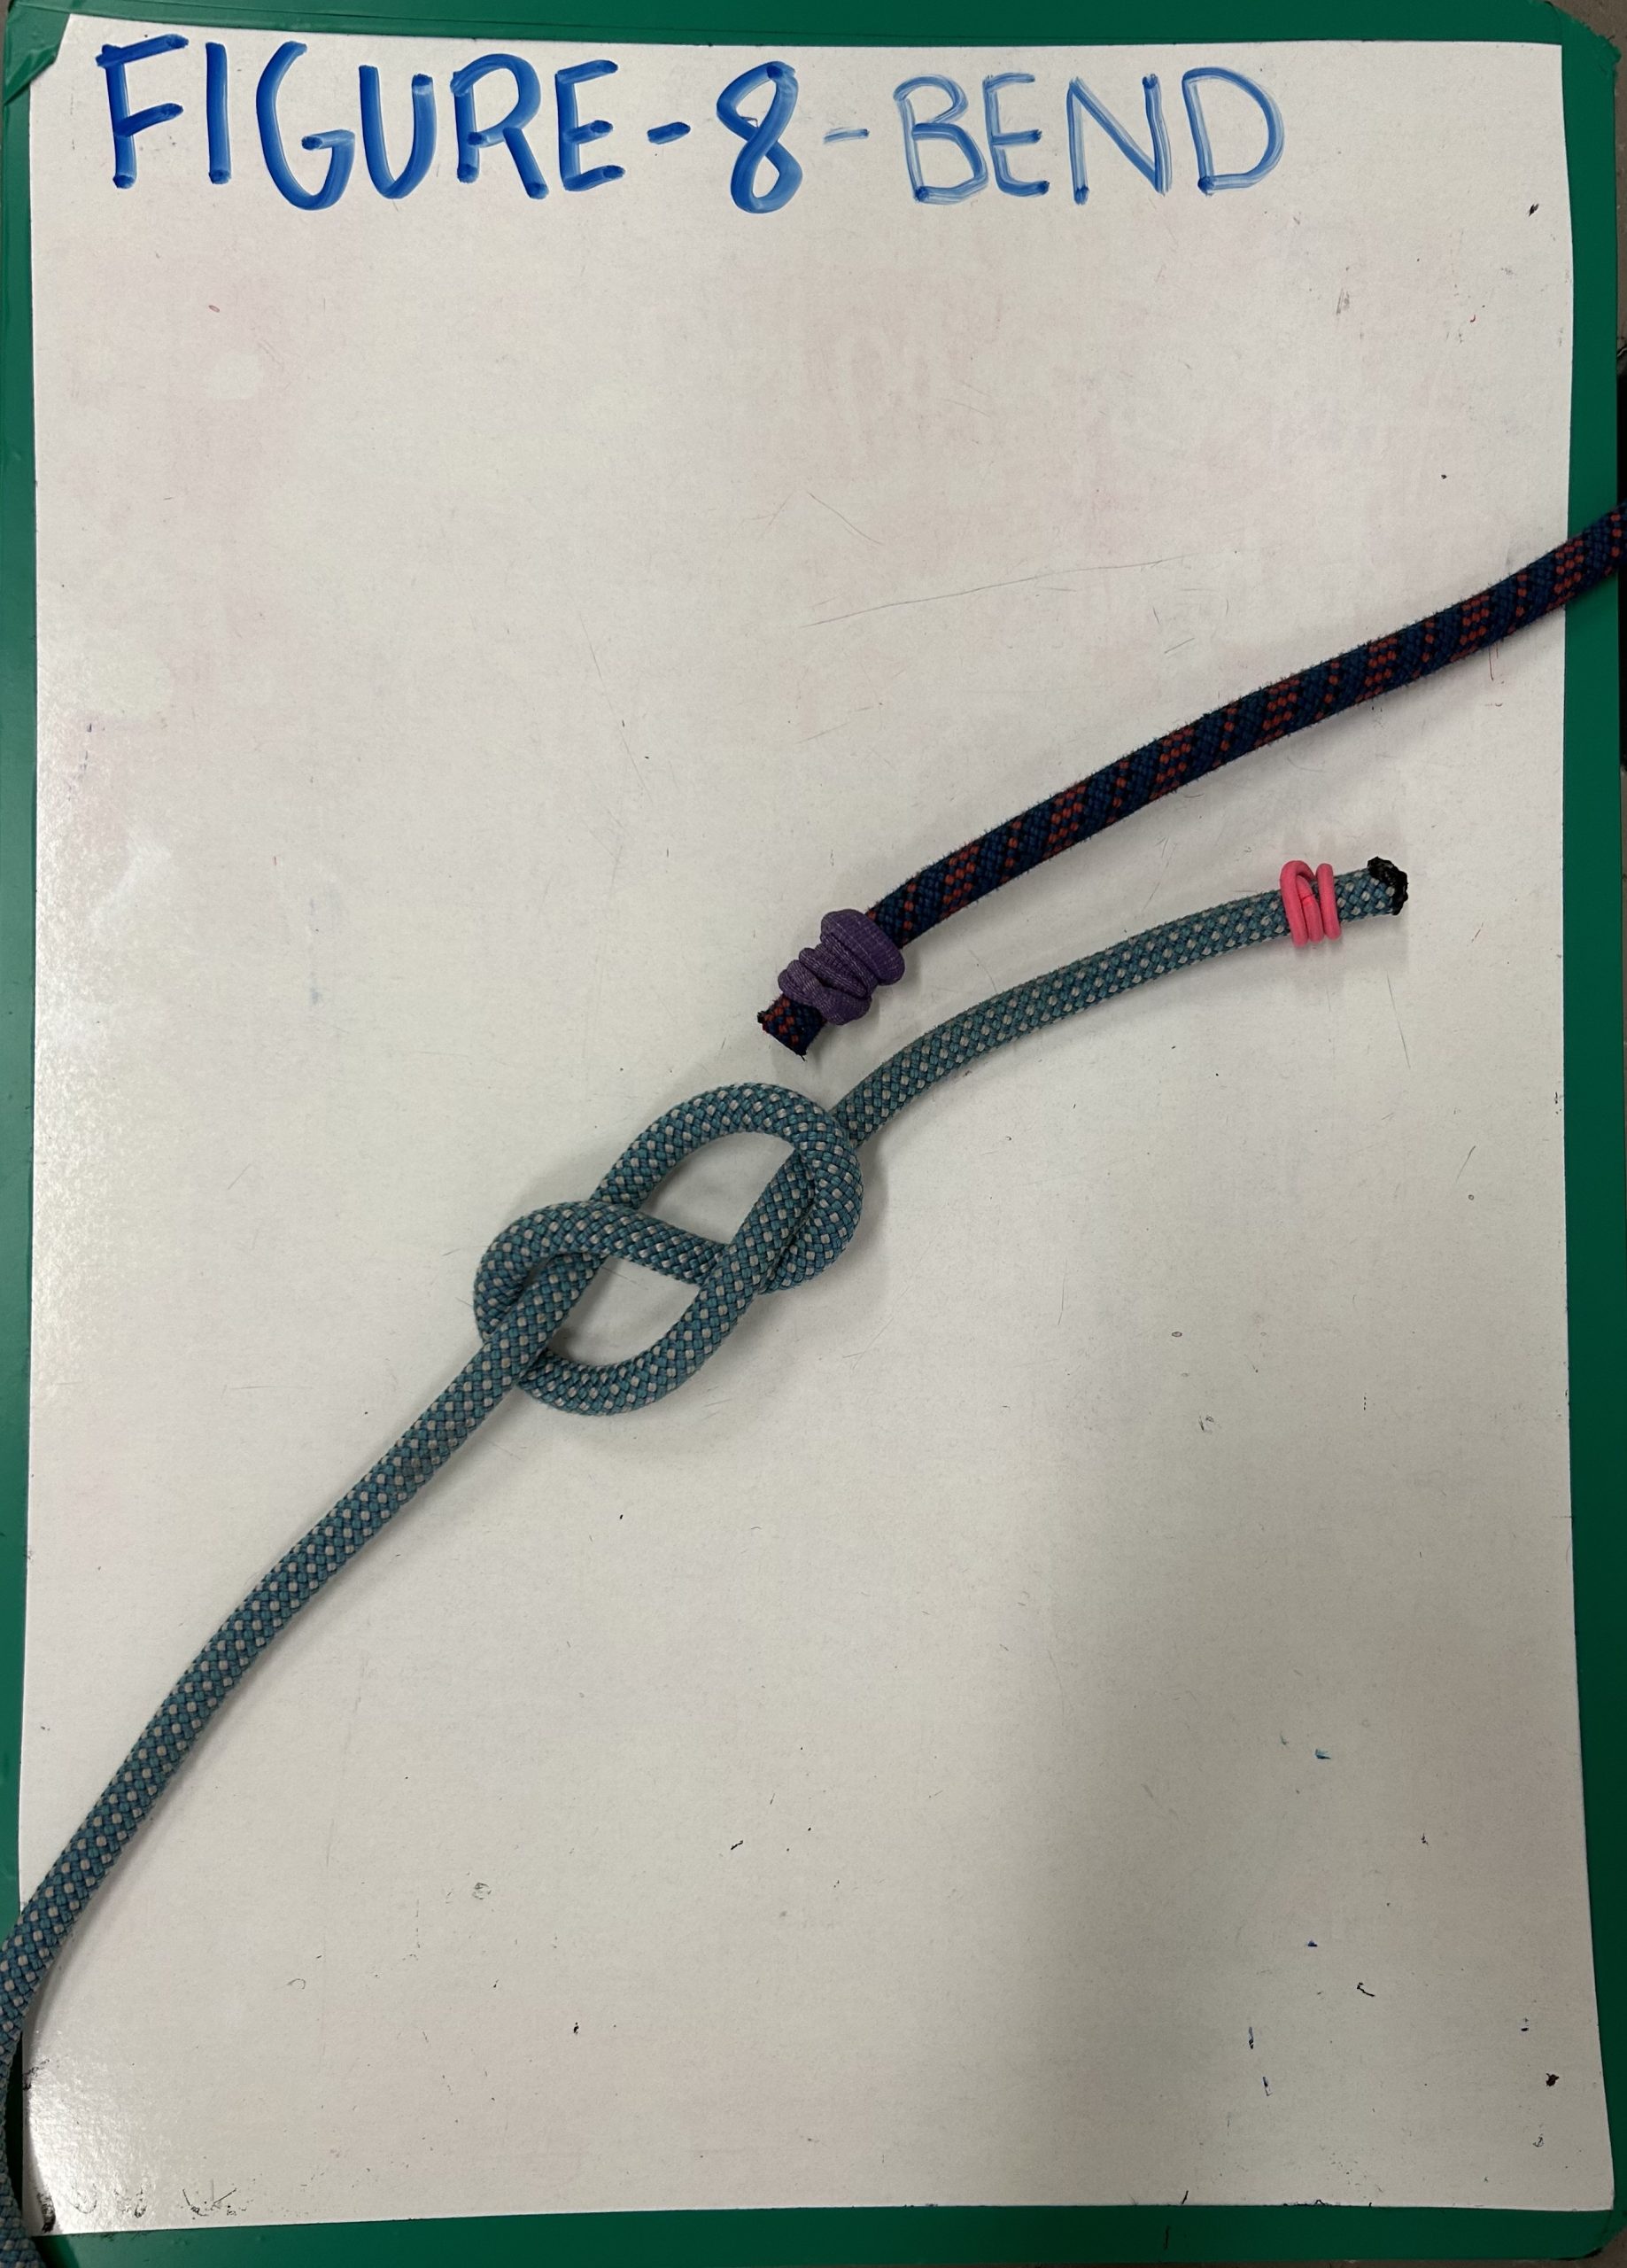
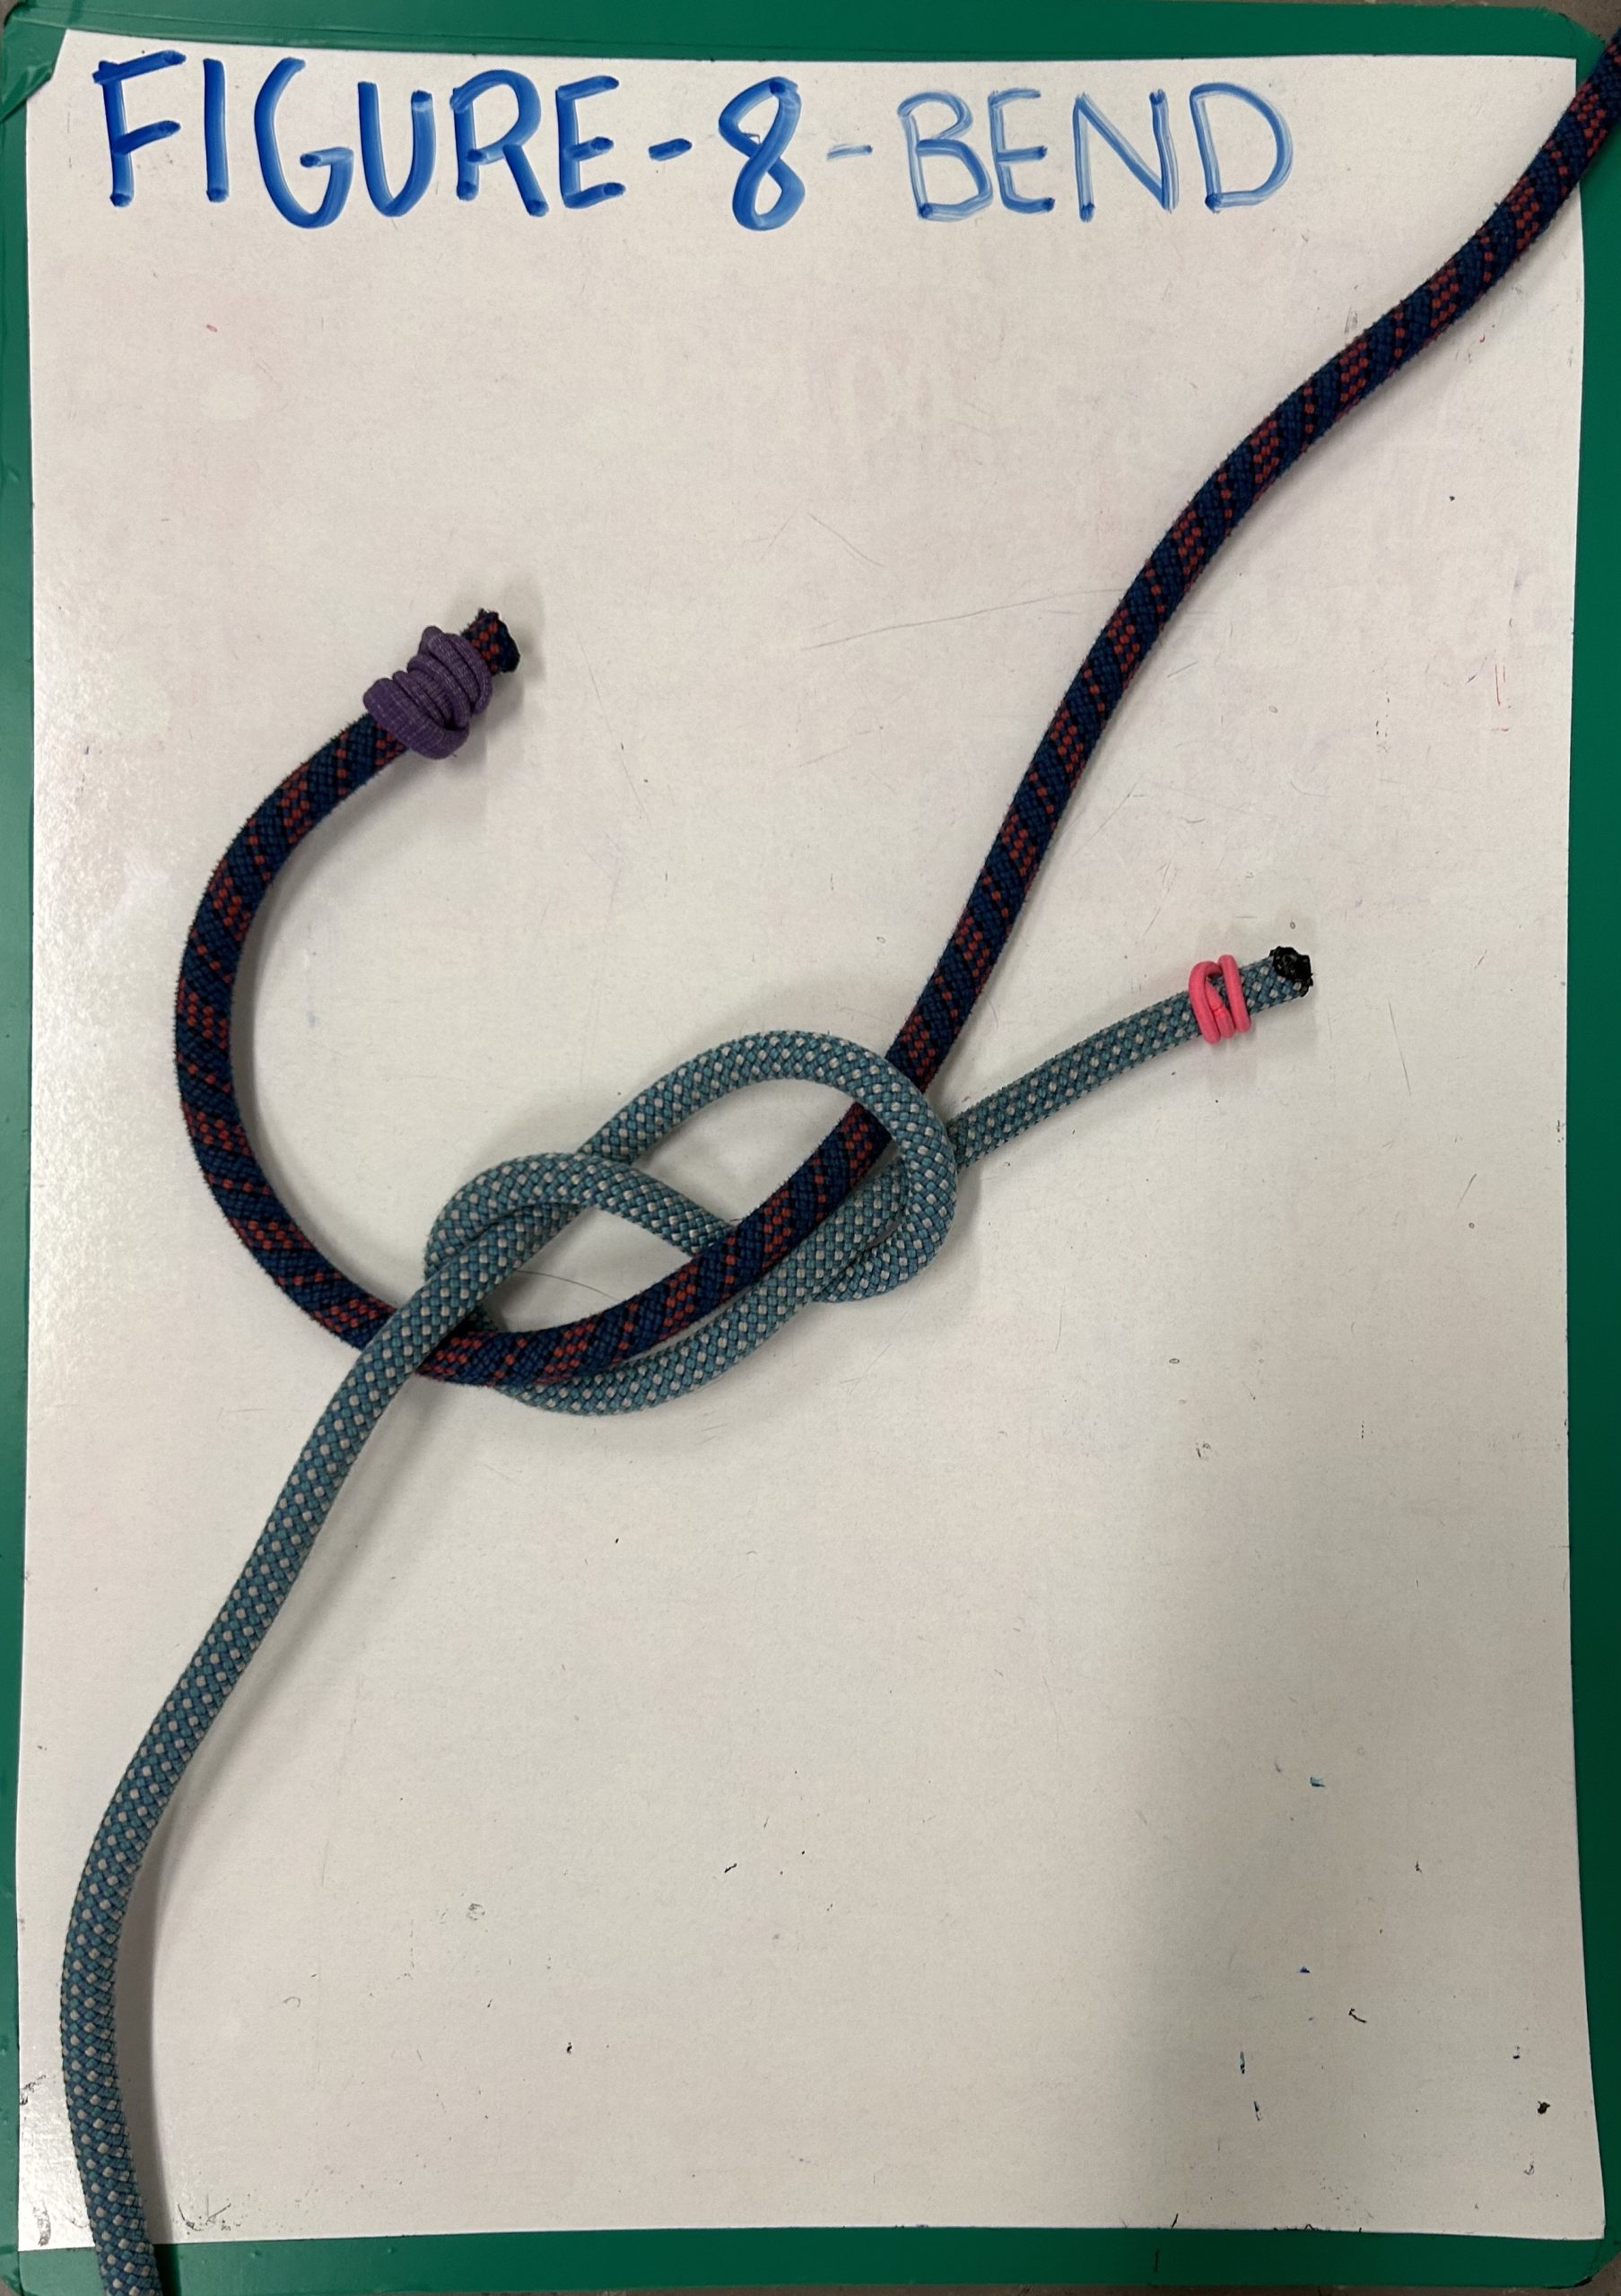
Safe and easy way to join two ropes of same thickness together.
 Make figure-8 at end of one rope, leaving at minimum three inches of tail.
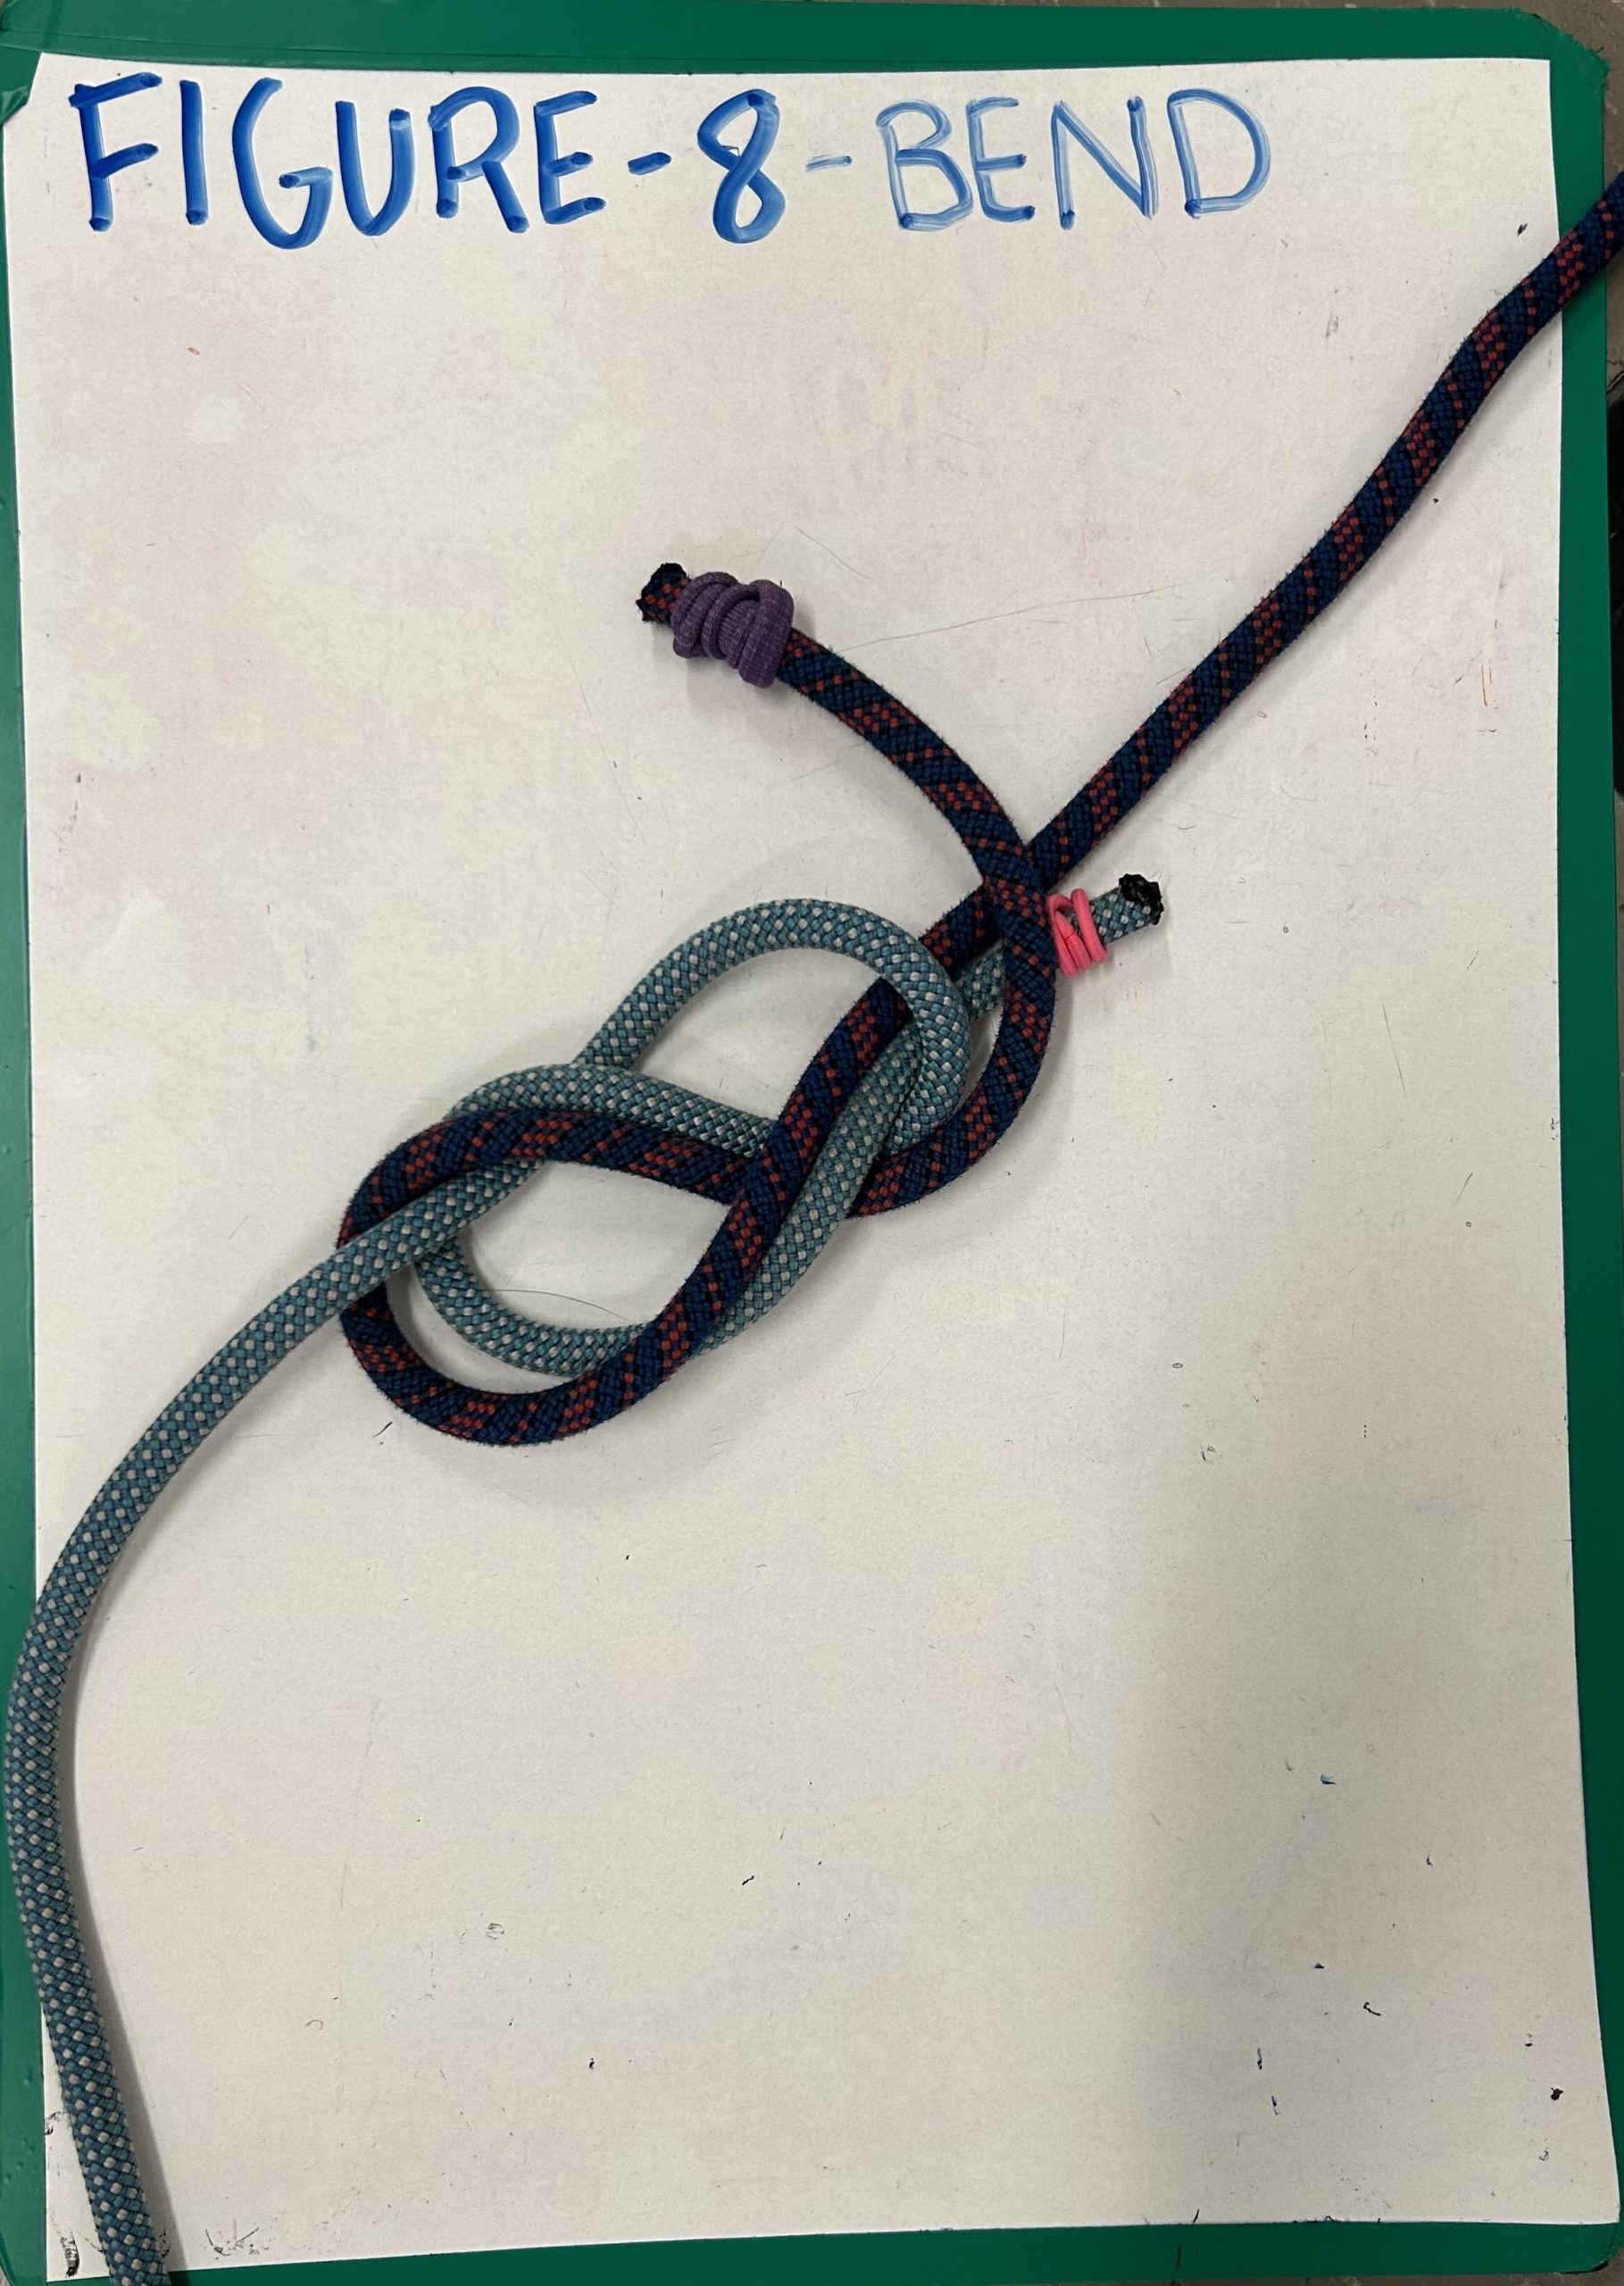
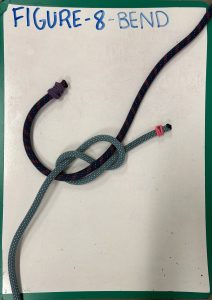 Feed other rope into the figure-8, starting at the tail of the other rope and going in the opposite direction.
 Trace figure-8 completely with second rope.
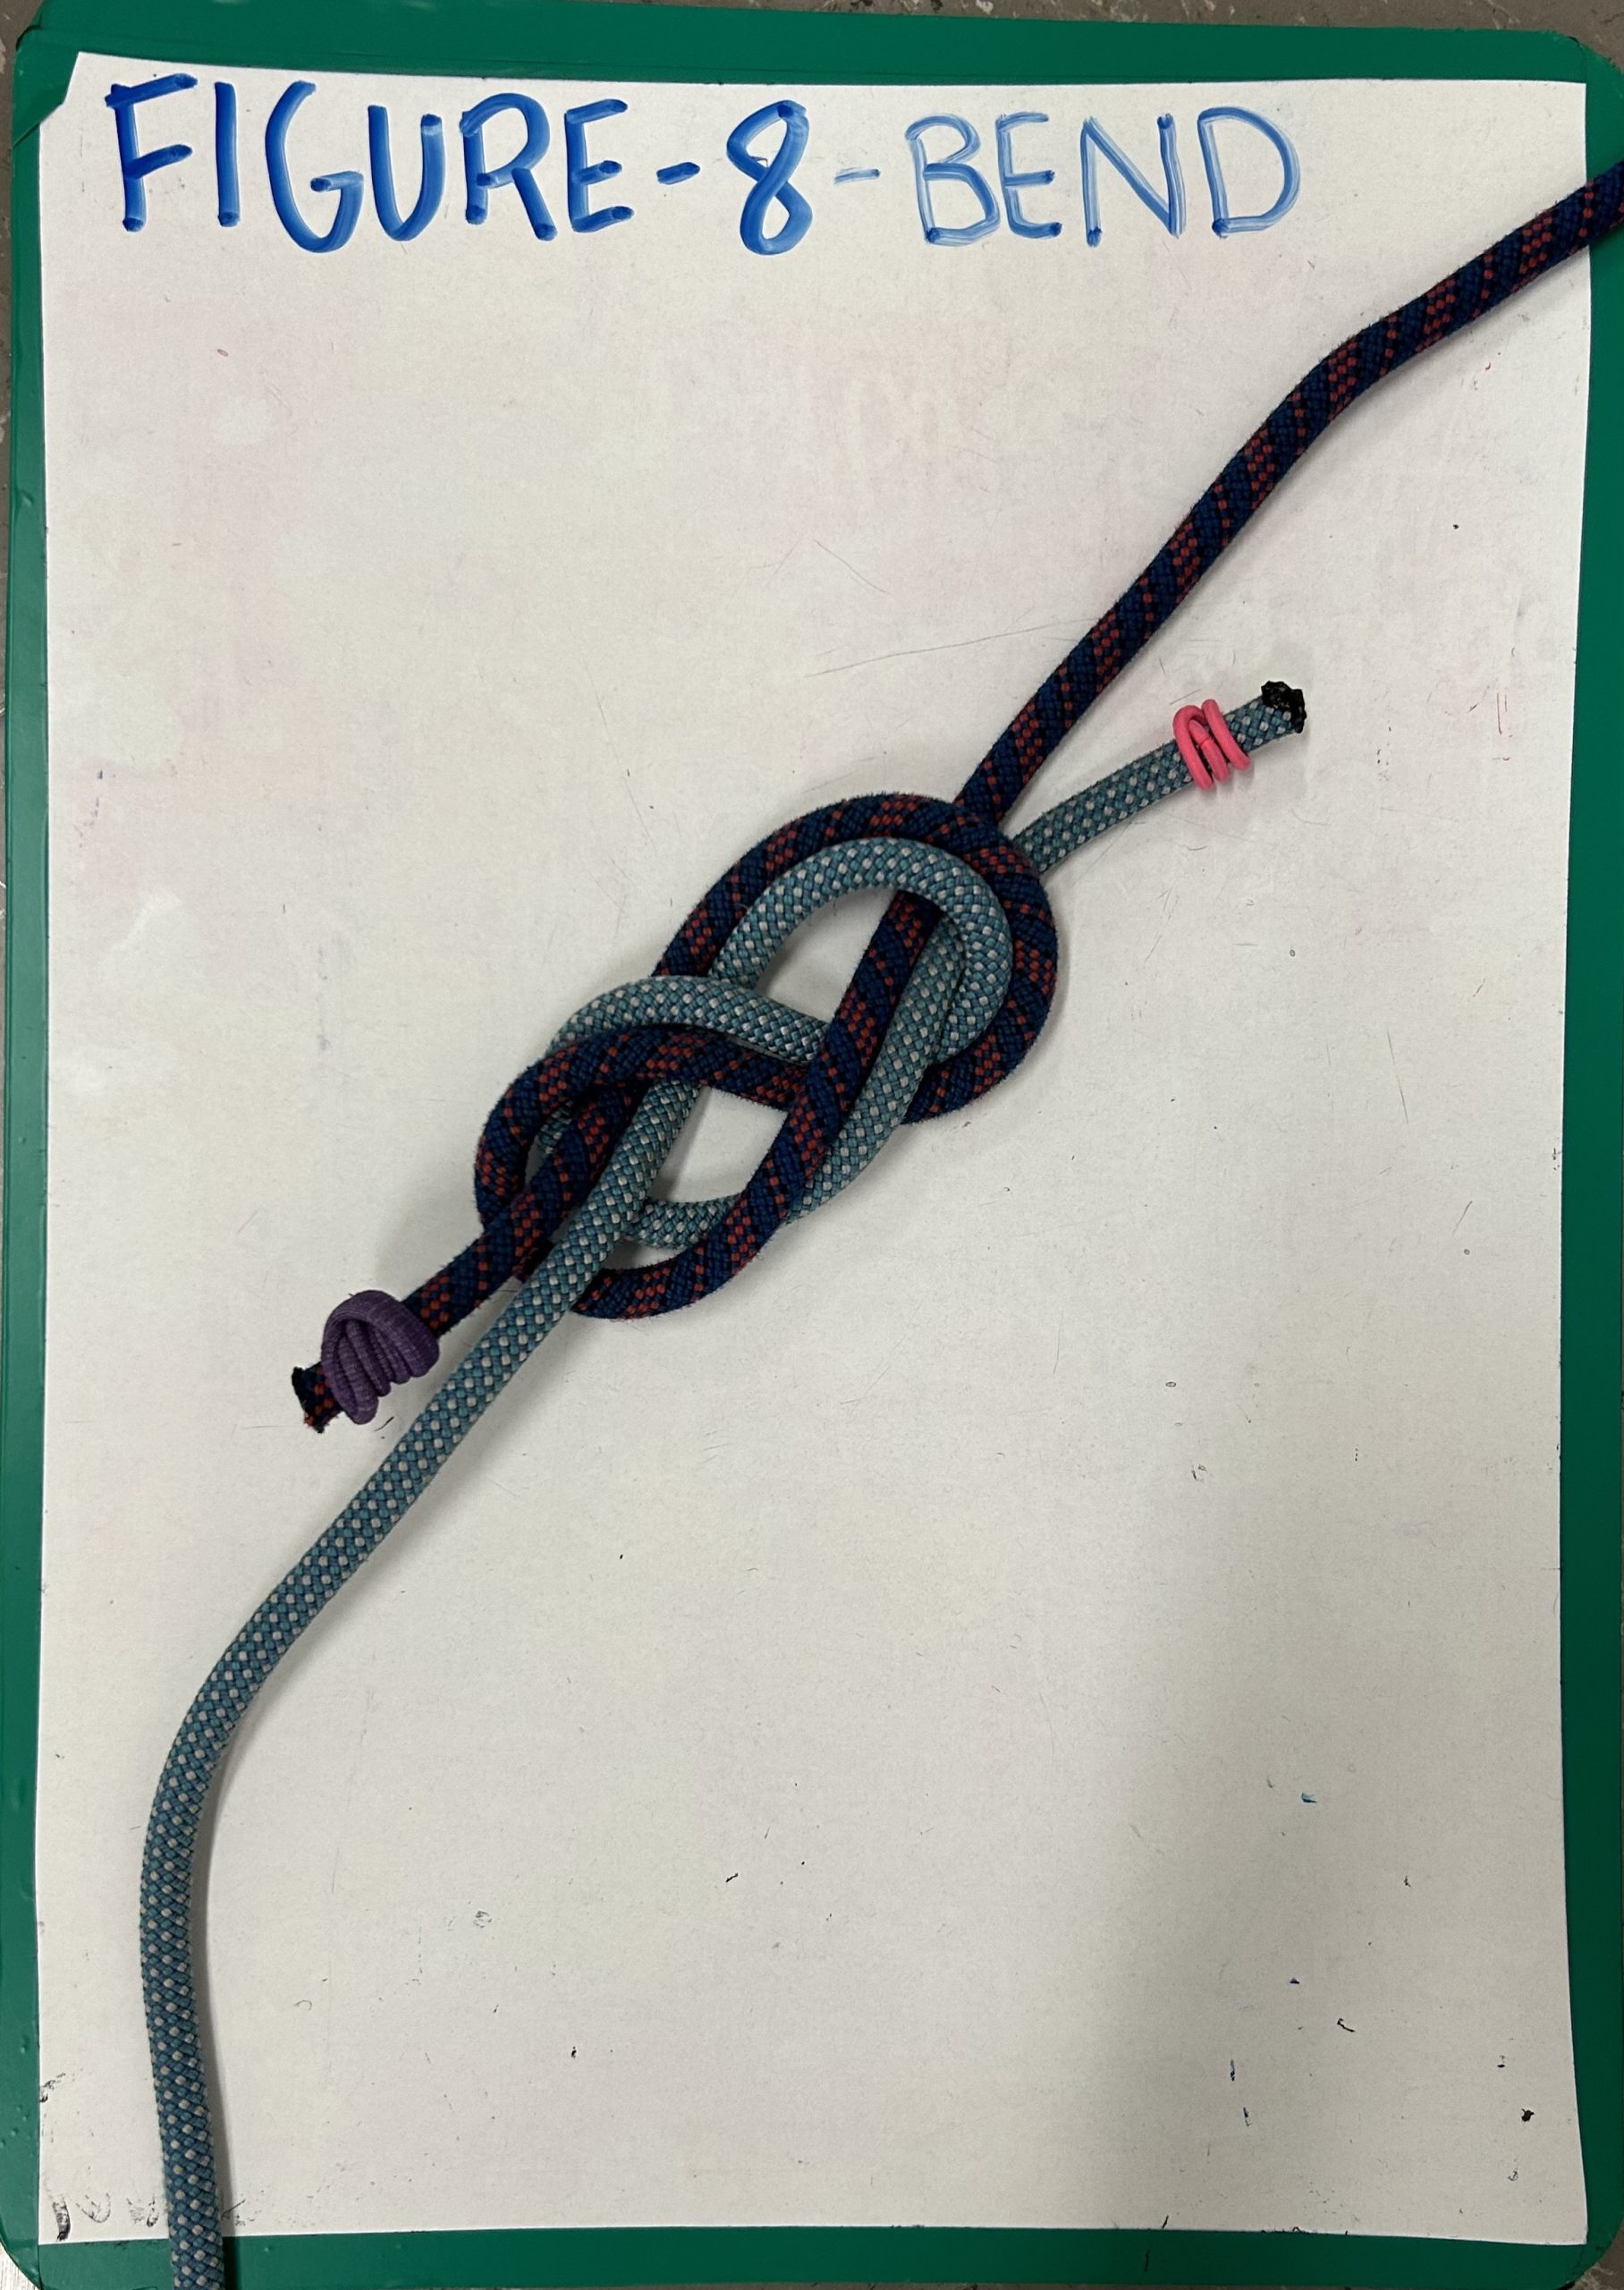
 Keep tracing, working end should be parallel to the standing end of the first rope.
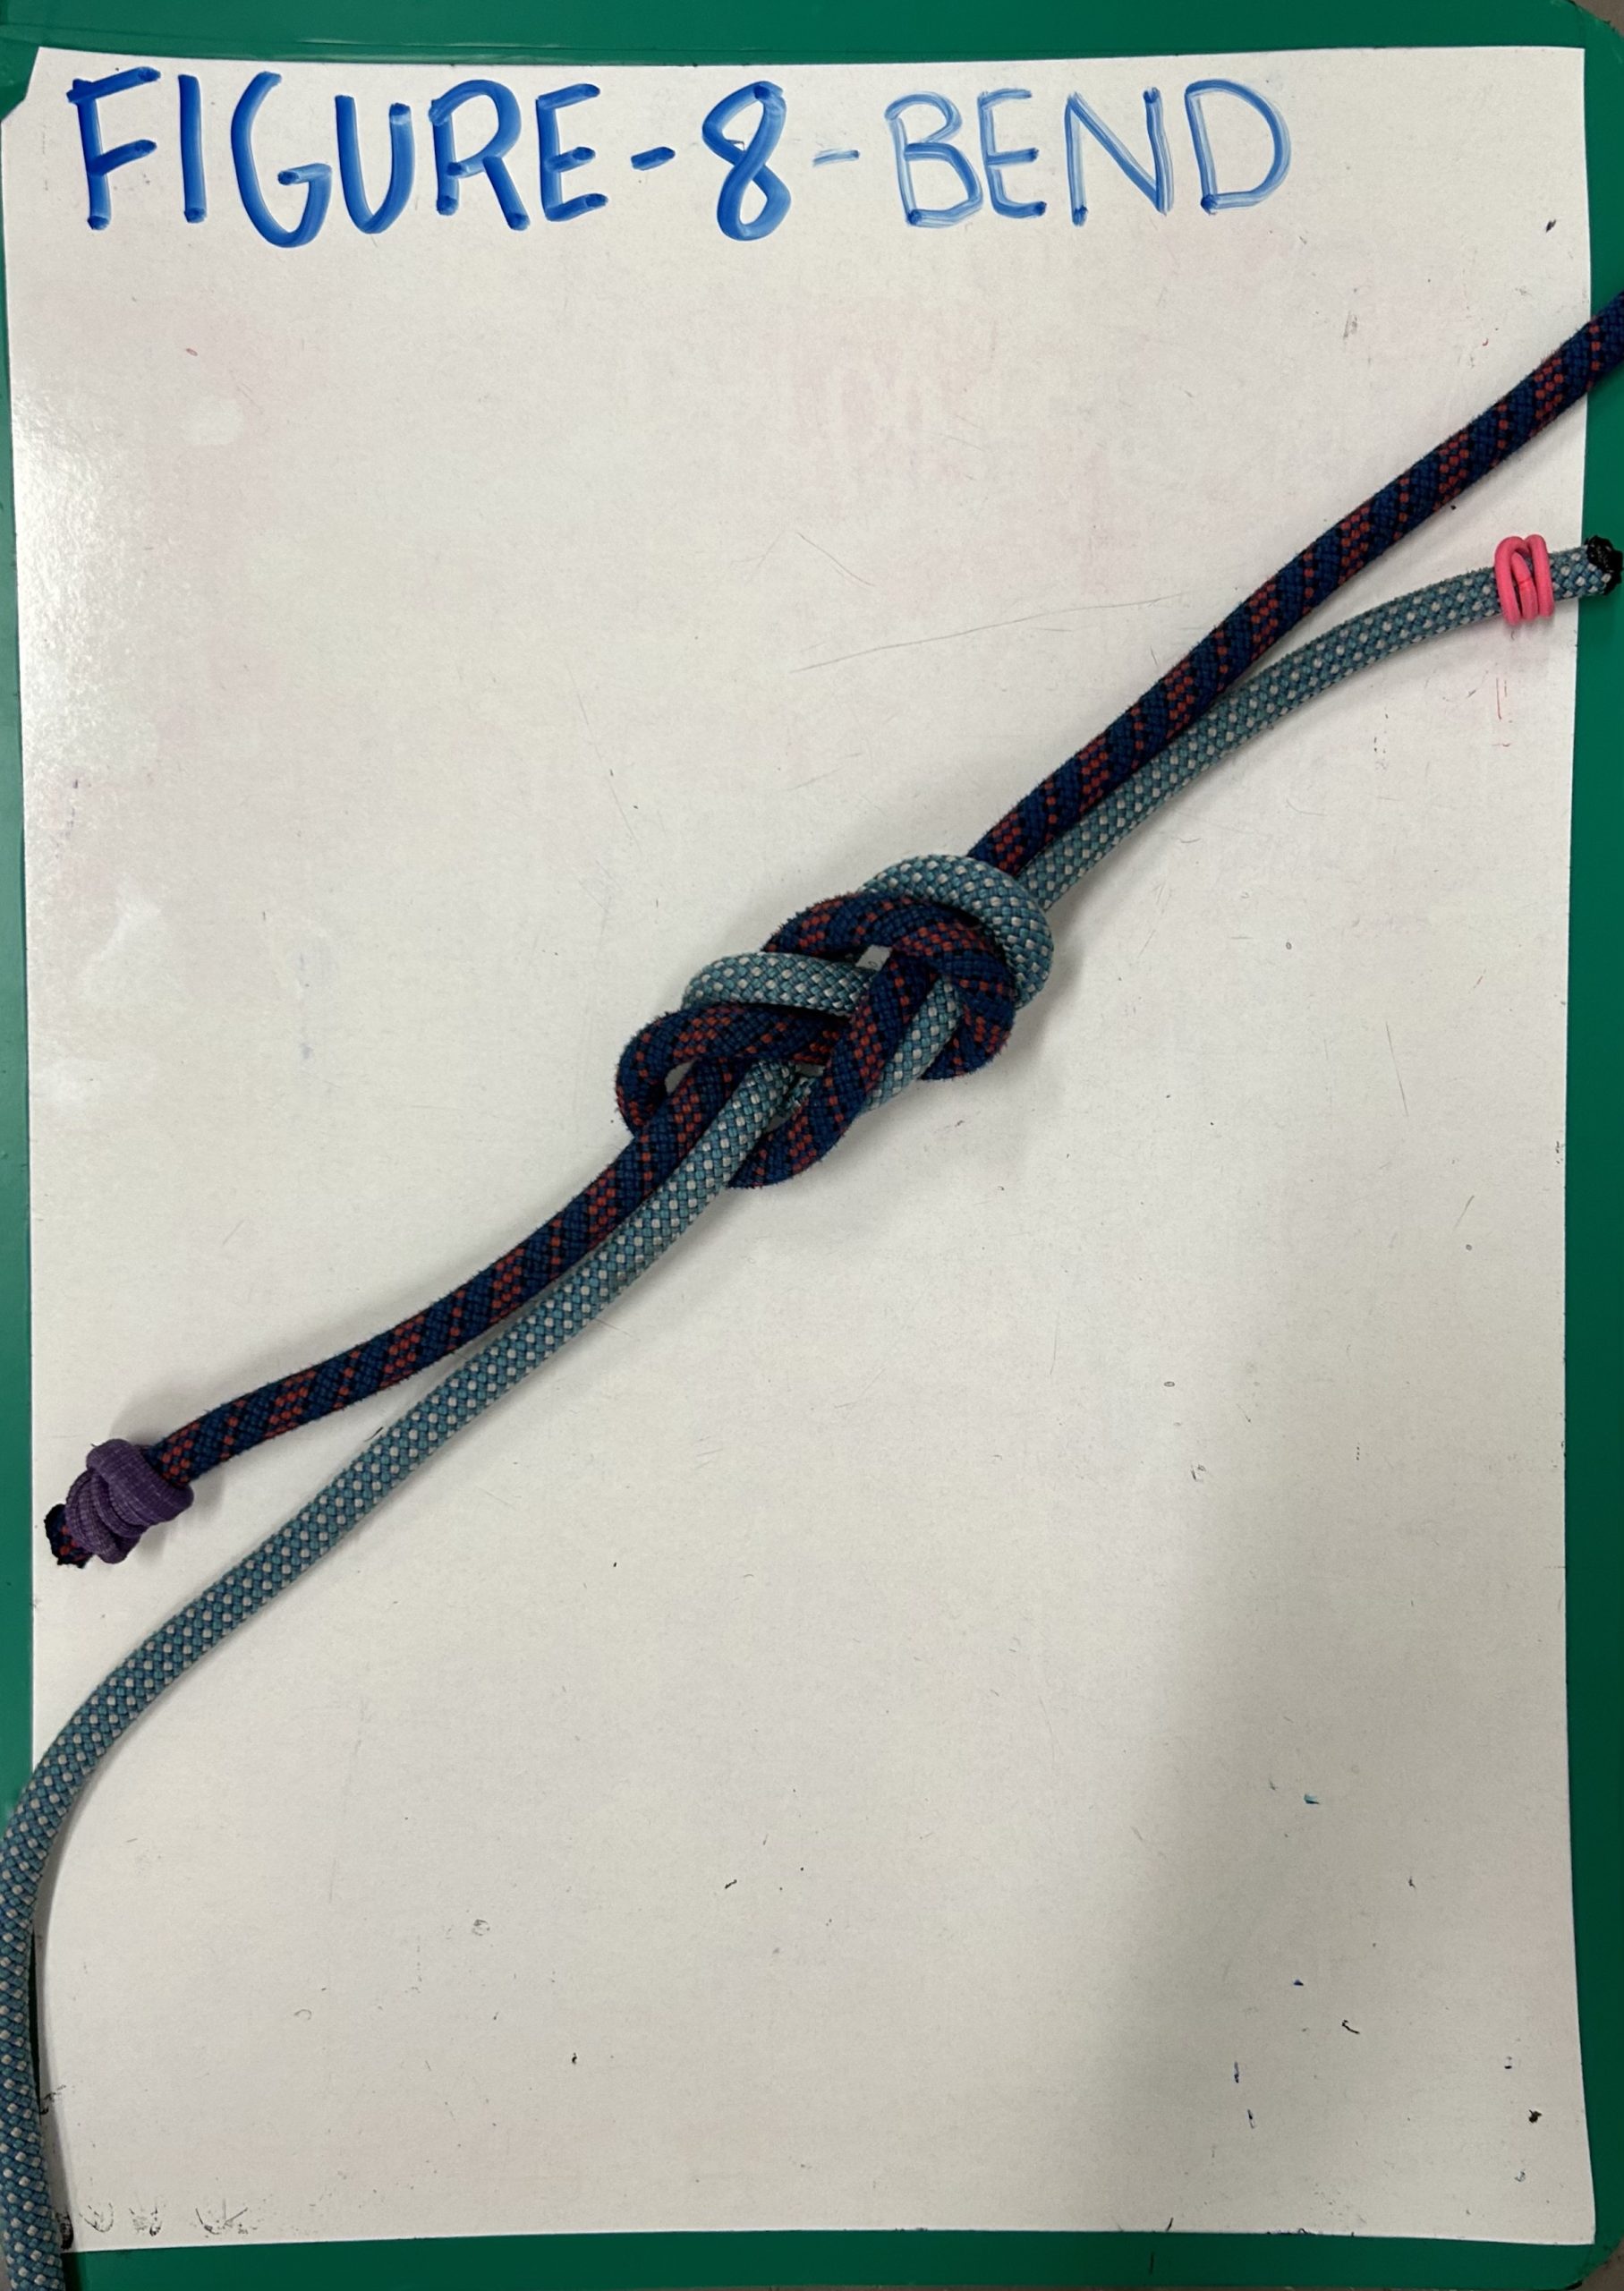
 Pull through and tighten. Dress as needed. Make sure there are five pairs of rope.
A figure-8 follow-through knot is a critical knot to know for rock and ice climbing. It is often used for tying in a climber from their harness to the climbing rope.
 Step one: Create a figure-eight with the rope.
 Step two: Wrap the rope around your support and pass it under the loop.
 Step three: Follow the figure-eight with the rope
 Step four: Continue following the figure eight and pull the tail through.
 Final step: pull the tails to tighten, making sure you have 10 sections of rope.