Wabanaki Bookmark Project
One of the first basketry projects Wabanaki children learn to make is a bookmark. This activity introduces students to Wabanaki basketry by making a traditional bookmark from readily available materials. The use of partners is recommended for this activity. Preparation of materials should be done by the teacher or parent prior to beginning the activity.
Preparing Materials:
You will need:
- Brown or tan poster board or light-weight cardboard (not corrugated)
- Black, brown or tan raffia (papery cord found at craft stores)
- Scissors
- Rulers
Before you begin:
Cut strips of cardboard 12 inches long by 1/4-inch wide. Twenty students will require approximately 55 strips. Take 35 of these strips and cut them into 4-inch lengths.
Instructions
To start:
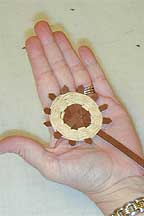
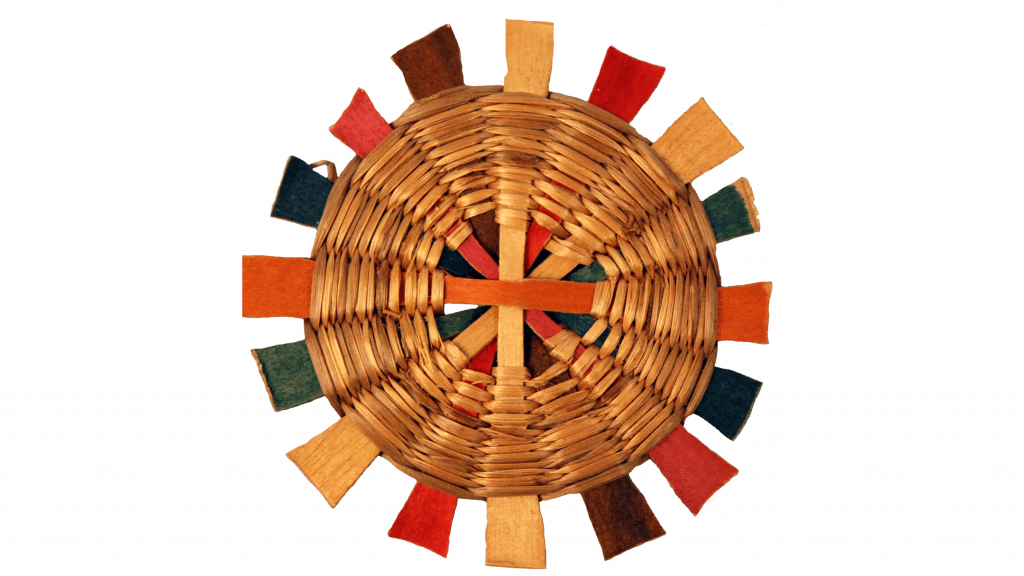
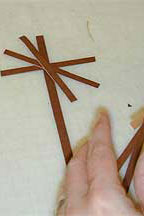
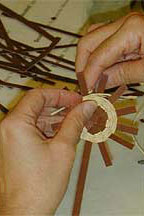
- On a flat surface place a long strip down first. This will form the stem of the bookmark.
- Place five shorter strips in a radial pattern centered around 2 inches from the top of the stem.
To weave:
- With a firm grip to hold the strips in place, begin weaving a piece of raffia around the strips in an over and under pattern. A thicker pieces of raffia will be easier to weave than a narrower piece. To start, the weaving pattern is over one, under one.
- Once you return to the start, weave under two strips, then continue in the over one, under one pattern. Repeat this pattern until the raffia runs out.
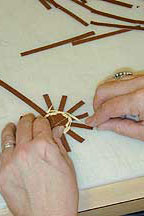
- To start a new piece of raffia, hold the raffia where the ends of the two pieces meet and continue weaving in the same pattern. Once you have gone around twice, the ends will be locked into place and the excess can be trimmed.
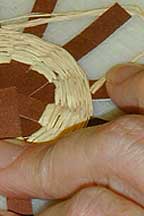
- Continue weaving in new strips of raffia until you have 3/4-to-1 inch of weaving completed.
To finish:
- With approximately 3 inches of raffia left, slide the end of the cord under the woven section closest to the stopping point in the weave. To make this process easier, wet the end of the raffia slightly and push it under the weave using another piece of thin cardboard or the end of a nail file. Once the end is under the weave, gently pull it snug and trim the excess.
Pointing:
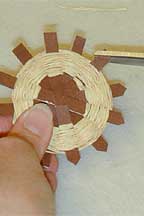
- Trim the ends of the short strips so there is approximately 3/8 inch of cardboard remaining.
Remember! Don’t trim off the stem!
- Go back around the short strips and cut the ends into angled points.
This activity may present some dexterity challenges for students. To facilitate the weaving, teachers may wish to glue the smaller strips into place on the stem before students attempt weaving.