Bulletin #2751, Starting Seeds at Home

Developed by Marjorie Peronto, Extension Professor; and Theresa Guethler, Extension Master Gardener.
Updated January 2021 by Marjorie Peronto; Frank Wertheim, Associate Extension Professor; and Emma Fournier, Extension Community Education Assistant.
For information about UMaine Extension programs and resources, visit extension.umaine.edu.
Find more of our publications and books at extension.umaine.edu/publications/.
When you grow your own seedlings, you can get a jump on Maine’s short gardening season, and start enjoying flowers and harvesting vegetables four to six weeks earlier than if you had waited for the ground to warm up enough to sow the seeds outside.
Starting your own plants from seed also allows you to choose from the much broader array of varieties offered by seed catalogs. Commercial transplant sellers offer a more limited number of varieties for sale.
Using transplants instead of direct-seeding is especially important for plants that take a long time to mature or are sensitive to frost, such as tomatoes, peppers, eggplants, and melons. Some plants (mostly root crops) do not transplant well, or they mature quickly enough that starting seedlings indoors is not necessary. Vegetables that are typically direct-seeded in the garden include beans, beets, carrots, corn, peas, spinach, lettuce, turnips, and zucchini.
Seeds and Supplies
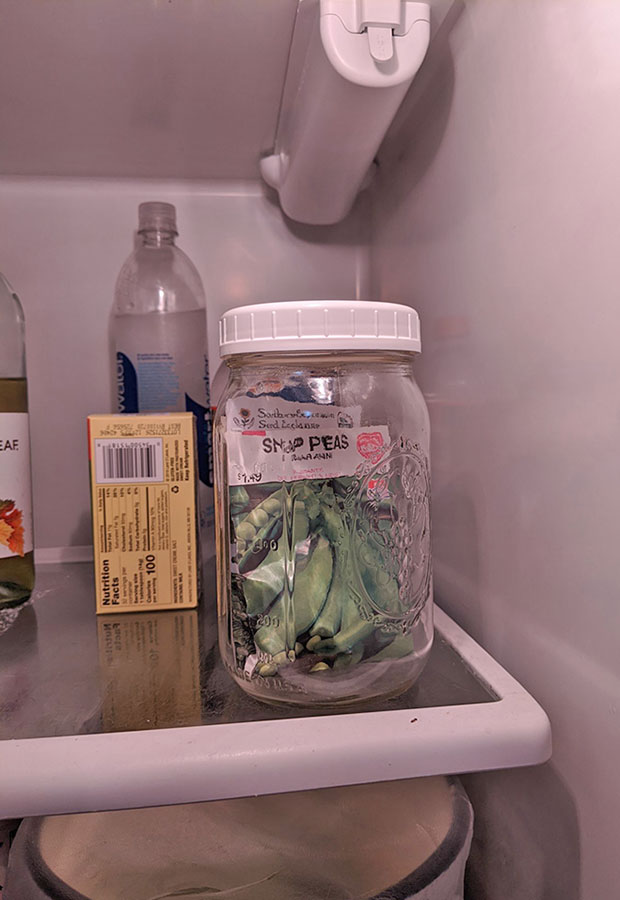
Use fresh seed from a reliable source. Use seeds saved from a previous year only if they have been stored in a cool, dry place. Properly stored vegetable seeds can remain viable for between two to six years, depending on the species. Store your seeds in their original packets in a sealed glass jar in the refrigerator. You’ll have even greater success if you add an antidessicant to the jar.
Containers
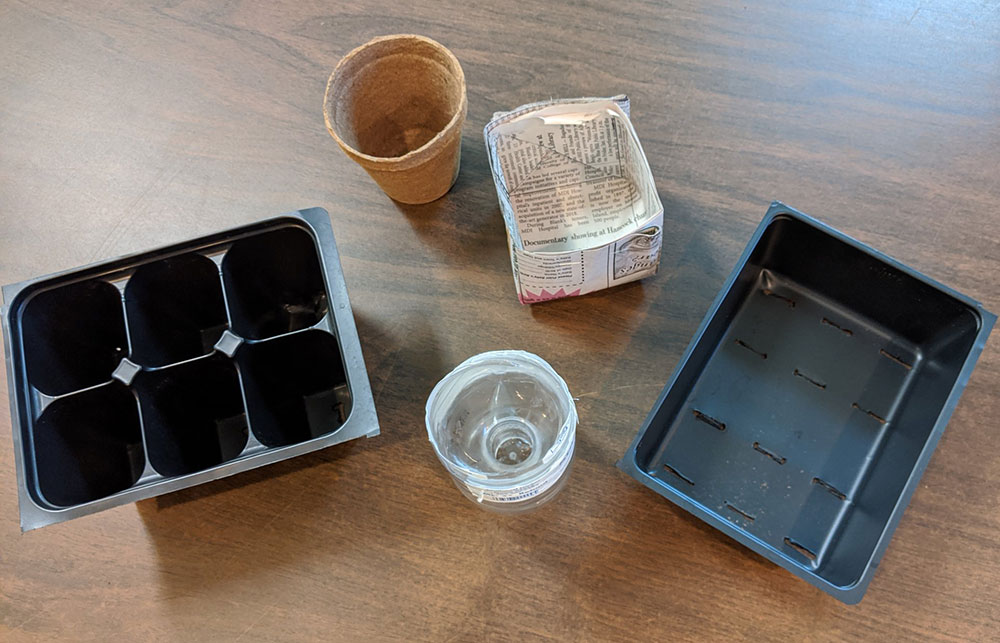
Seeds may be planted in any clean, 2- to 3 1/2-inch deep container with adequate drainage holes. You can use containers made of plastic, compressed peat, or wood, or recycled containers such as the cut-off bottoms of milk jugs. Using shallow trays or flats sold in garden supply stores saves space when you want to start a lot of a single type of seed. The seedlings will need to be separated and transplanted into individual containers as they grow. If you want only a small number of plants, skip this step and direct-seed into small individual pots. Containers that have been previously used for planting should be thoroughly cleaned and disinfected with a solution of one part chlorine bleach to nine parts water. This will help prevent disease.
Growing Medium
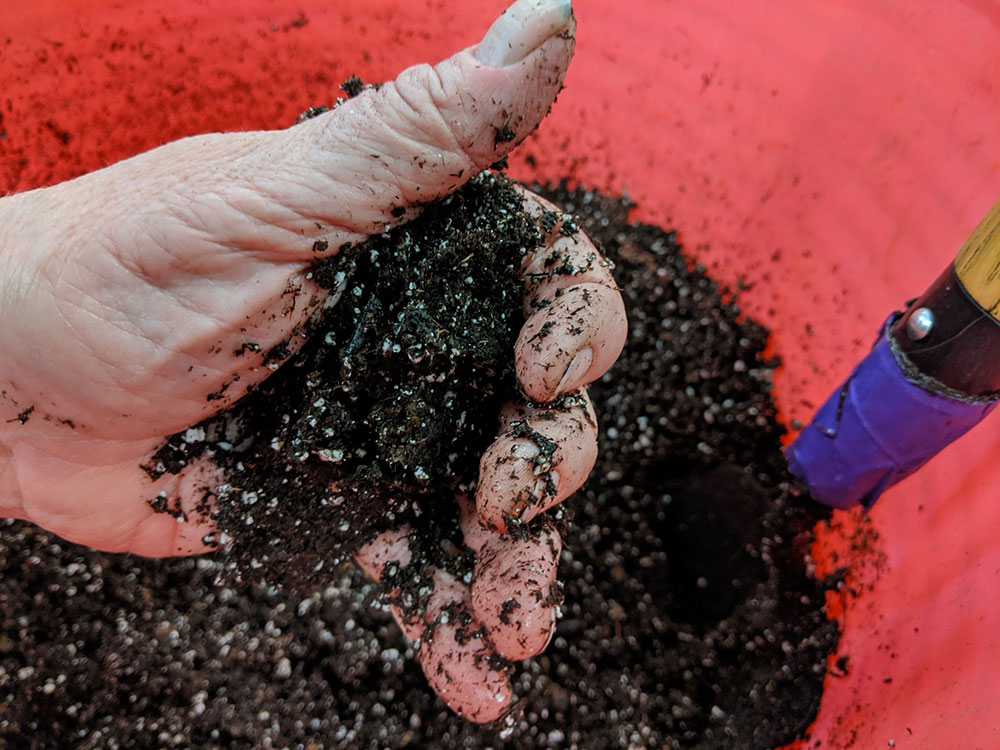
Seeds should be germinated in a sterile, fine-textured soilless mix. Standard seed-starting mixes have a pH of about 6.2 and are typically composed of ingredients such as sphagnum peat moss, perlite, vermiculite. They may also contain composted bark, compost, or coconut coir. Some add small amounts of lime and fertilizer. Soilless mixes tend to be hydrophobic — they repel water — so mix warm water into the medium until it is uniformly moist, but not oversaturated. You can either buy a commercial seed-starting mix or prepare your own at home by buying the ingredients separately and mixing a custom blend. Soil from your garden is not recommended when germinating seeds or growing seedlings in containers — it may contain weed seeds or disease pathogens, and it tends to compact, dry out, and crust over quickly.
-

- Dry transplanting mix.

-
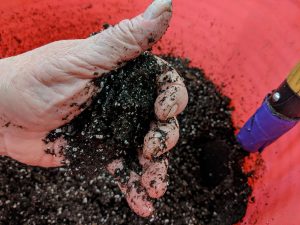
- Moistened seed starting mix.
Once seedlings have emerged and developed one or two sets of true leaves, you can transplant them into slightly larger individual containers or cells.
Planting Seeds
You can figure out when to plant your seeds based on how long the seedlings will take to become mature enough to transplant into the garden. Seedlings may take from 4 to 12 weeks; the amount of time will usually be indicated on the seed package. To determine when to start seeds indoors, count back from the average last spring frost date for your area. Last frost dates for most of Maine are in late May or early June. You can more accurately determine the average first and last frost dates in your area using this handy First and Last Frost Date Calculator.
*usually direct sown, but may be started indoors
**for fall crop
Some seeds may need special treatment before they are ready for germination; be sure to check for instructions on the seed package. Since seeds vary widely in how well they germinate, plan to sow more than you will need.
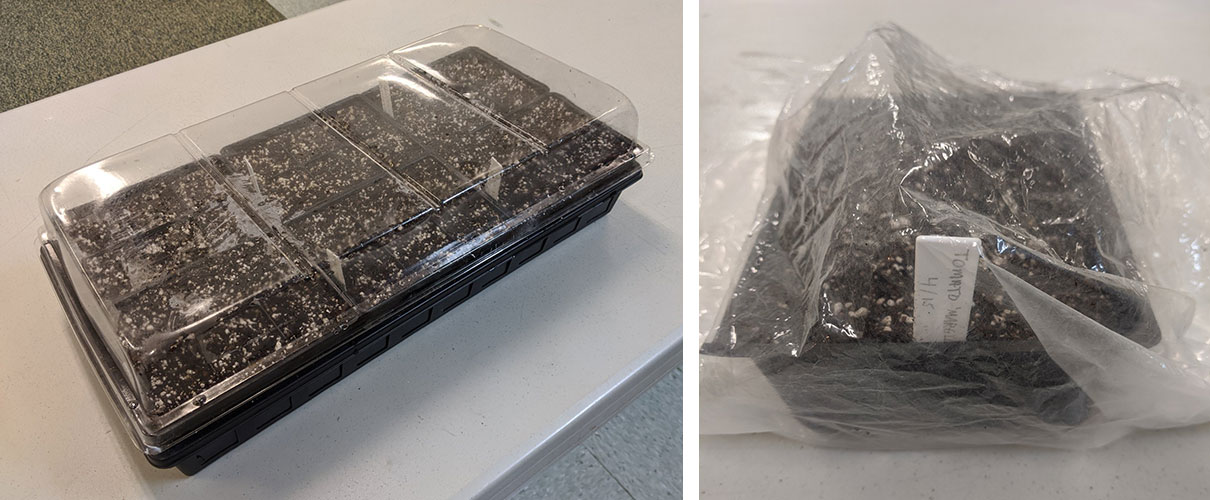
Fill containers with moist growing medium and gently press seeds onto the surface. Some seeds are fussy about the amount of light they need to germinate; follow the package directions and cover accordingly. A general guideline is to cover each seed with a layer of growing medium that is one to two times as deep as the seed’s diameter. Label the container. To keep the growing medium moist while the seeds are germinating, cover your container with a clear plastic dome, with plastic wrap, or put it in a plastic bag.
Bottom Heat
Your vegetable and flower seeds will sprout more quickly and uniformly if the growing medium is kept at a consistent, warm temperature. Inexpensive bottom heat mats warm the growing medium to about 70 degrees Fahrenheit. They can be found at garden supply stores and websites. Do not use other heating devices that are not made for this purpose, such as electric blankets or heating pads. In the absence of a bottom heat mat, find a warm spot in the house, like on top of a refrigerator or near a wood stove. Avoid putting the trays into direct sunlight at this time. The soil could get too hot and kill the seeds.
-
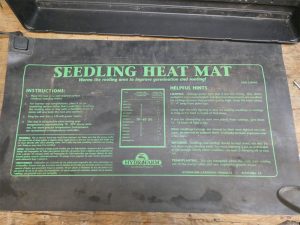
- Bottom heat mat.

-

- Just-germinated seedlings under lights.
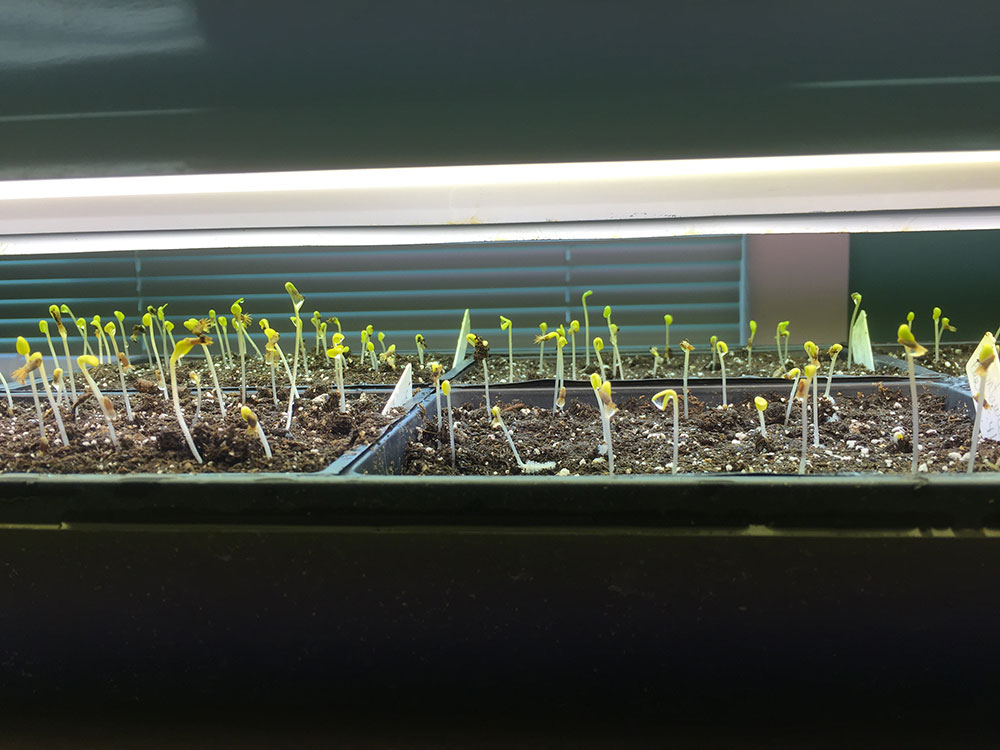
It is important to note that seedling heat mats only need to be used to provide bottom heat under seed trays until germination begins. As soon as about 50% of the seeds you planted begin to sprout, remove the tray from the source of bottom heat, take off the plastic covering, and move the seedlings to your supplemental light stand. This frees up your heat mat to sprout several more trays of seedlings within a few weeks’ time.
| Crop | Time from seeding to germination (days) | Optimum soil temperature (°F) | Time from germination to transplanting (weeks) |
|---|---|---|---|
| Broccoli | 7–10 | 50–85 | 5–7 |
| Cabbage | 4–10 | 50–85 | 5–7 |
| Celery | 9–21 | 50–65 | 10–12 |
| Cucumber | 6–10 | 65–85 | 4 |
| Eggplant | 6–10 | 65–85 | 6–9 |
| Lettuce | 6–8 | 50–65 | 3–5 |
| Melons | 6–8 | 65–85 | 3–4 |
| Onion | 7–10 | 65–85 | 8 |
| Pepper | 9–14 | 65–85 | 6–8 |
| Squash | 4–6 | 65–85 | 3–4 |
| Tomato | 6–12 | 65–85 | 5–7 |
Lighting for Growing Seedlings Indoors
Most of us have tried to start seedlings in a sunny window here in the Northeast, and you may have noticed that oftentimes we end up with seedlings that are leggy — thin and angling reaching out for more sunlight. That is because our days here in the Northeastern US are still relatively short in late winter/early spring and we often have low light days that are cloudy or rainy. As a result, the plants just don’t get enough light intensity (brightness) or duration (short days). In addition, another potential problem with growing seedlings in a sunny window is that we often have very cold nighttime temperatures during late winter and early spring, exposing them to radiational cooling which ultimately stresses the plants. Therefore, for starting seeds indoors to get a jump on the season your best lighting option, if you don’t have a greenhouse, is to use supplemental lighting.
-

- Leggy, leaning tomato seedlings grown on a windowsill.

-
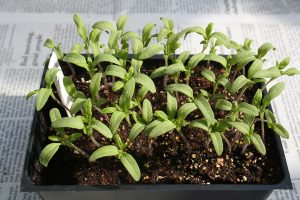
- Less-leggy tomato seedlings grown under lights.

For many years hobby gardeners have used inexpensive fluorescent shop lights with a mixture of cool white and warm white bulbs. For example, if you are using a standard 4-foot shop light on chains that accommodates two 4-foot bulbs, you would use one warm white bulb and one cool white bulb. Plants absorb light for photosynthetic growth at both the short (cool) wavelength spectrum and long (warm) wavelength spectrum. Using this combination of warm and cool white bulbs provides the seedlings with adequate wavelength light, without having to invest in more expensive specialized grow lights. In general, since fluorescent lights give off much less intense light than real sunlight, it is important to adjust the height of the lights to within 2-4 inches from the canopy of the growing seedlings The shop light chains facilitate the raising and lowering of the light fixtures as new seedlings grow.
You can make an inexpensive, collapsible light frame out of ¾ inch PVC pipe.
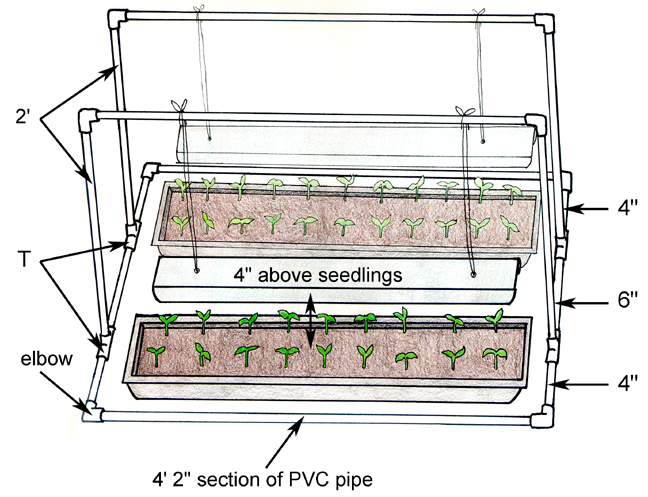
Plans for building a wooden seed stand: diagram and materials list (PDF). NOTE: This is a different model from the PVC stand pictured in the diagram above.
Fluorescent Bulbs: T-12, T-8, T-5 — which to use?
Fluorescent bulbs for use with general home light fixtures have been evolving over the years. The old standard T-12 fluorescents bulbs were 1. 5 inches in diameter and could be easily found in 4 -foot shop light fixtures with chains and thus ideal for seed starting. In recent years, T-12 bulbs have been phased out for the newer T-8 bulbs (1 inch in diameter), which are more energy-efficient and give off more light intensity than T-12 bulbs, thus providing more light for less money in energy costs. Next was the introduction of T-5 bulbs (⅝ inch in diameter) which have improved yet again in the light intensity output and are even more energy-efficient than T-8 bulbs. While the initial cost is a bit more for T-5 bulbs compared to T-8, the cost differential will again be more than made up in the long run through energy efficiency savings. Standard fluorescent T-8 or T-5 fixtures such as shop lights or kitchen fixtures still work great for starting seedlings with either daylight-balanced bulbs or if you use a mixture of cool white and warm white bulbs.


LED Lights
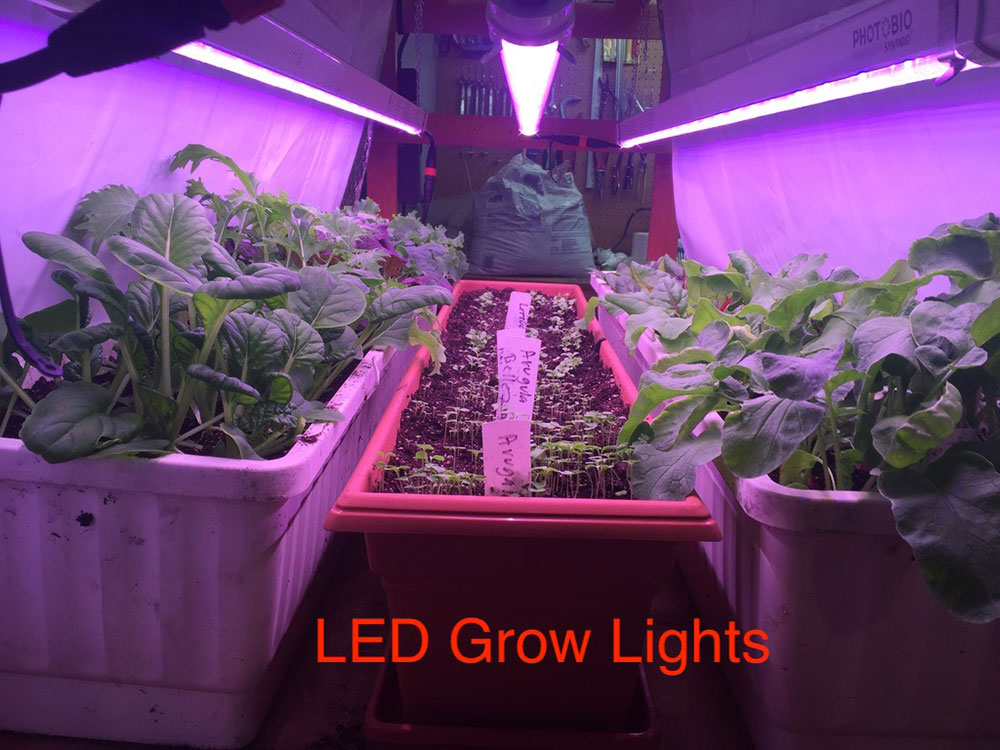 LED lights have improved in both light intensity and energy efficiency, and while the upfront cost is a bit more than fluorescent lights, they more than make up a return on investment over time due to lower energy costs. LED grow light bulbs that are balanced for plant growth are a bit more expensive than the standard lighting LED bulbs. They will help you produce nice healthy seedlings that may be more vigorous than those grown under fluorescents, or standard LED bulbs, but again if your goal is to just get seedlings off to a good start you need not spend the extra money.
Grow Light Bulbs
Another option is to invest in more expensive horticulture grow-light versions of these bulbs that will cost more but are better suited to give the plants more of the light intensity and specific wavelengths to stimulate photosynthesis and thus plant growth. Once again, if your main goal is to just get seedlings started before transplanting them outside in the garden, you may not need to spend the extra funds on the more expensive grow lights. However, if your goals also include using your seedling stand to grow herbs or leafy vegetables to harvest and/or flowering and fruiting, then you will get better results from high quality LED grow light bulbs.
NOTE: Buyer beware, there are a lot of inexpensive LED grow lights on the market, but like everything else you tend to get what you pay for. The less expensive LED grow lights may have the correct wavelength balance, but they often are lacking in light intensity output and may not be sufficient for the crop you are growing. If your goal is to bring crops to harvest and fruiting, rather than just getting your seedlings off to a good start, you are better off investing in high-quality bulbs. Do some online research and talk to local garden center staff that specialize in selling LED grow lights before you buy.
Light Duration
How long you run your lights each day also influences the total amount of light a plant can absorb in one day. The longer the lights are on the more total light can be absorbed. For seed starting with basic fluorescent bulbs, it is generally recommended to run the lights for 16 hours a day. Investing in an inexpensive timer will do that job for you. Attaching a plug strip to your seedling light stand is also handy to plug in the lights, which can all be run off the timer.
Temperature
The ambient temperature for seed starting should range should ideally be about 55°F–70°F, so avoid drafty window sills. If you are growing seedlings in a basement utility space and the ambient temperature runs 50-55°F, you could drape an inexpensive foil emergency space blanket over your frame. Fluorescent light fixtures do give off a small amount of heat, so draping an insulating blanket over the frame will boost the temperature around the seedlings by about 5-10°F. Be sure the insulating blanket allows for air movement through the ends of the stand and is not in direct contact with the light fixture, but extended a few inches above over the frame with the fixtures suspended below.
Potting-Up Seedlings
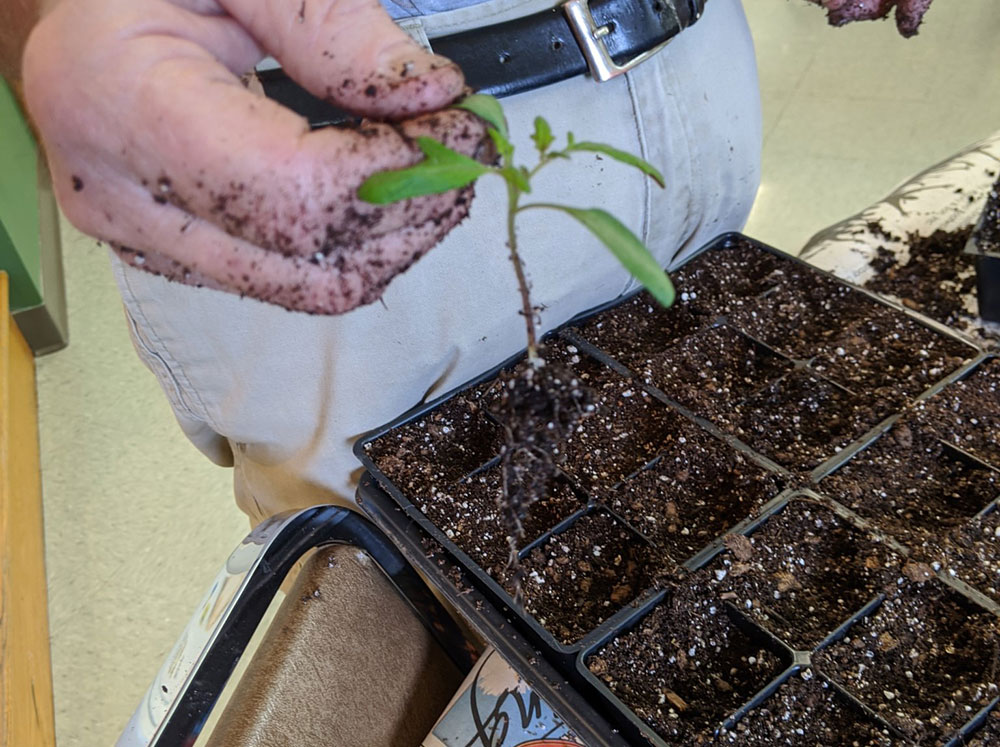
Once the second set of true leaves appears, seedlings should be thinned to at least 1 inch apart or transplanted into individual pots or cells. When transplanting seedlings, handle them by the leaves only. Their stems are very delicate, and while a seedling can stand to lose part or all of a leaf, it will not survive with a bruised or broken stem.
When transplanting into a new container, water with a half-strength solution that is water-soluble, all-purpose plant food, either synthetic or organic. In other words, if the instructions for the fertilizer you are using say to use 1 tablespoon per gallon of water, cut that amount to ½ tablespoon per gallon. To avoid damaging tender seedlings, use a very fine sprinkler directed at the base of the stem to saturate the soil, or water from the bottom by setting your seedling containers in a tray of ½” water for 20 minutes.
Do not overwater — this is the most frequent mistake growers make.
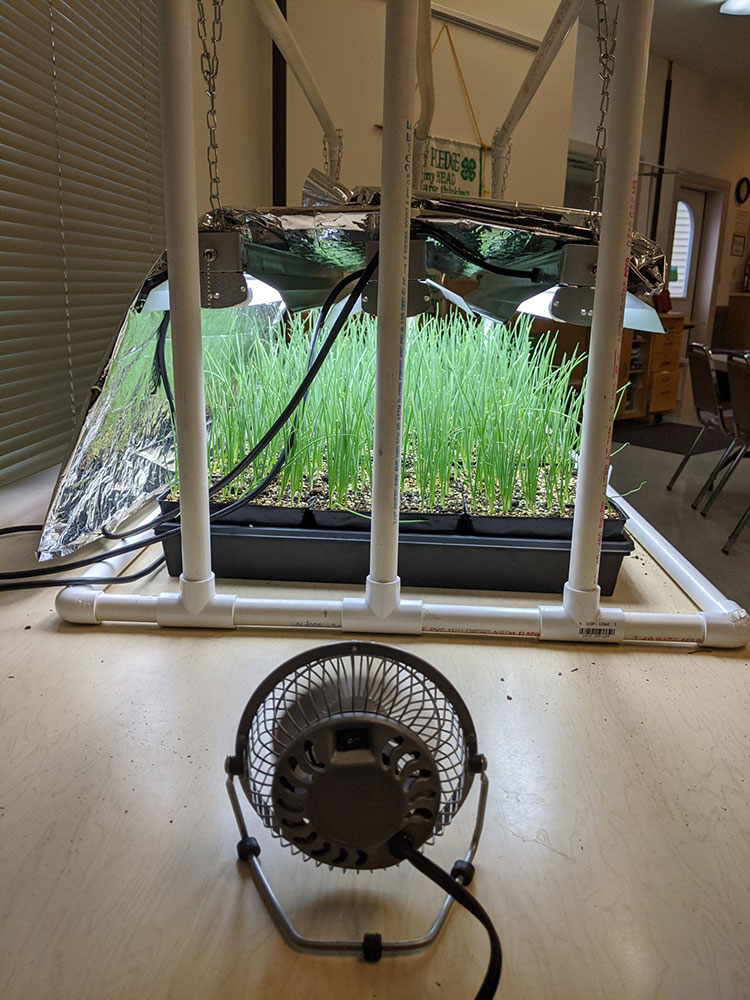
A common problem when growing seedlings is damping-off. The fungi that cause damping-off thrive in warm, moist soils; the same conditions that seeds need to germinate and grow. Infected seedlings develop a dark-colored rot at the base of the stem, then shrivel and fall over. To minimize the risk of damping-off in your seedling trays, use a sterile, well-drained growing medium. Water the seedling trays thoroughly, and wait until they are almost dry before you water again. Do not sprinkle frequently, as this will keep the soil surface too moist and promote fungal growth. Space your seedlings so that air circulates between them. A small fan blowing a gentle breeze over the tops of your seedlings will improve air circulation and toughen up the plant tissues.
Transplanting to the Garden
The young seedlings will need one to two weeks of hardening off before they go into the garden. Hardening off is the process of acclimating plants to outdoor conditions. Start by setting them outside for a few hours at a time in a protected, semi-shady location, such as on a porch or under a shrub. Outdoor temperatures should be 45°F or warmer, depending on the crop. Gradually increase the time outdoors and the exposure to direct sunlight. Transplant your seedlings to the garden in the late afternoon after the heat of the day has subsided, or on a cloudy day, and water them thoroughly.
Keep a record of what you plant, when you planted it when it germinated, and how well it did in the garden, so that you can see whether you need to make changes next year.
Recommended Resources
Researched Based Article on Indoor Gardening of Lettuce (PDF)
UNH Bulletin Growing Seedlings Under Lights
Bubel, Nancy. The New Seed-Starters Handbook. New York: Rodale Press, 1988.
Marinelli, Janet, and Karan Davis Cutler, eds. Starting From Seed: The Natural Gardener’s Guide to Propagating Plants. Twenty-First Century Gardening Series. New York: Brooklyn Botanic Garden, 1998.
Plans for building a seed stand: diagram and materials list (PDF)
Reviewed by David Handley, Extension professor and cooperating professor of horticulture; and Barbara Murphy, associate Extension professor. Additional assistance and reviews by Sue Christian, Diane Gordon, Anne Graecen, and Anne Price, Extension Master Gardener Volunteers.
© 2008, 2021, 2023, 2024
Call 800.287.0274 (in Maine), or 207.581.3188, for information on publications and program offerings from University of Maine Cooperative Extension, or visit extension.umaine.edu.
In complying with the letter and spirit of applicable laws and pursuing its own goals of diversity, the University of Maine System does not discriminate on the grounds of race, color, religion, sex, sexual orientation, transgender status, gender, gender identity or expression, ethnicity, national origin, citizenship status, familial status, ancestry, age, disability physical or mental, genetic information, or veterans or military status in employment, education, and all other programs and activities. The University provides reasonable accommodations to qualified individuals with disabilities upon request. The following person has been designated to handle inquiries regarding non-discrimination policies: Director of Equal Opportunity, 5713 Chadbourne Hall, Room 412, University of Maine, Orono, ME 04469-5713, 207.581.1226, TTY 711 (Maine Relay System).