Jarvis Glacier - stories from the field
Arpil 11 - 19
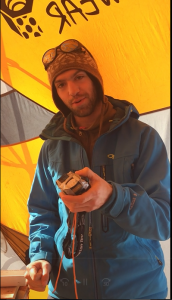
Written by Seth
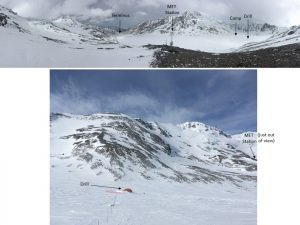
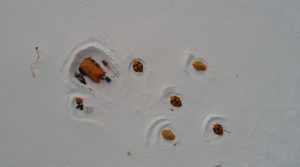
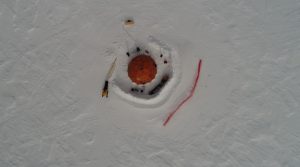
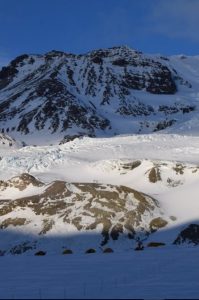
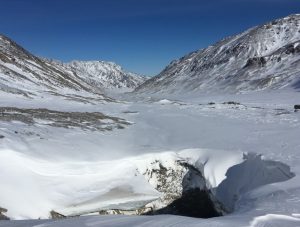
It’s been a busy couple of weeks. I can’t entirely remember what we wrote last so forgive me if I overlap somewhere. After we finished the 80-m borehole (actually, 79.99 meters to bedrock) we attempted at 60-meter borehole. Unfortunately, a relatively continuous rock debris band at 33 meters stopped us cold. Being unable to penetrate the rock, Steve and I spent a few days collecting radar in a 100 x 60-meter grid and creating a 2.5 D (basically 3D) model of the area to figure out the most likely places we could drill to bedrock, OR at least get close to bedrock. Unfortunately, in a temperate glacier where plucking of rock debris from the bottom is significant, options are limited! BUT, we prevailed and found three locations we believe we can get close, within the shear margin. Today, we drilled the shallowest location and made it to within 3 meters of the bed before debris stopped us, 11.5 m down. Tomorrow Mike and David will attempt a second shallow hole near the one they drilled today with hopes of reaching 15-18 meters down. Steve and I have three more sites picked out for shallow borehole attempts.
Ian has been busy testing and rigging his down-borehole sensors which will measure tilt and strain of each borehole and specific depths we decide to place each sensor. In the 80 meter deep hole, we will place a sensor at the bottom, and consecutively 2, 4, 8, 16, 25, 35, 45, 55, and 75 meters above the bottom of the hole. We want the most sensors towards the bottom because we assume that is where most of the action happens (that is different flow velocities from the bed towards the enter mass of the glacier).
David has been using his optical tele-viewer to take fancy 360 degree photos of the borehole wall which allows him to map stratigraphic layers (such as dirty layers in the ice). We use those images to orient which portion of the core we collect is facing down-glacier, and which portion of the core is facing up-glacier. This will help with Stephanie’s work of taking thin sections of the core to look at micro structure. We want to know how the micro-structure changes relative to depth and flow down glacier, so knowing the orientation of the core (which is a perfect cylinder) is quite important for Stephanie to know!
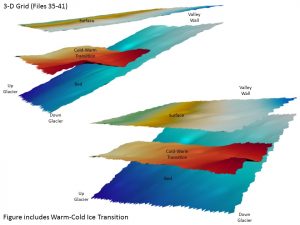
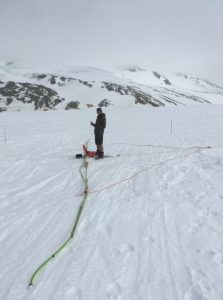
Steve has been cranking through all kinds of fun radar work. Mainly he has been completing common midpoint (CMP) surveys which is a fancy radar technique that helps him sort out how fast the radio waves travel within the different regions of the ice. We use that information to calculate depths to each layer. The two primary layers of interest are a cold ice layer which is about 20-40 meters thick on the top of the glacier and warmer ice which has water within it, for the rest of the glacier thickness to its bottom. Radio wave velocities vary quite a bit between warm and cold ice. So, understanding those velocity changes is pretty helpful to us. I’ve been calling Steve’s radar setup “franken-radar” because he has created a Frankenstein looking setup to complete his surveys with the radar system that wasn’t originally designed to do this type of work. That said, its working great so kudos to Steve for thinking through this process to collect some much-needed data.
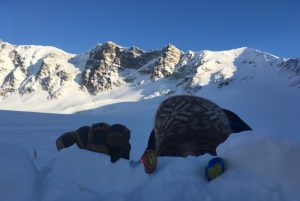
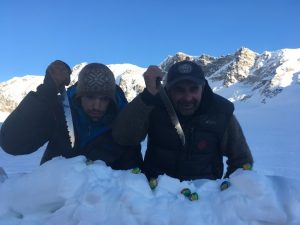
Some other fun activities: Easter egg hunt for Easter, courtesy of Kimberley, who will be arriving in Fairbanks on April 22 to process some core samples with Stephanie for some of her PhD Research. Thanks for sending those eggs up Kimberley! We may have also made an archeology find, but someone MIGHT have placed that find in our path… we are not entirely sure. This is a temperate glacier but we are quite sure it was not originally a lake with fish in it!
That’s all for now. We are all in good spirits, lots of great cooking by our rotating chefs (i.e. all of us!) and some great evenings with beautiful alpenglow on the mountains that surround us, calm nights, and crisp mornings. Can’t beat this recent stretch of nice weather to let us keep tackling this project. Tomorrow, we have a helicopter arriving with some new equipment so we can start completing seismic profiling, some more CMP radar surveys with a different radar setup, and a new drill system that is designed for shallower (20-30 m) and quicker ice core drilling. That new system may be quite helpful for these shallow cores we are trying to collect in the margin where numerous debris bands seem to have been dragged up into the ice from the glacier bed while the ice flows down glacier into our study site. Lots of interesting science challenges on this project but we are bound to learn some cool things. The core that has been coming out of each borehole is certainly interesting and it has some very cool shear structures that we think will help answer some of our questions. Stand by for more science, videos, photos, and science figures on the next blog!
Cheers!
Seth, Steve, David, Ian, and Mike
April 3 - 11
Written by Seth
It’s been a busy couple weeks of work after the major storm which put us out of commission for a few days. We spent multiple days digging out equipment and gear, fixing tents and equipment and digging out the drill tent.
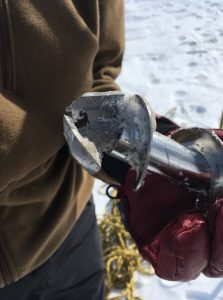
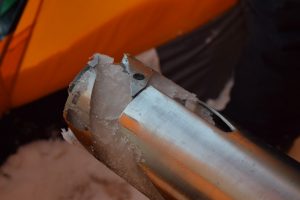
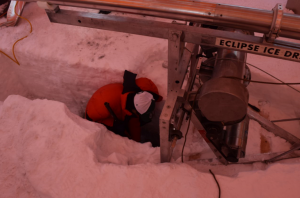
We commenced drilling again near the end of last week and as of today we reached 79.99 meters. At that depth Mike and team attempted three times to recover a core but each time, nothing returned in the core barrel except for dripping water and some small rock chips. They were not entirely sure if we had hit bedrock (Steve and I estimated ice thickness to be 80 m based on radar data) so Dave and Ian dropped a Go-Pro camera down the hole to see what the bottom of the borehole looked like. As you will see in the video, the bottom of the hole was filled with water, slush, and floating rock chips. The team will try one more time Tuesday morning to extract another core but the final couple tip off’s that we may be at the bottom include: 1) the last few meters of ice drilled more easily than the prior ice according to Mike, which apparently is common when nearing the ice-bed interface; 2) a fairly thick section of ice within the core near the bottom of our borehole is bubble-free, and has some debris inclusions, suggesting that there has been significant melting and refreezing (likely common on a temperate glacier such as Jarvis); and 3) the cutter heads are pretty beat up from this last drilling attempt suggesting that it was rotating on something fairly solid (rock perhaps?), or at the least, some debris at the bottom.
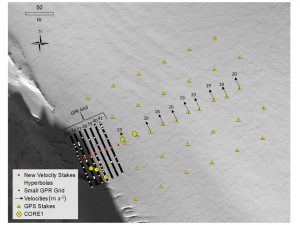
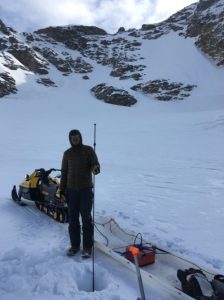
As for other work, Steve and I have been busy collecting 100 MHz and 10 MHz radar data to map ice thicknesses. The 100 has been useful down to around 80 meters near the valley walls whereas we are relying on the 10 MHz for any deeper profiles. We have collected a grid of profiles with both systems oriented perpendicular and parallel to the valley wall and we have both picked bedrock depths in the radar data to select drill sites 2 and 3. We next hope to extract one 60 m and one 120 m deep core, each reaching all the way to the bed.
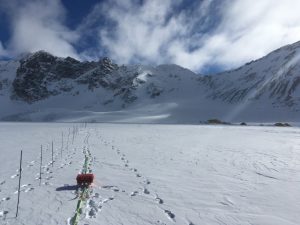
Finally, Steve and I installed about 34 velocity stakes in a grid pattern around our study area. To place each stake we drilled 8 meters into the ice at each stake site and inserted our stakes into the hole. That was 272 meters of drilling with a Kovac Auger over the past few weeks (mostly completed over the course of 2 days). We surveyed the location of each stake with GPS and will resurvey their locations again in September. The difference in location for each stake represents ice flow velocity at each stake. We plan to use this information to map the deformation field of our study area which will be useful for comparison to the numerical models that Chris, Stephanie, and Steve will be working on.

We have sent out several photos and videos showing camp setup, drilling, time-lapse photos, and aerial footage, to show everyone where we are working and what we have been up to. We joke that about 90% of our job description up here has been to dig and move stuff around to keep it from getting buried by snow drifts caused by the high winds on this glacier. Fitness and science at its finest!
March 24 – April 3
Photos by Seth and David. Compiled by Stephanie.
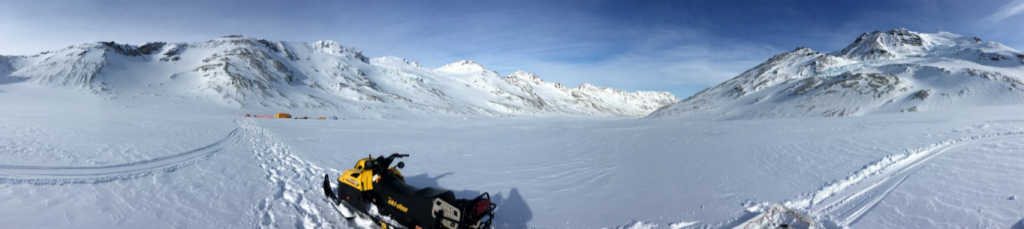
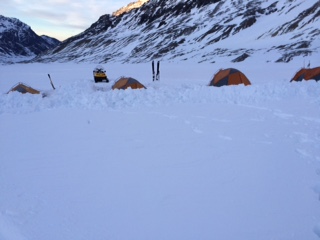
The glacier team did make it up on March 24. Here they are getting ready to go up:
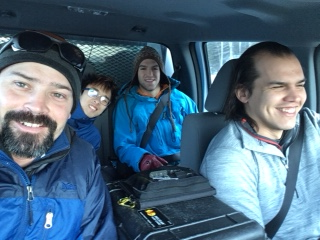
It took several flights to get all the gear and team members up on the ice.
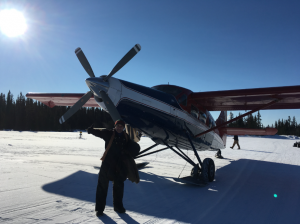
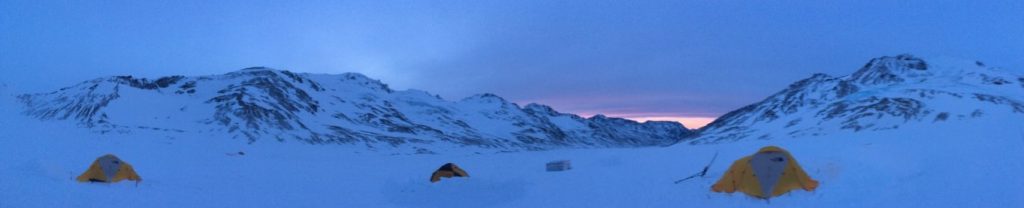
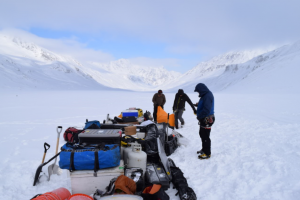
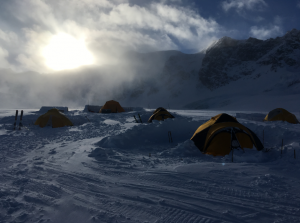
And they and ALL their gear have arrived on the glacier! They will be living and working on the glacier for about six weeks, so they need a lot of stuff!
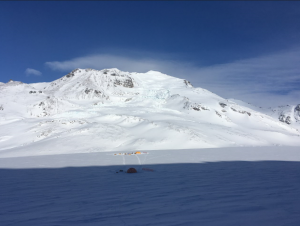
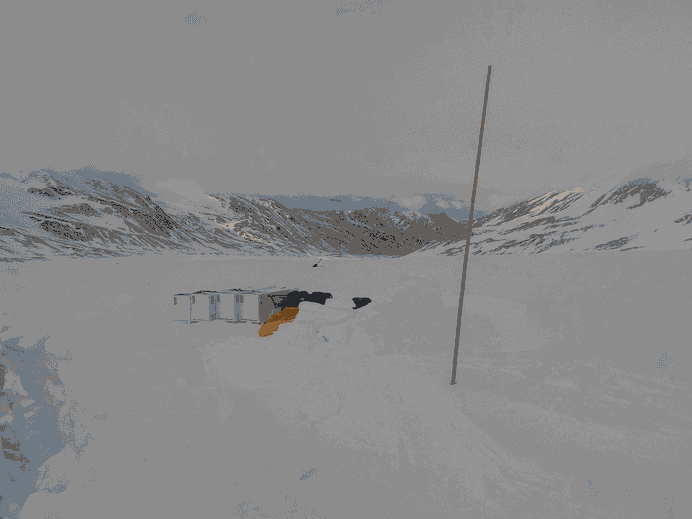
The ice core drill is housed in a giant tent and Mike and Ian are getting everything set up.

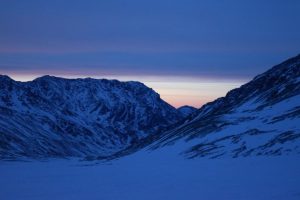
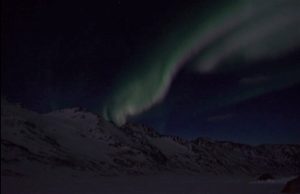
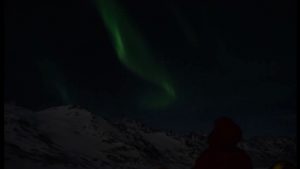
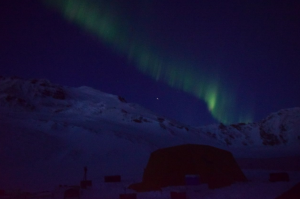
The calm before the storm: the night before a big wind storm came in, the team was able to enjoy a beautiful aurora.
They were able to drill about 32 meters (about 104 feet) of ice core, did radar survey, and installed 30 velocity stakes which involved auguring 240 meters of ice to put them in before a wind storm hit on March 30th.
The storm lasted 4 days and during that time, the team was mostly hunkered down in their personal tents. The drill tent and cook tent were damaged, but everyone was safe and only a few other non-essential items were lost. After the storm, the team dug out, fixed some snow-logged generators, and built snow walls to help prevent future wind damage.
On April 3rd, we sent a helicopter with replacement gear up to the team and brought back most of the ice they had drilled. Stephanie and Eric, a UAF student, got the ice to the freezer at the Cold Regions Research and Engineering Lab (CRREL) right away.
Spring 2016
Team: Seth Campbell, Kimberley Rain Miner, Steve Bernsen
We used radar to map the elevation of the bedrock underneath the glacier; this will be used to generate a glacier geometry to use in a numerical model.
We also set up stakes all around the glacier and took their positions with a GPS. We will come back in the fall to re-measure their positions. This will be used to determine the velocity of the glacier and find where the steepest velocity gradient exists near the margin so we know where to drill the ice cores in Spring 2017.
We had exceptionally bad weather this season and spent a lot of our time digging our tents out of the snow.
March 24, 2017
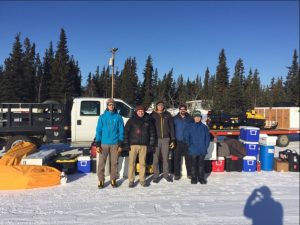
Everything is packed and the glacier team (Seth Campbell, Steve Bernsen, Ian Lee, David Clemens-Sewall, and Mike Waskiewicz) is all ready to fly out to the glacier. They are just waiting for clear weather!
Stephanie Mills and Kimberley Rain Miner will be in Fairbanks to process the ice cores as they come off the glacier.
Fall 2016
We came to take more radar measurements and re-measure the position of the stakes (for velocity) only to find that all but one stake had melted out! It was an exceptionally warm and wet summer. Despite not having the velocity measurements, we will be able to use our numerical model to determine where the steepest velocity gradient will be so we know where to drill.